
Guide: Automated Stencil Cutting
 Silhouette Cameo with a Raspberry Pi 3B+ Stencil Server
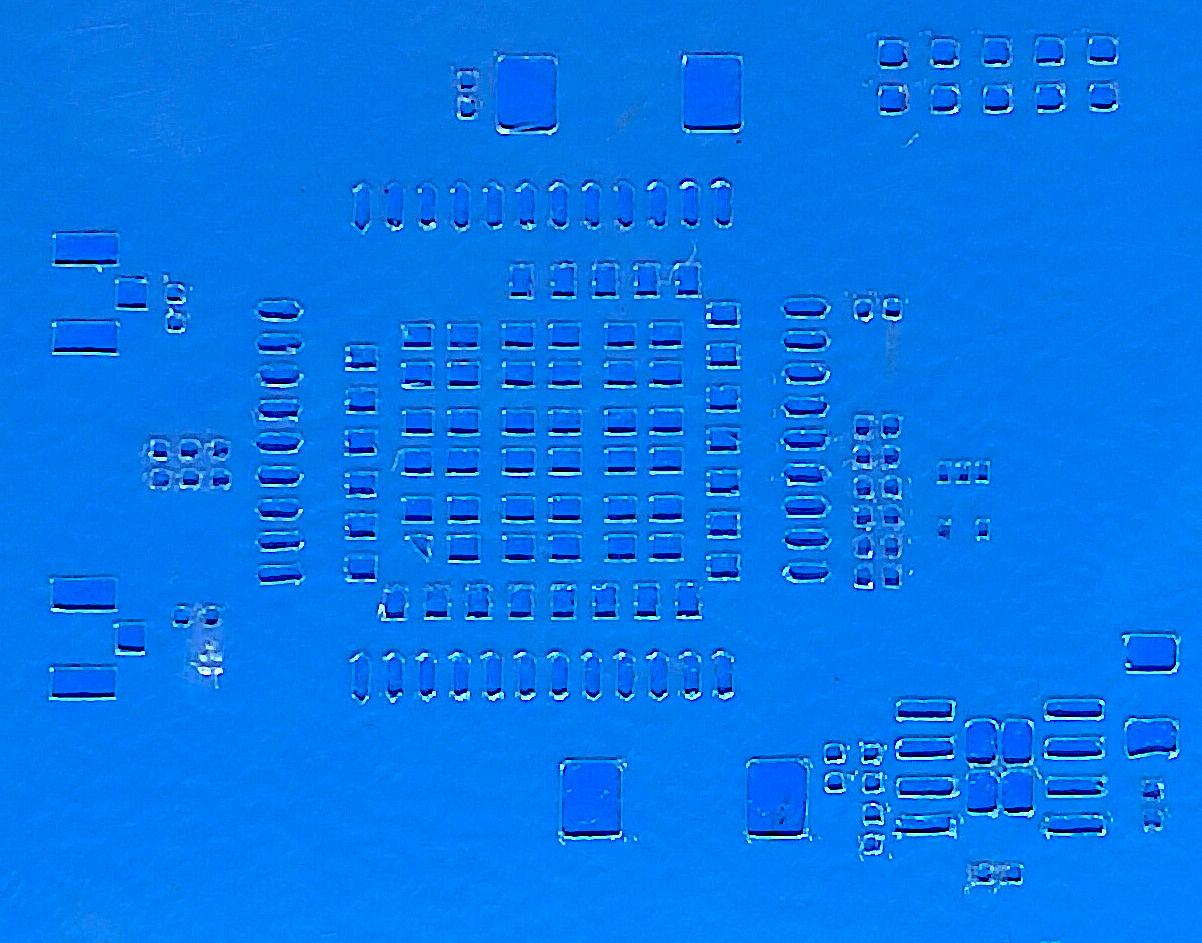 Example Stencil for the R1 Radio Module with 0402 Caps and Rs.
Overview
The objective of this guide is to simplify the PCB stencil cutting process by setting up a dedicated server to manage the entire cutting workflow. This is advantageous because, despite the great stencil quality, cutting with a vinyl cutter can be dreadfully slow and requires a USB connection operate the machine at all times.
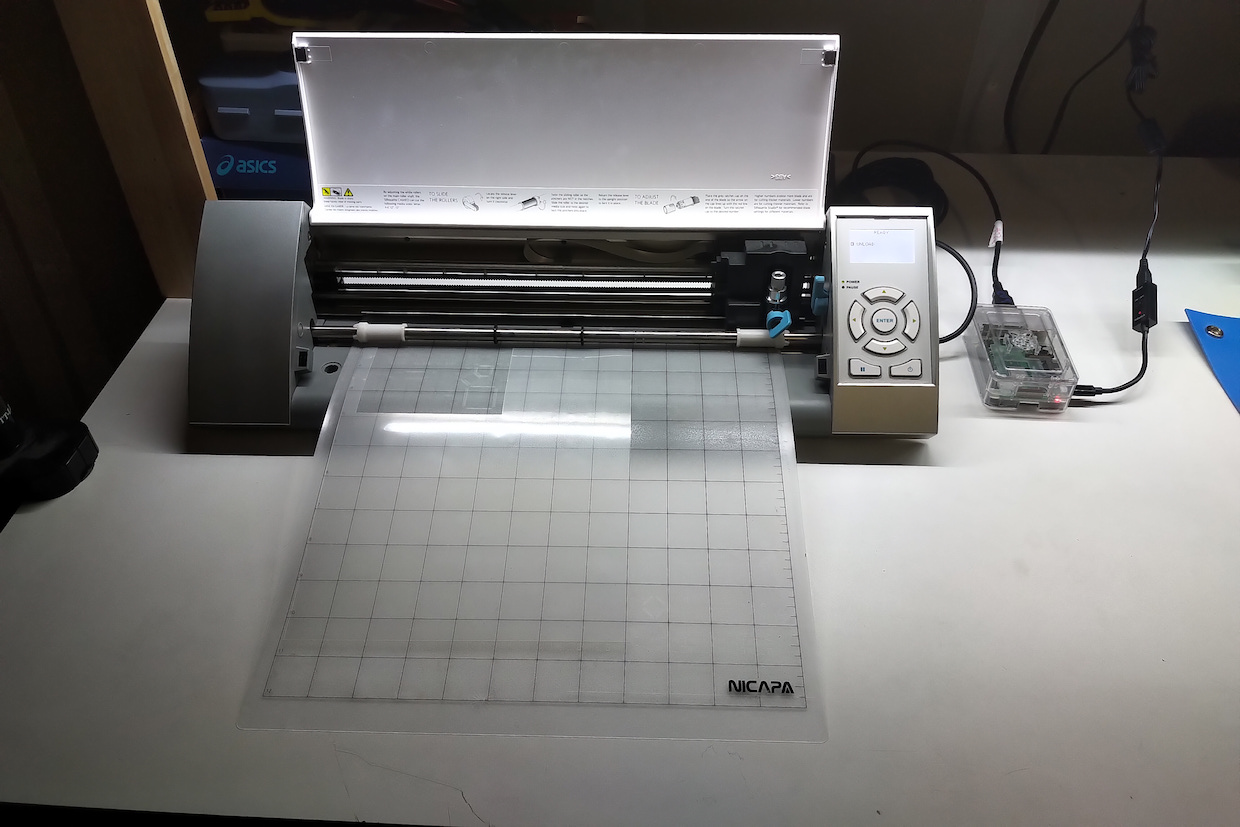
To free my laptop from a USB tether, I set up a small Raspberry Pi 3B+ to interface with my Silhouette Cameo. Now, I can transfer a gerber to the Pi over the network, have the Pi process it, and have the Pi manage the cutter with a single terminal command.
The Cameo preprocessing and cutting tools are available in Peter Monta’s Github repo. Once I dialed in settings for my specific machine, I set up the Raspberry Pi for network communication, installed the tools, wrote a script on the Pi that automates processing and cutter communication, and wrote a script on my Mac that copies a file to the Pi and executes the cutter script.
 The Pi and cables can be tucked away without impeding cutter operation.
Materials Used
- Raspberry Pi 3B+ w/ Power Supply
- MicroSD Card w/Adapter
- Macbook Pro (OSX 10.14)
- Silhouette Cameo
- Cutting Blade, 45° or 60°
- Mylar Sheet, 4 mil
- Cutting Mat
Guide
Raspberry Pi Setup
- Download Raspberry Pi OS Lite at https://www.raspberrypi.org/downloads/raspberry-pi-os/
- Unzip the file and mount the resulting .img
- In the terminal, add an empty ssh file and set up your wireless network credentials so that you can remotely ssh into the device.
cd /Volumes/boot
touch ssh
nano wpa_supplicant.conf
In wpa_supplicant.conf, include the following:
ctrl_interface=DIR=/var/run/wpa_supplicant GROUP=netdev
update_config=1
network={
   ssid="YourNetworkNameInQuotes"
   scan_ssid=1
   psk="YourNetworkPasswordInQuotes"
   key_mgmt=WPA-PSK
}- Download an etcher program to flash the .img onto an SD card. Raspberry Pi appears to offer one for those without a favorite etcher.
- Select the .img file, select the SD card, and flash
- Transfer the SD card to the Pi and power it up. The initial boot may take 30s as it expands the file system.
- SSH into the system and change the default credentials.
ssh [email protected]
(use raspberry as the password when prompted)
sudo raspi-config- The config menu will allow you to change the password and hostname in the Network option. Hostname is the name of the device on the network, so the next login will become YourHostname.local
- Reboot the device and confirm that the new password and hostname work:
ssh [email protected]
(enter password when prompted)- Install and update required software:
sudo apt-get update
sudo apt upgrade -y
sudo apt install git gerbv pstoedit -y
git clone https://github.com/pmonta/gerber2graphtec.git
sudo usermod -a --group lp pi- Build and install an older version of Ghostscript. The pstoedit utility will fail to generate a .pic file for identifying cutter paths with the current version:
wget https://github.com/ArtifexSoftware/ghostpdl-downloads/releases/download/gs921/ghostscript-9.21.tar.gz
tar xvf ghostscript-9.21.tar.gz
./ghostscript-9.21/configure
make
make install
Pi Cutter Script
- Create a script that will be used to automate the stencil cutting process. NOTE: Parameters that I am using in this script have been proven to work well with my specific machine, blades, and mylar film. When testing your own system, please refer to Peter Monta’s website and repository for background and calibration advice:
nano ~/g2g.shIn g2g.sh, include the following:
#!/usr/bin/bash
python ~/gerber2graphtec/gerber2graphtec --speed 1--force   14 --border 0.5,0.5 --offset 3.75,0 stencil.gbr > /dev/usb/lp0
Optional: Password-free Server
- Exit the SSH session and optionally create a key pair so that a password does not need to be entered every time a file is transferred to the Pi for cutting.
exit
ssh-keygen -t rsa
(enter file location/name when prompted to save the key)
ssh-copy-id [email protected]
File Transfer and Execute Script
- Create a script that sends a gerber to the Raspberry Pi and automatically starts the cutting process.
nano ~/gerber2cameo.shIn gerber2cameo.sh, include the following:
#!/bin/bash
HOSTNAME="$1"
FILE="$2"
scp $FILE pi@${HOSTNAME}.local:stencil.gbr
ssh pi@${HOSTNAME}.local ./g2g.sh- Create an alias so that the script is executable anywhere in the terminal. The example below is for fish, but an alias can easily be created for bash, which is the default shell. Refer to Google for advice on how to create aliases for your shell.
alias g2c="source ~/gerber2cameo.sh"
funcsave g2c- To use the script and start cutting through the Raspberry Pi, run the following:
g2c YourHostname FileToCut.gbrThere you go! You are now able to start a stencil with a single command and move on with your life. No need to remain tethered to cutter.
Leave a Comment
Comments are moderated. Email won't be published. All fields are required. *