
Build Your Own: Home Electronics Lab
Introduction
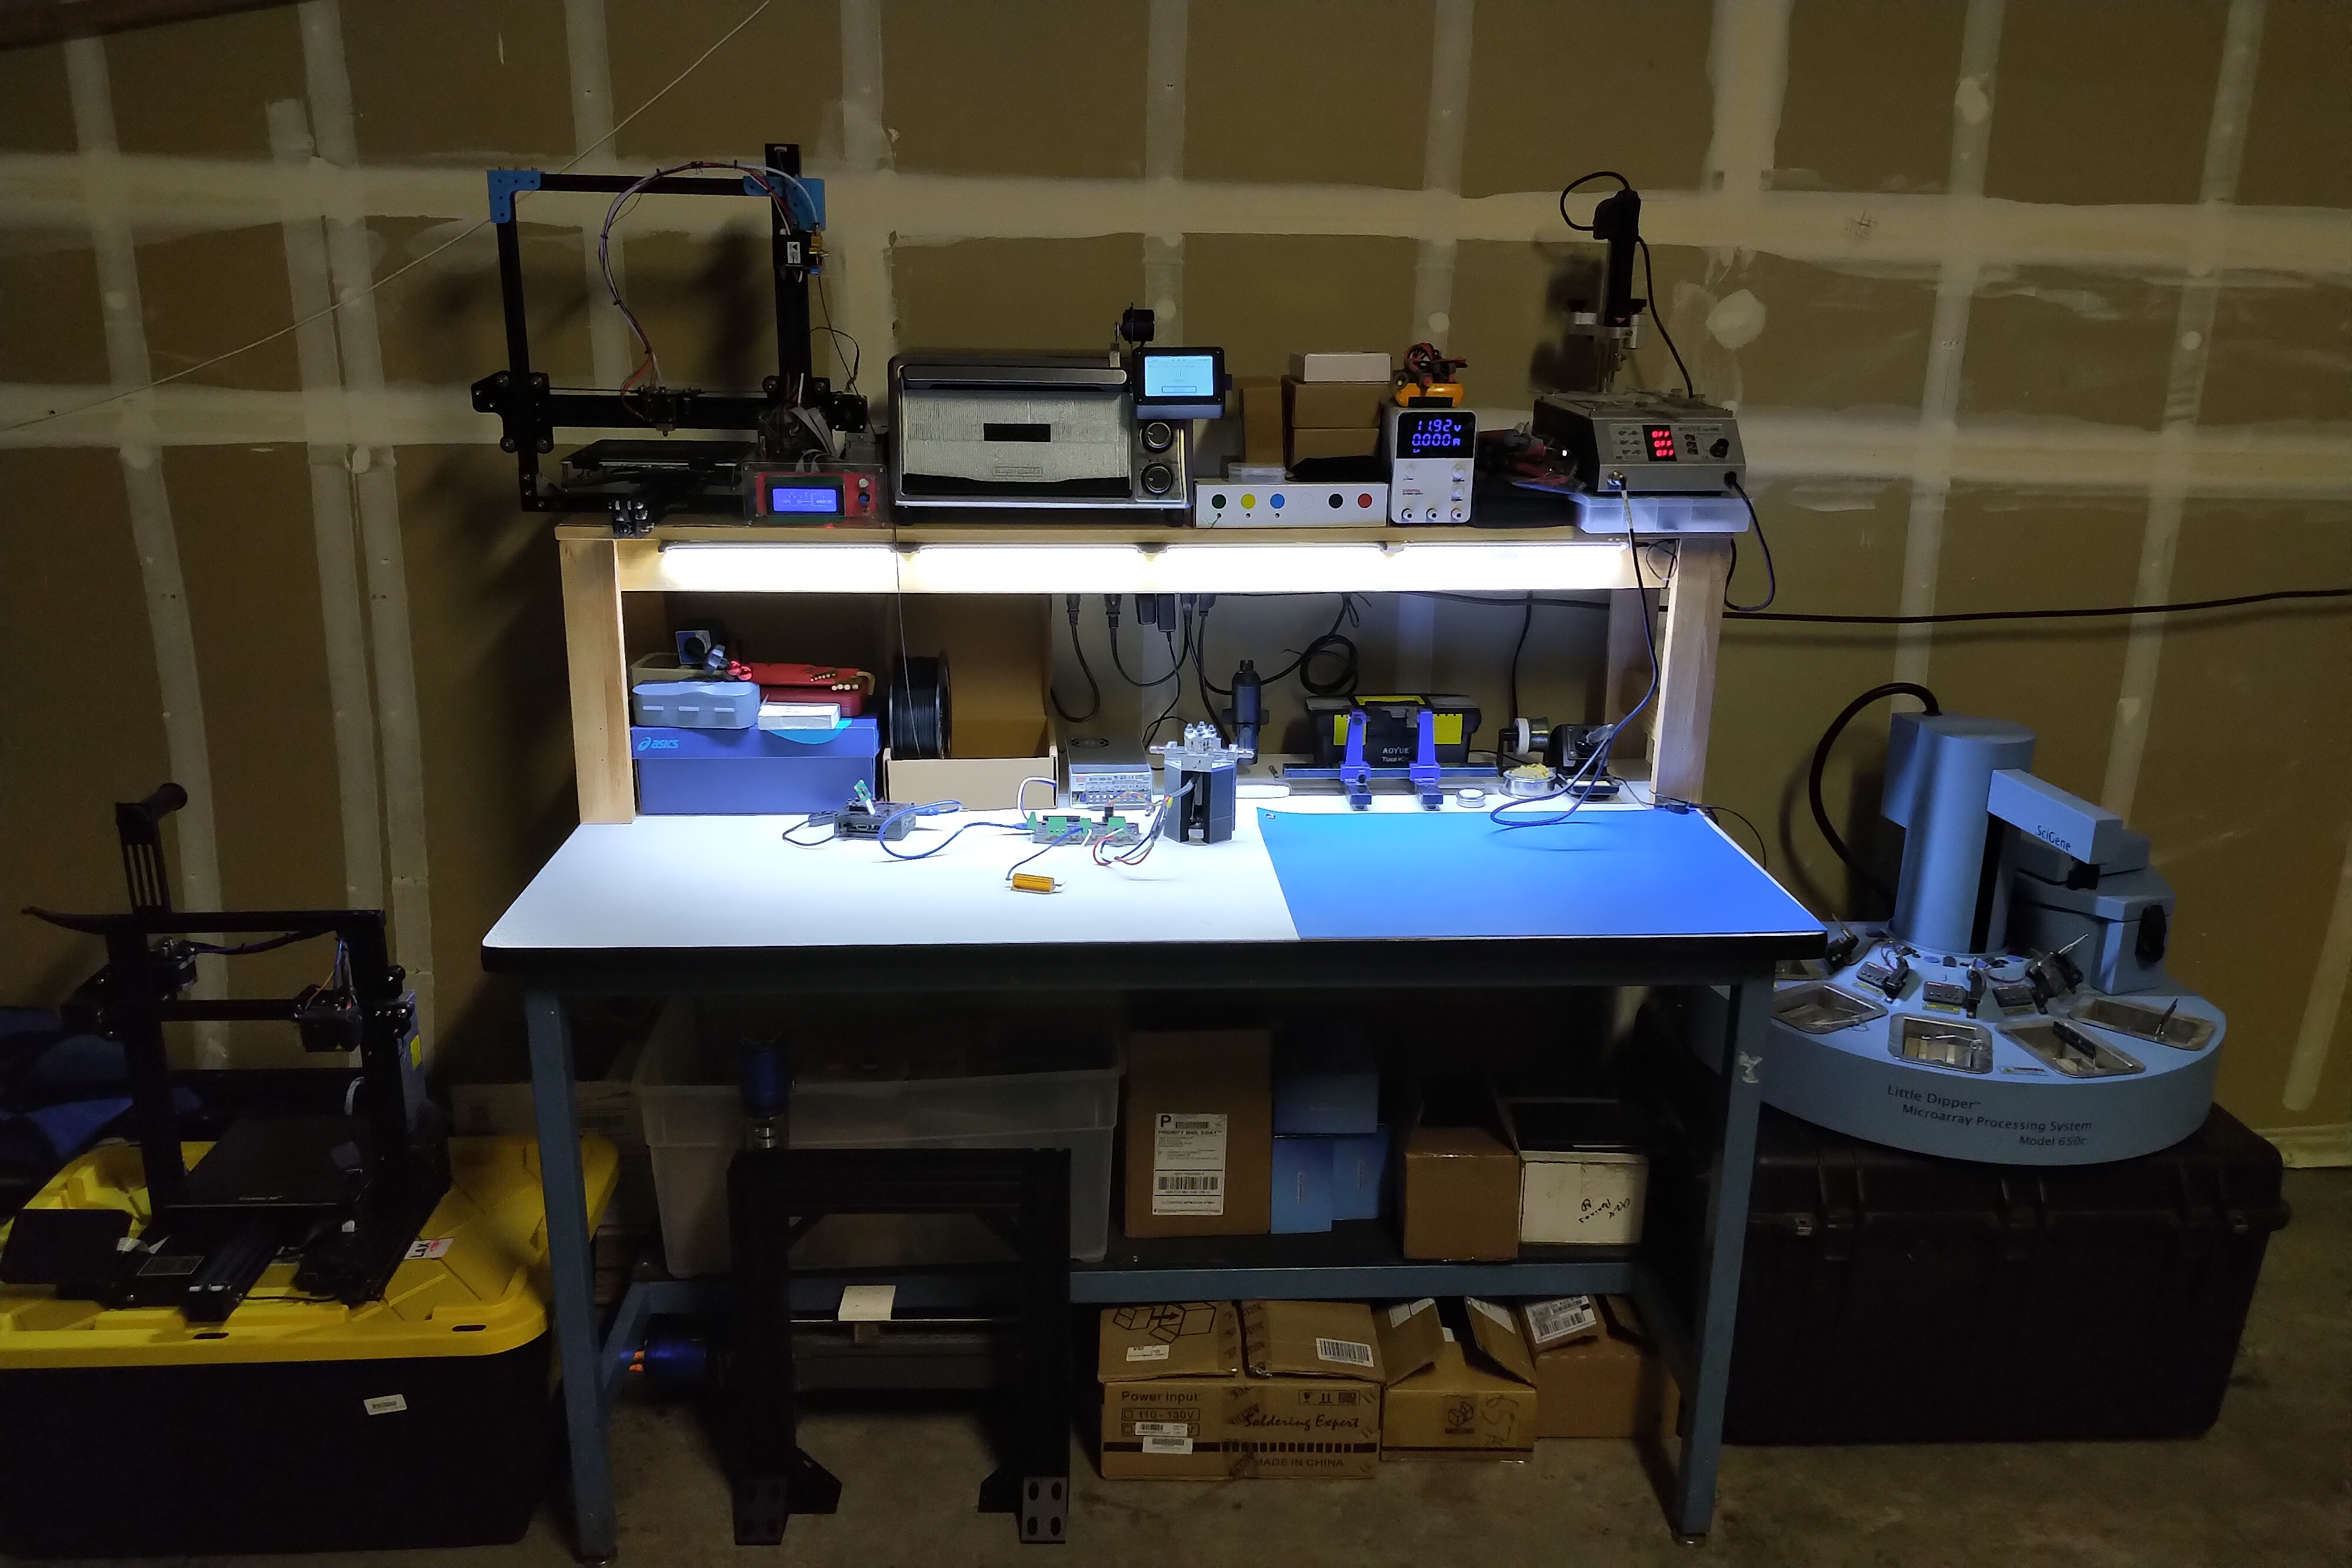
So, you got a taste of electronics and have been thinking about building your own at-home lab? I started building my lab around 2017 and have some good news for you. It’s actually not that bad and you don’t need a ton of space. For a couple of years, my lab lived in my 150 sq ft room, before it was moved to a garage, followed by my 550 sq ft studio. Everything useful can comfortably fit on a 2.5’x5’ bench if you give it a shelf. The budget also isn’t outrageous if you forgo status in favor of utility and buy what you need over time. Below are my hardware recommendations along with some commentary about its usefulness. Not all of my equipment is listed here, but these things should take care of 95% of the PCB assembly and circuit testing jobs you’ll want to take on.
Essentials
In my opinion, the sooner you learn to manage surface mount components, the better off you’ll be. There are so many parts out there that just don’t support through-hole packages anymore, so depending on through-hole components really restricts your PCB designs with respect to part flexibility and part density. With rampant component shortages in the post-pandemic era, limited part selection is the last thing you want. You don’t NEED to start here, but it is extremely useful and not as difficult as it seems. The essentials listed here cost me ~$700. It sounds like a lot, but it’s about the price of a mid-tier laptop and you’ll probably be using these tools longer than that laptop if you find that you enjoy building things.
Reflow Oven
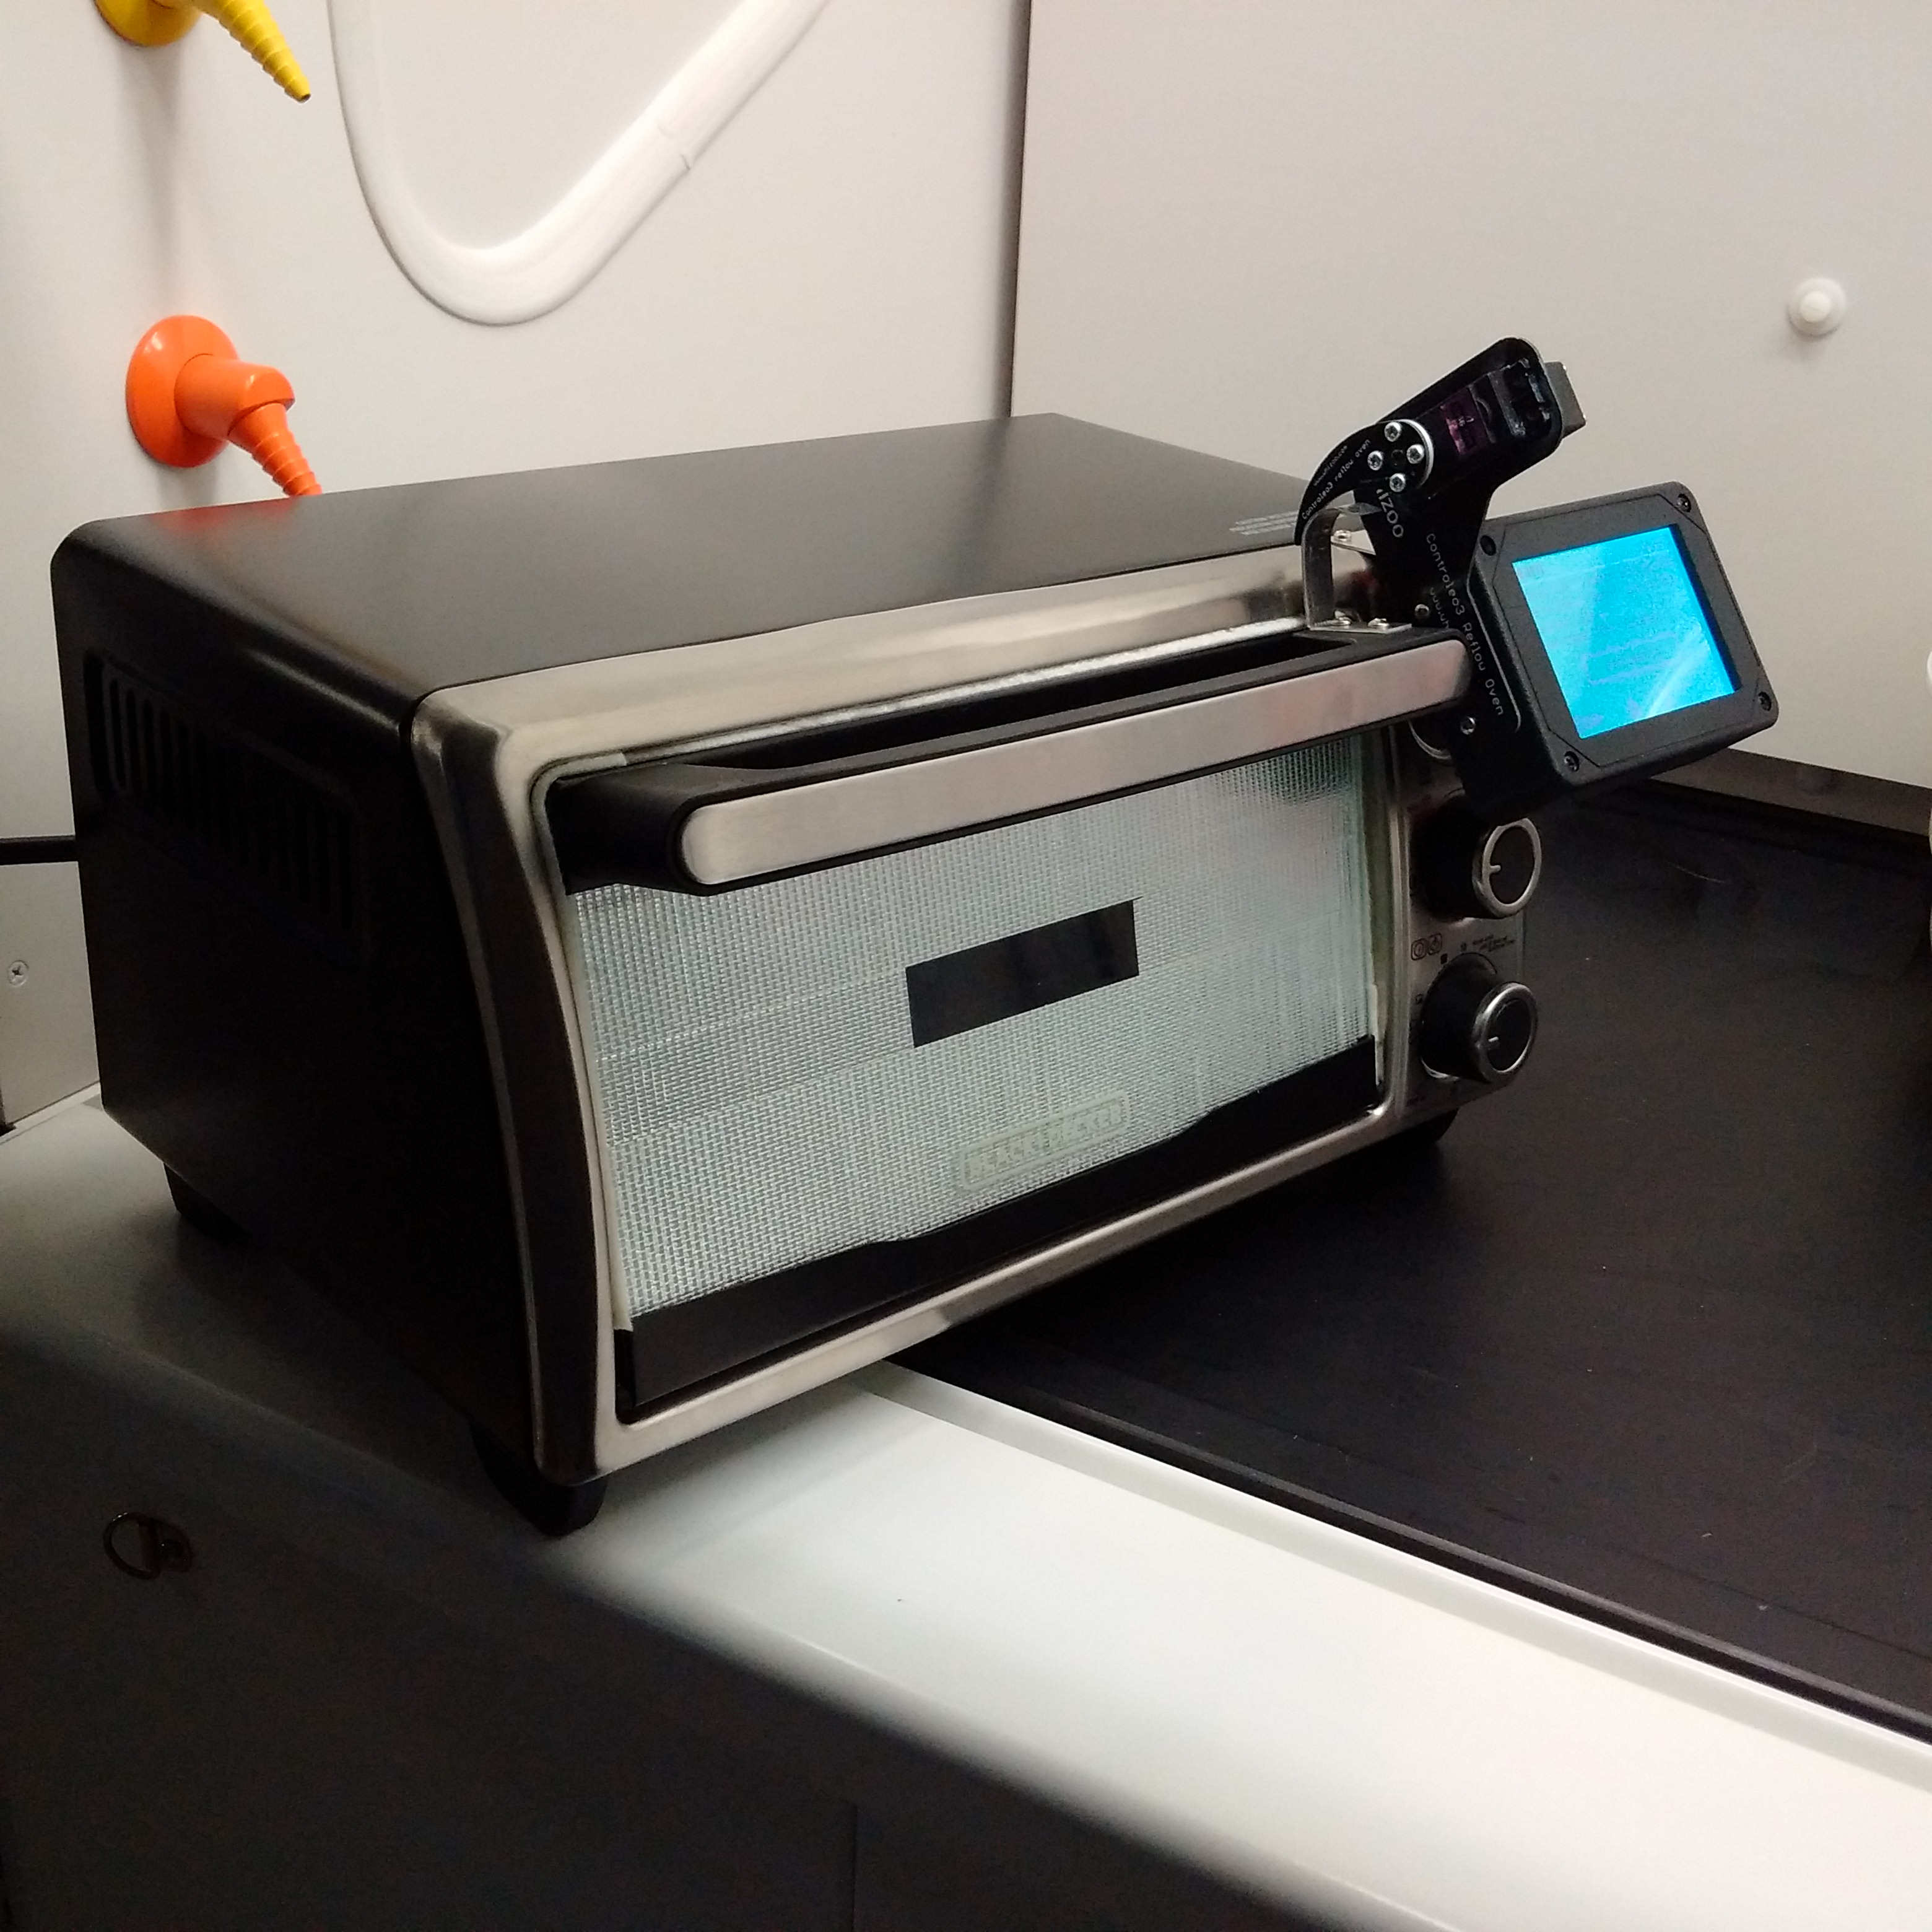
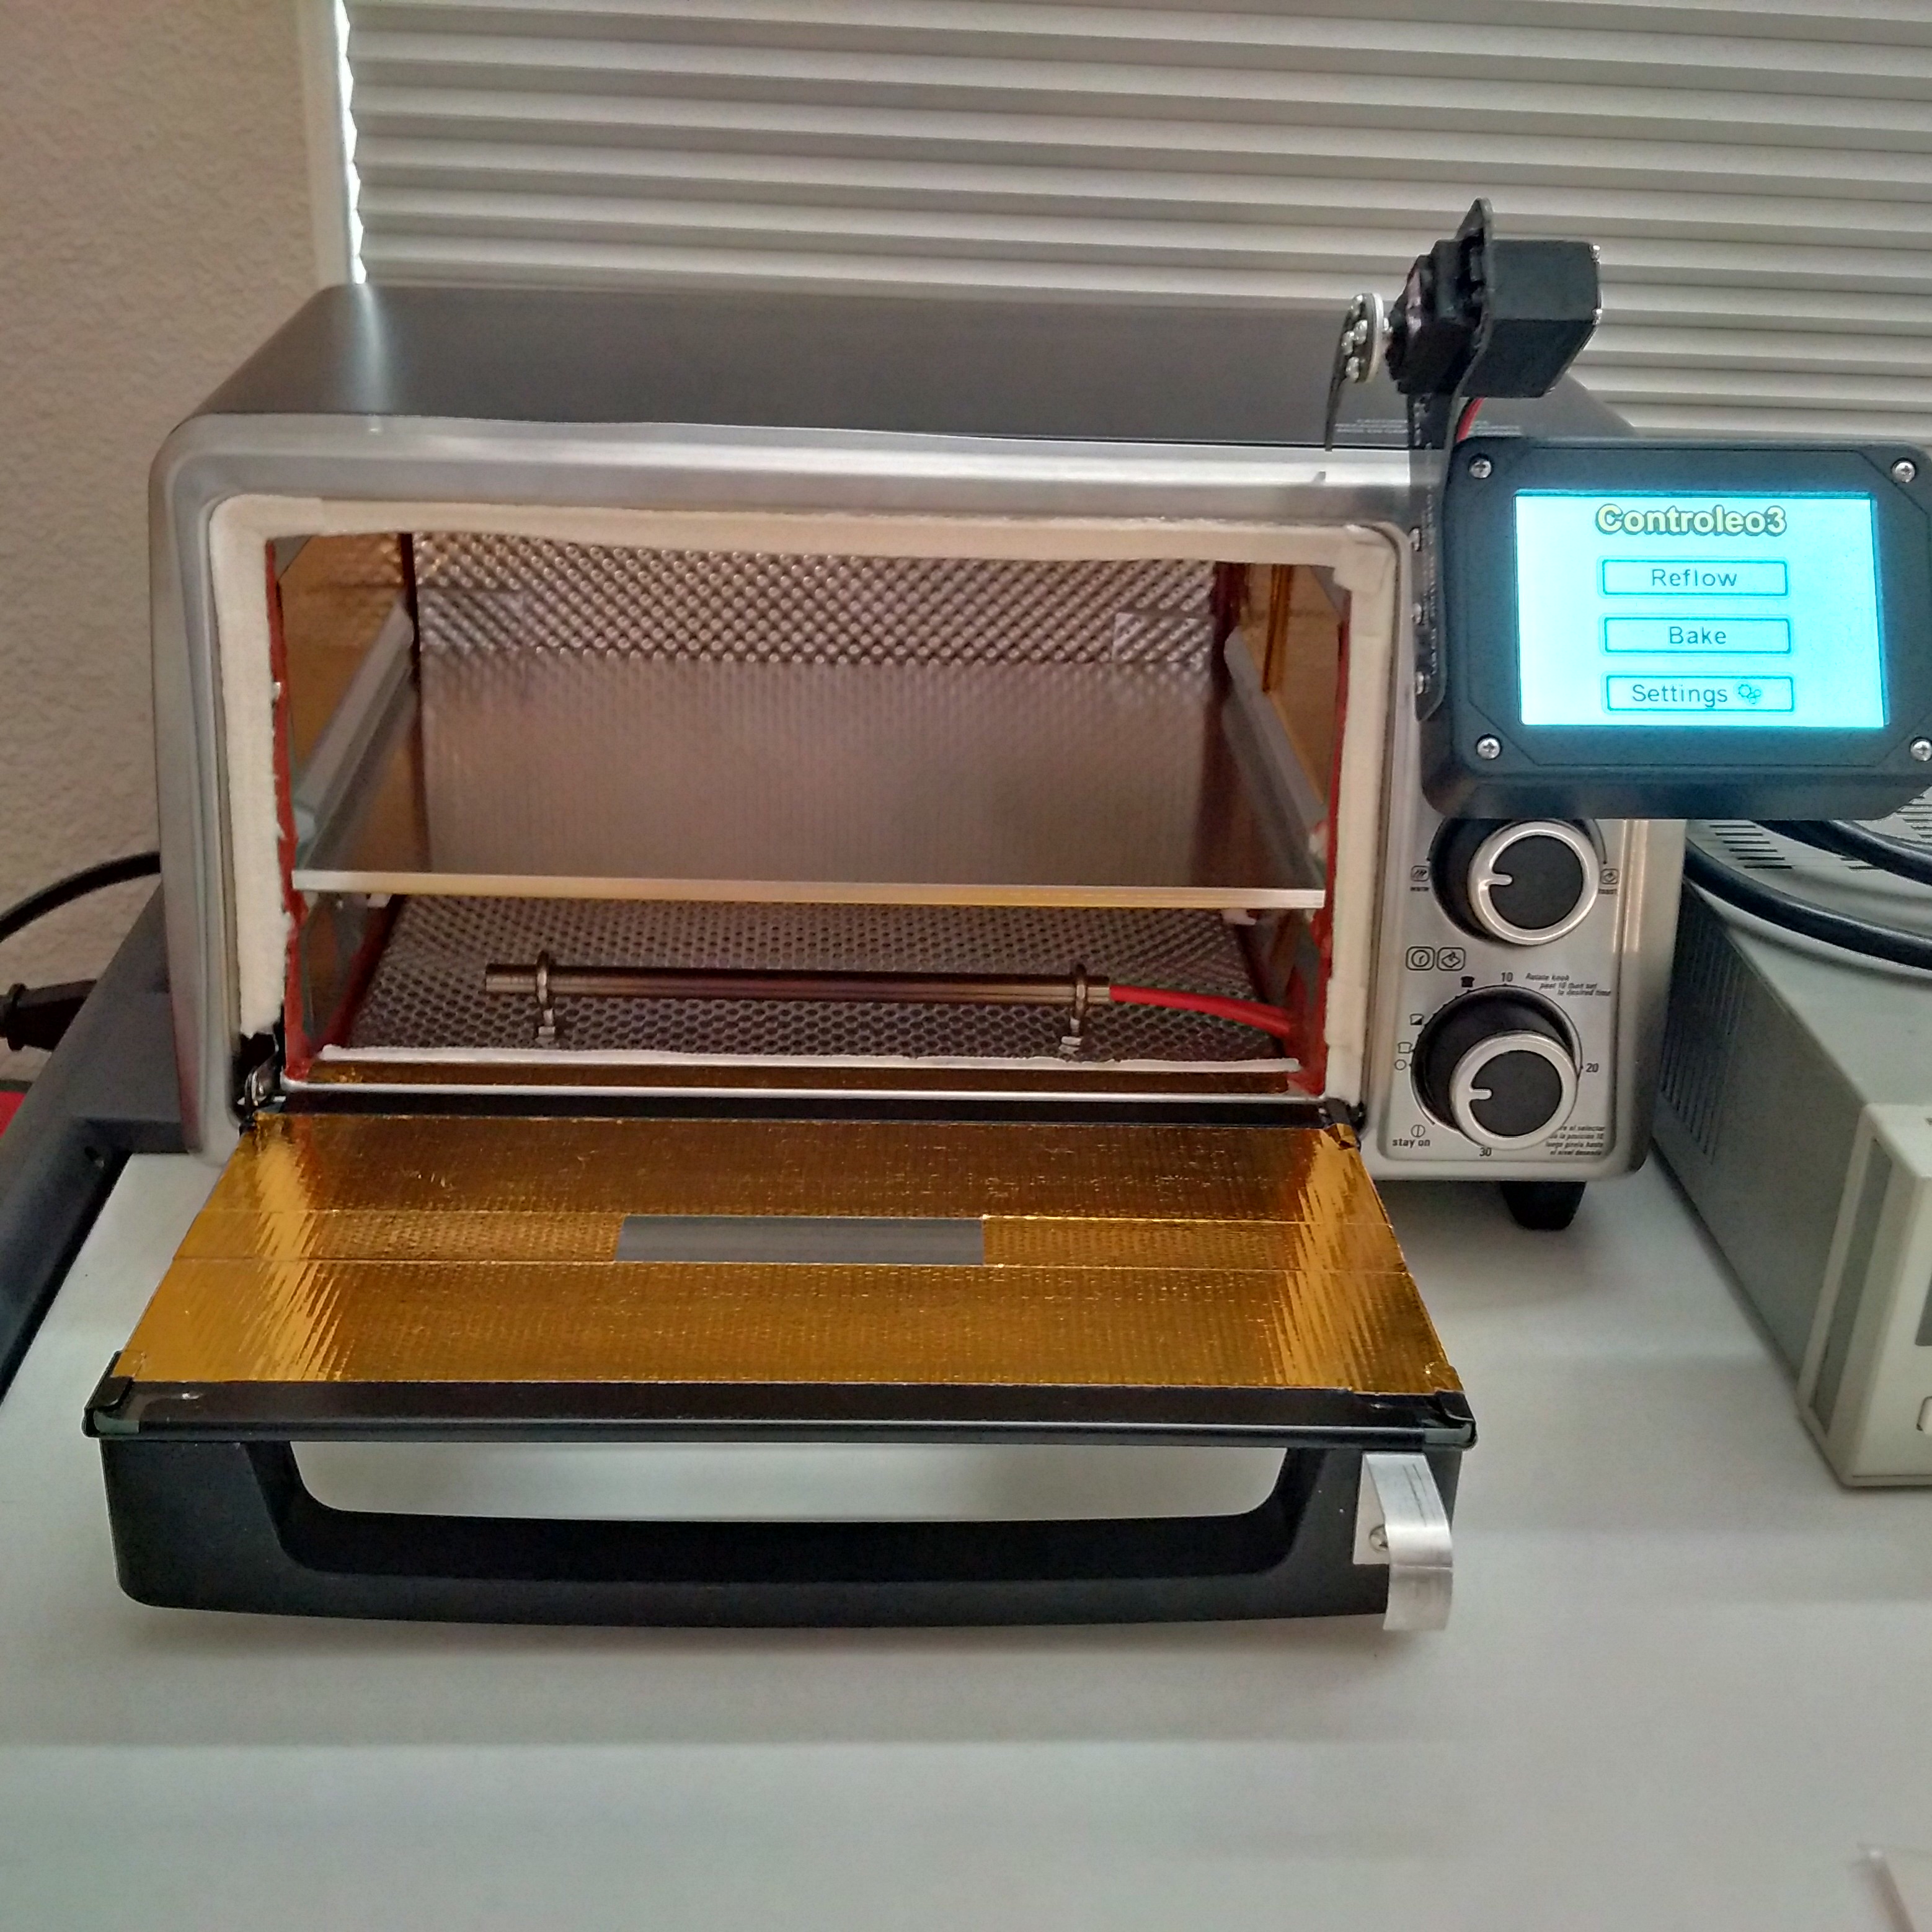
I know it’s kind of a jump to start with a reflow oven an not a soldering station, but bear with me. Virtually every single PCB that I have made since I started has been made with the DIY Controleo3 reflow oven from Whizoo. I’m talking about dozens of PCBs. It is AMAZING! You buy a dirt cheap toaster oven from Amazon and outfit it with Whizoo’s $289 reflow oven build kit and you are basically set for life. If you want to get fancy, you can build a nicer system than mine by including a convection fan, but I have never really had issues with reflowing solder in this oven besides very large inductors that just have too much thermal mass to reflow properly. Surface mount PCBs are easy to process with this DIY oven at a fraction of the price of a conventional oven. If you’re new to reflowing, I wrote a short guide on how to do it.
All-in-One Rework Station
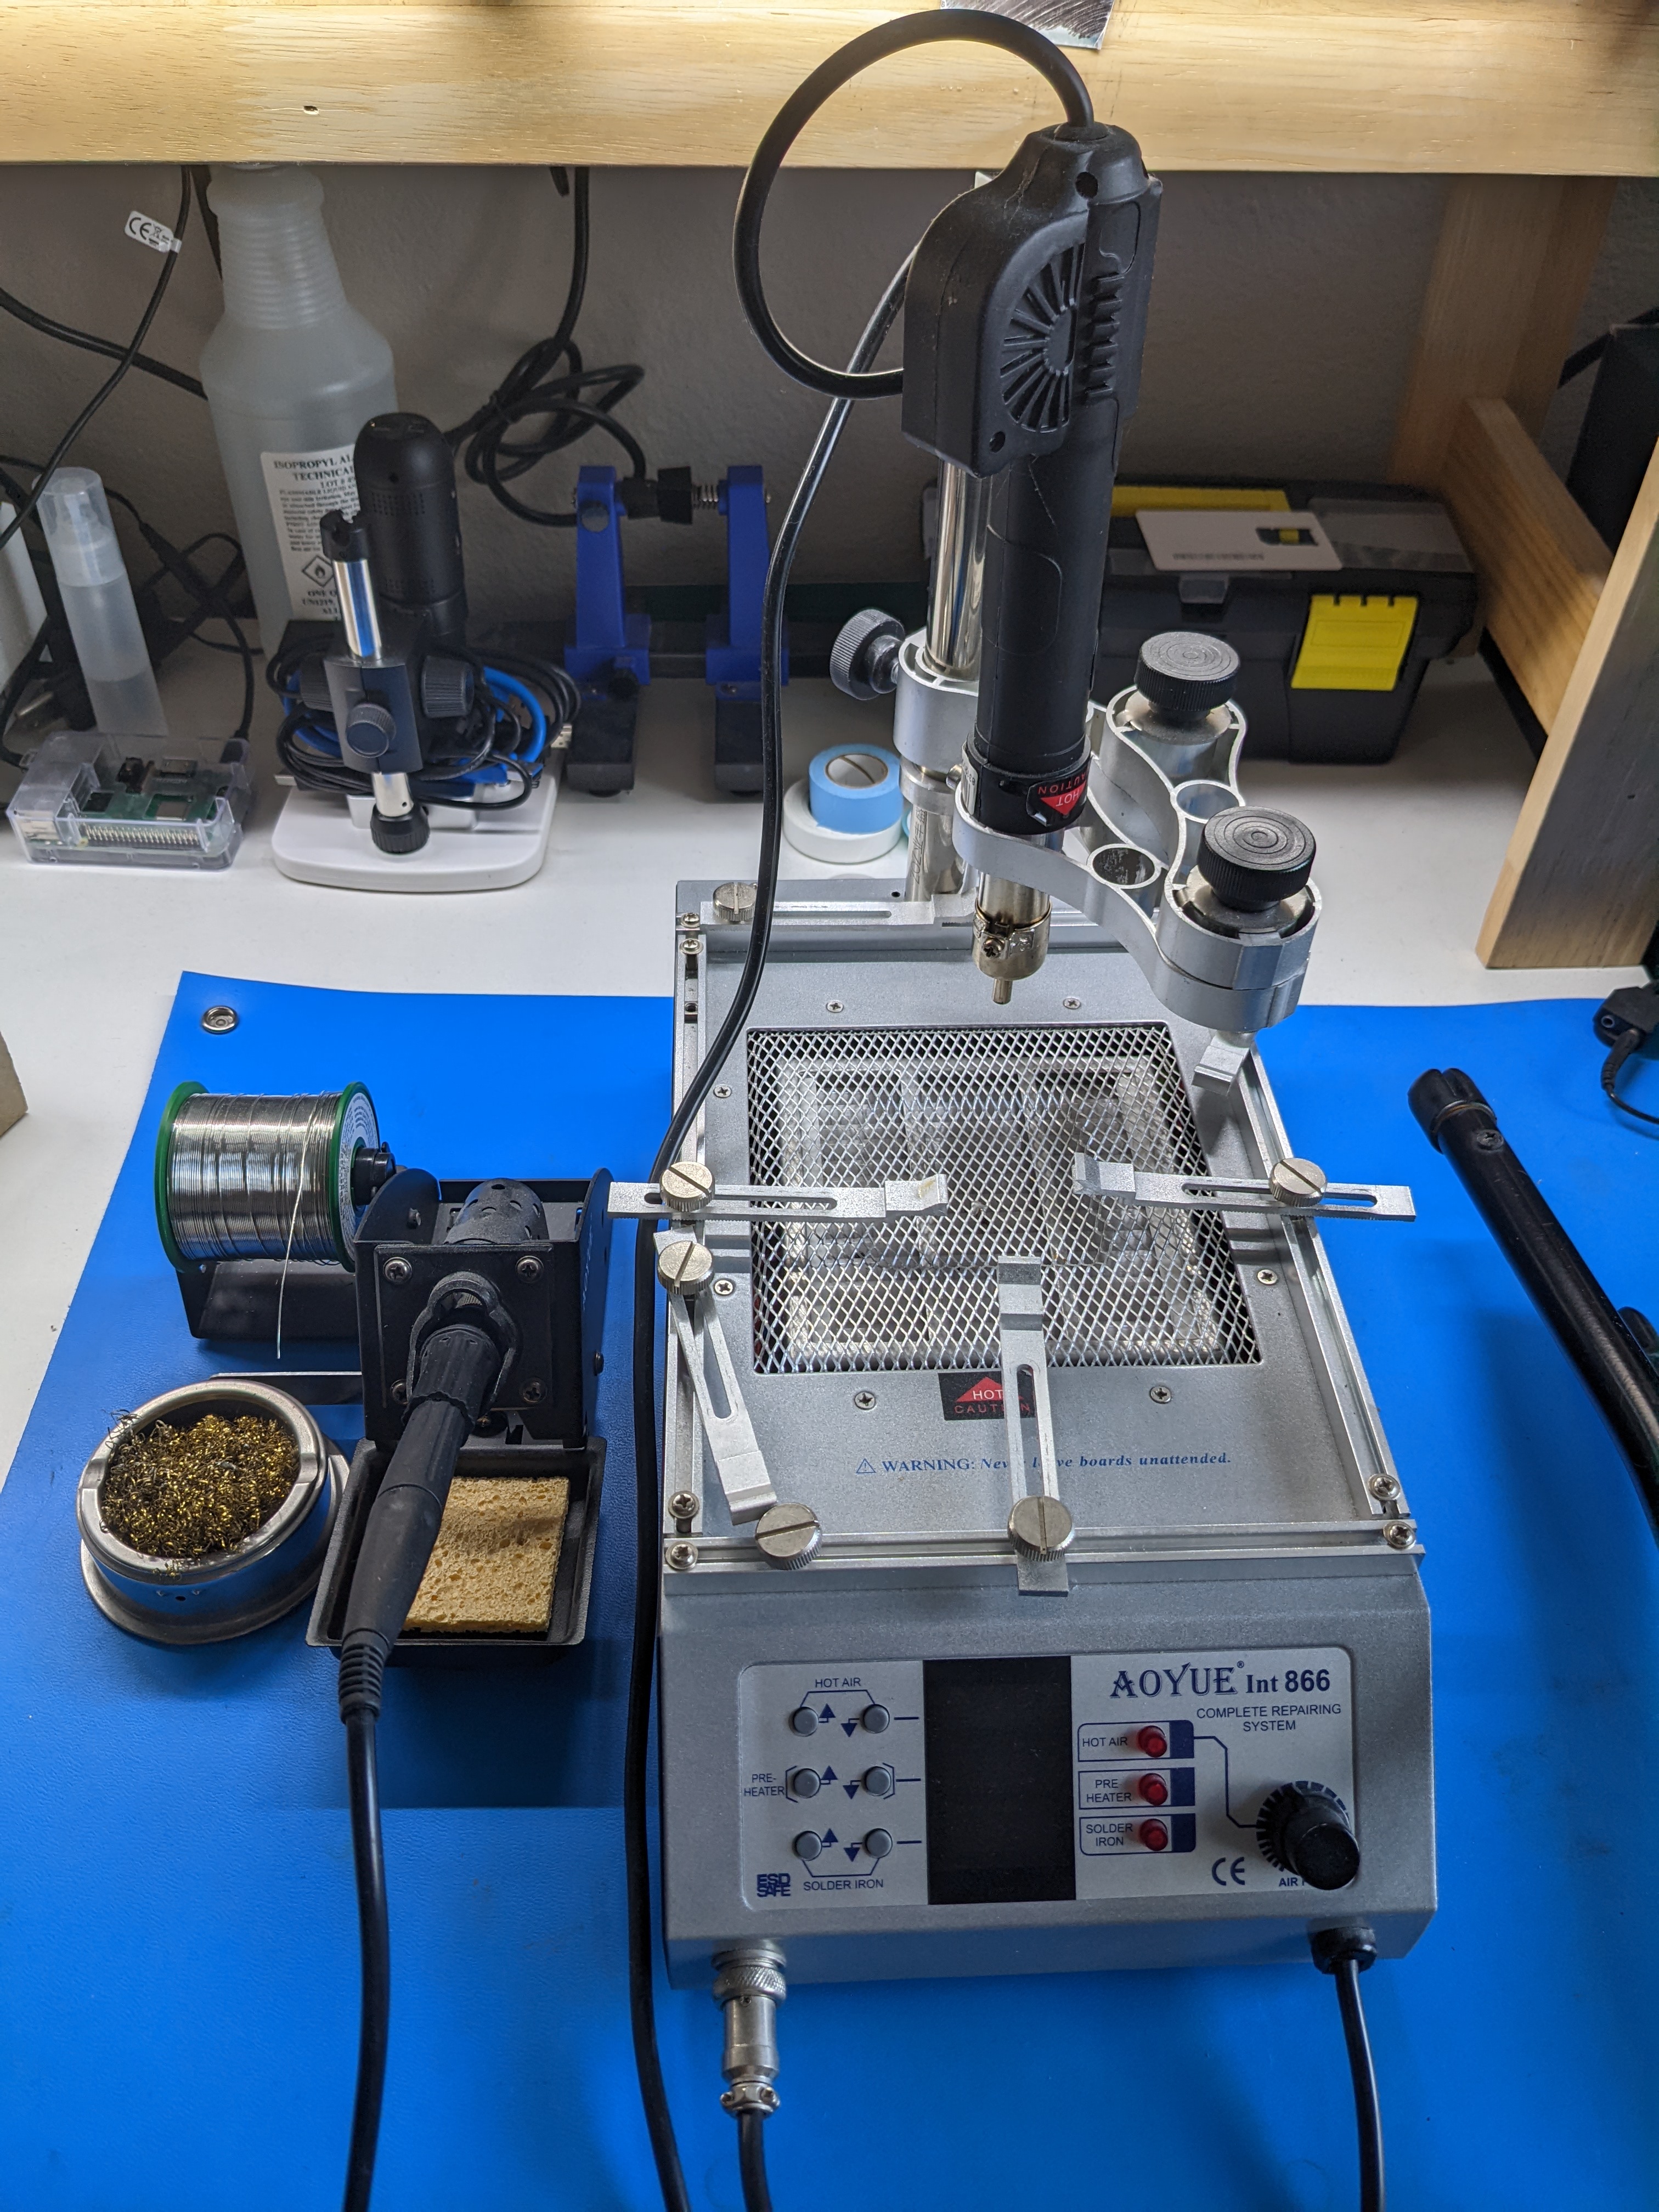
While my particular SMD rework station (Aoyue 866) is no longer available on Amazon, I’m sure that it is not difficult to find a comparable system. Mine cost $179 at the time of purchase and has been very useful. The soldering iron is digitally programable and includes exchangeable tips and a holder with a brass wipe station. The station also has an IR heater bed that suspends the PCB in the air while you heat large copper planes that sink a lot of heat to help with soldering or desoldering components. In addition, there is a heater gun with interchangable nozzles, which is perfect for heating a large chip to remove it or warming up heat shrink tubing. This rework station has a lot of utility in a good sized package and I’m very glad that I picked it up instead of just buying a standalone soldering iron.
Digital Multimeter
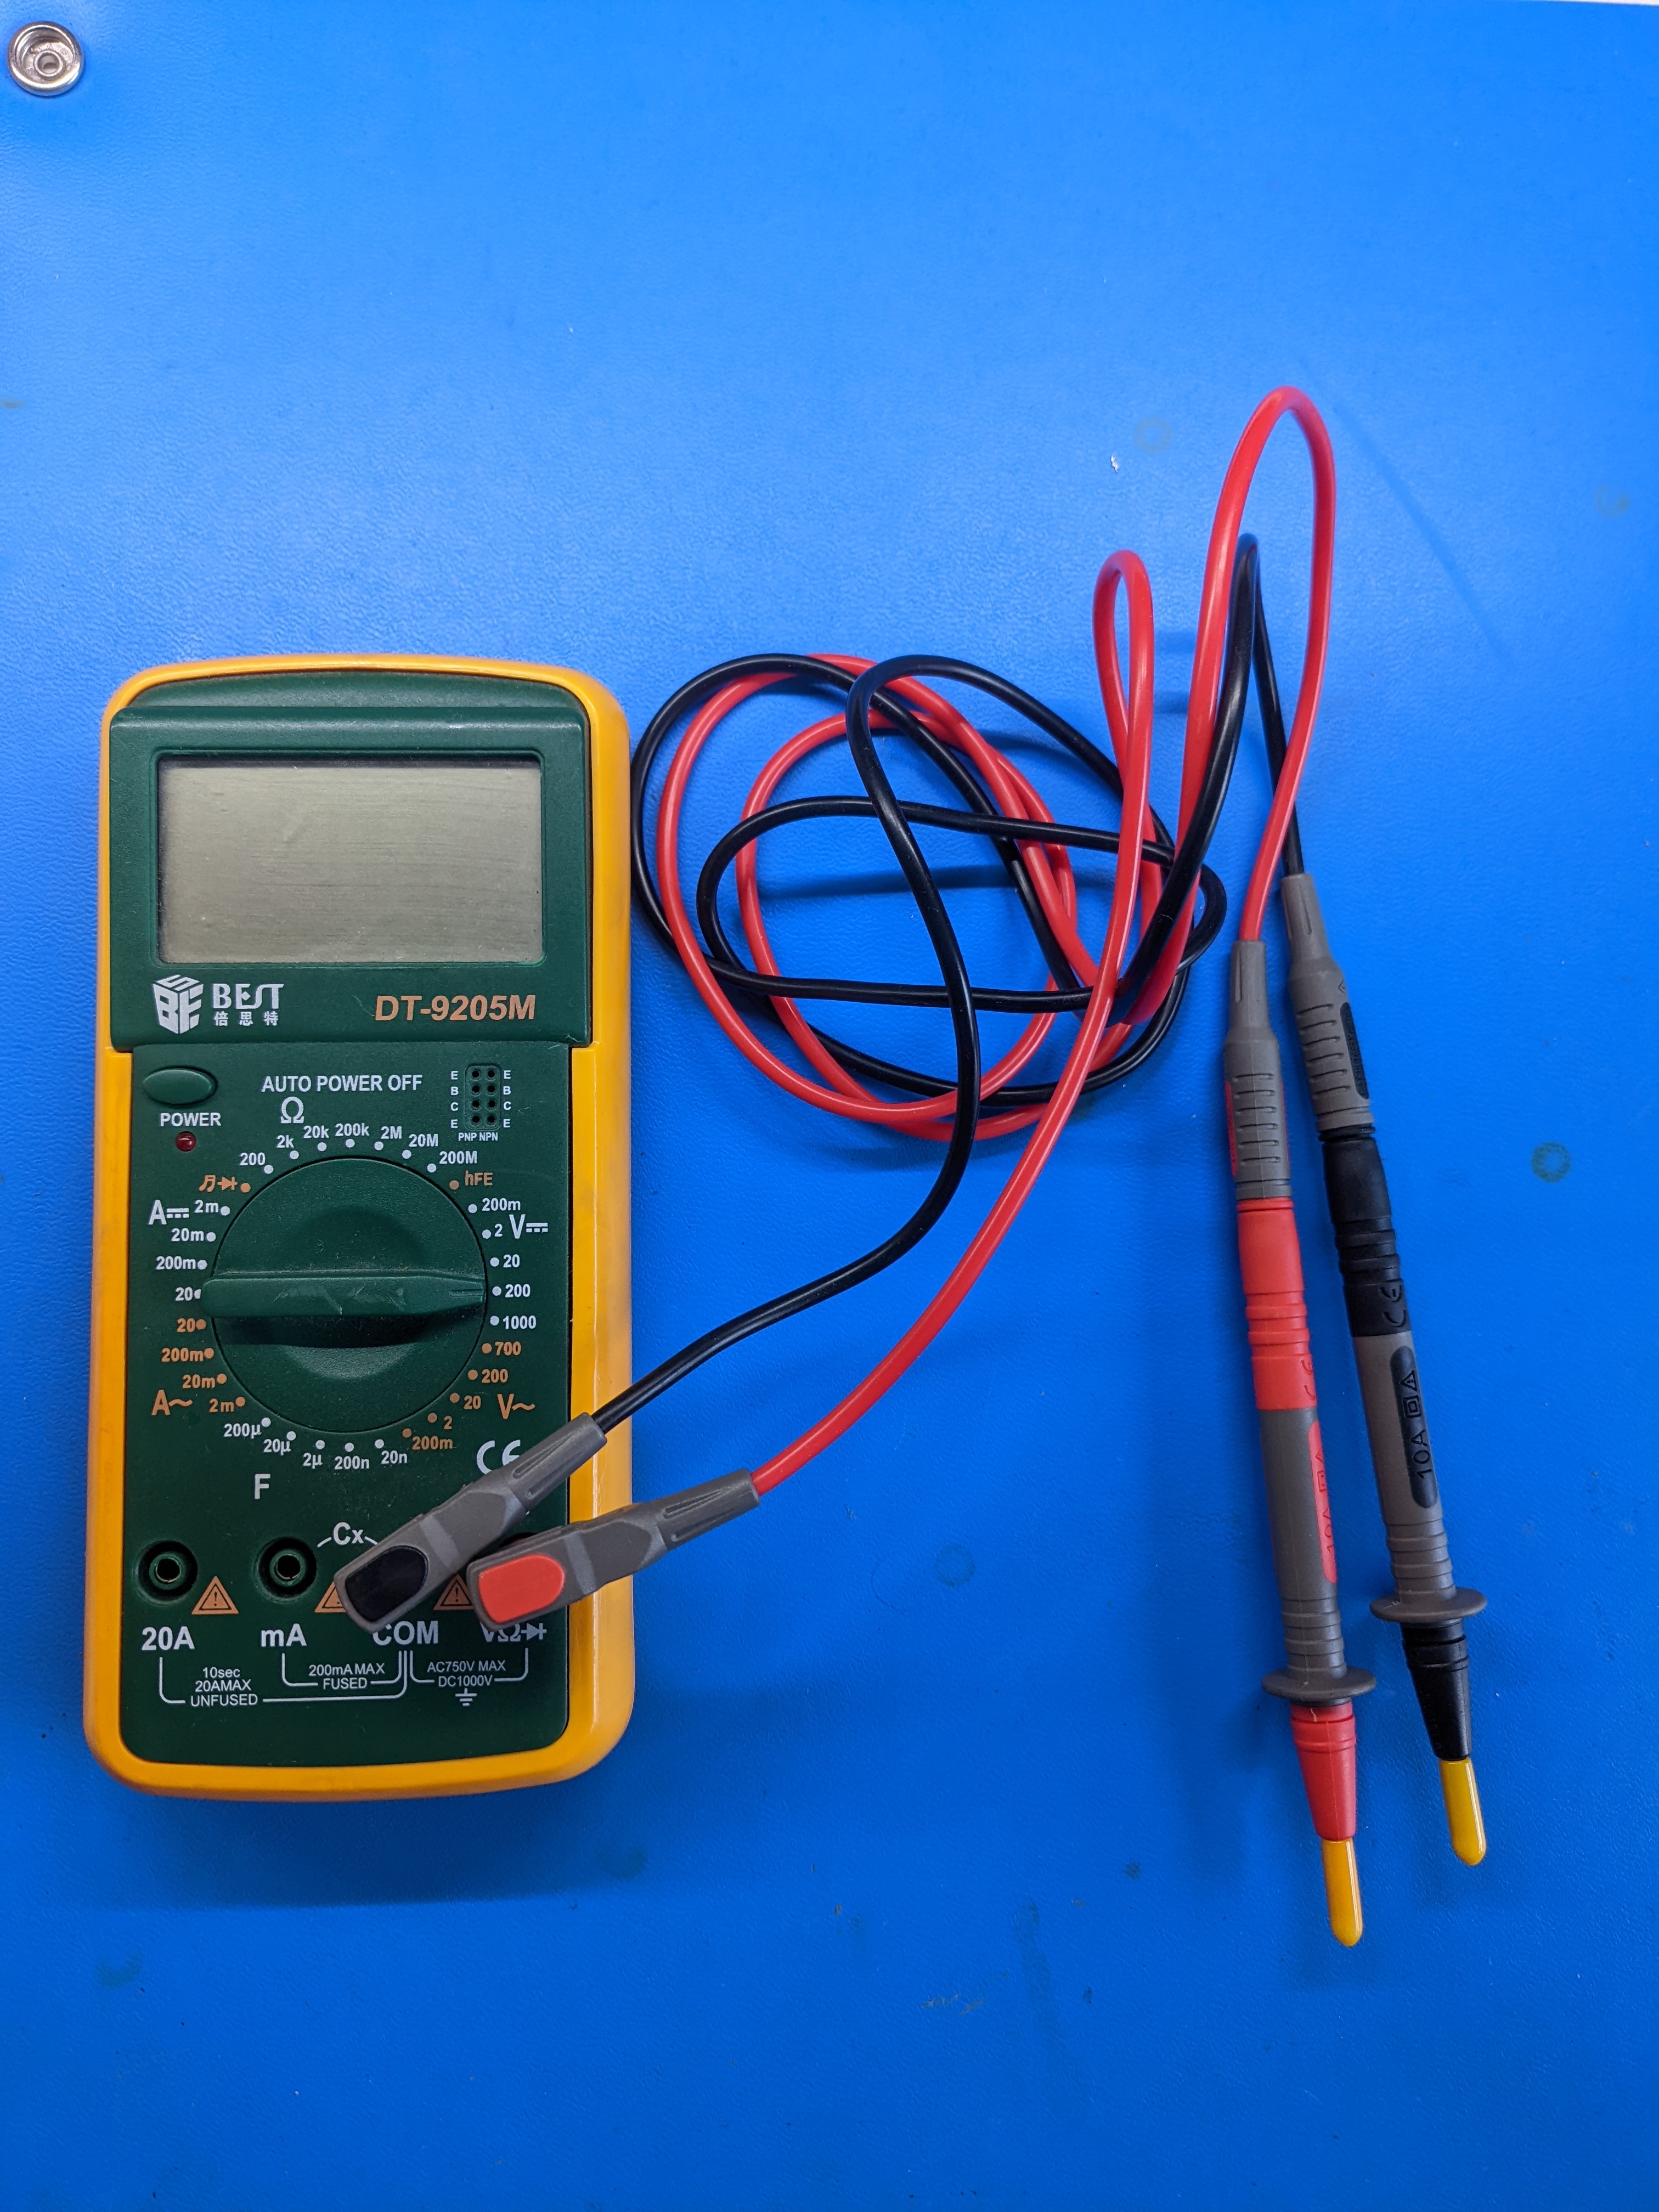
The DMM is the go-to tool for debugging circuits and is absolutely fundamental. That being said, you don’t need to swear allegiance to Fluke to get by. I don’t recommend that you do this per-say, but I purchased my BEST DT-9205M from Taobao for about $5 and it has done everything that I have wanted it to. If you want one from Amazon, it looks like it is being sold there as well. For me, the most important features for a DMM include: having a continuity tester to find shorts (it’s a feature that causes the tool to beep), being able to tell me a close voltage estimate (it doesn’t need to be extremely precise), being able to tell me a close resistance estimate (again, no need to be exact), and it also has a auto power-off feature to save the battery. That has served at least 90% of my needs. I will one day upgrade it to an EEVblog Bryman since it is virtually equivalent or better than some Flukes for less, but that is just a luxury.
Workbench
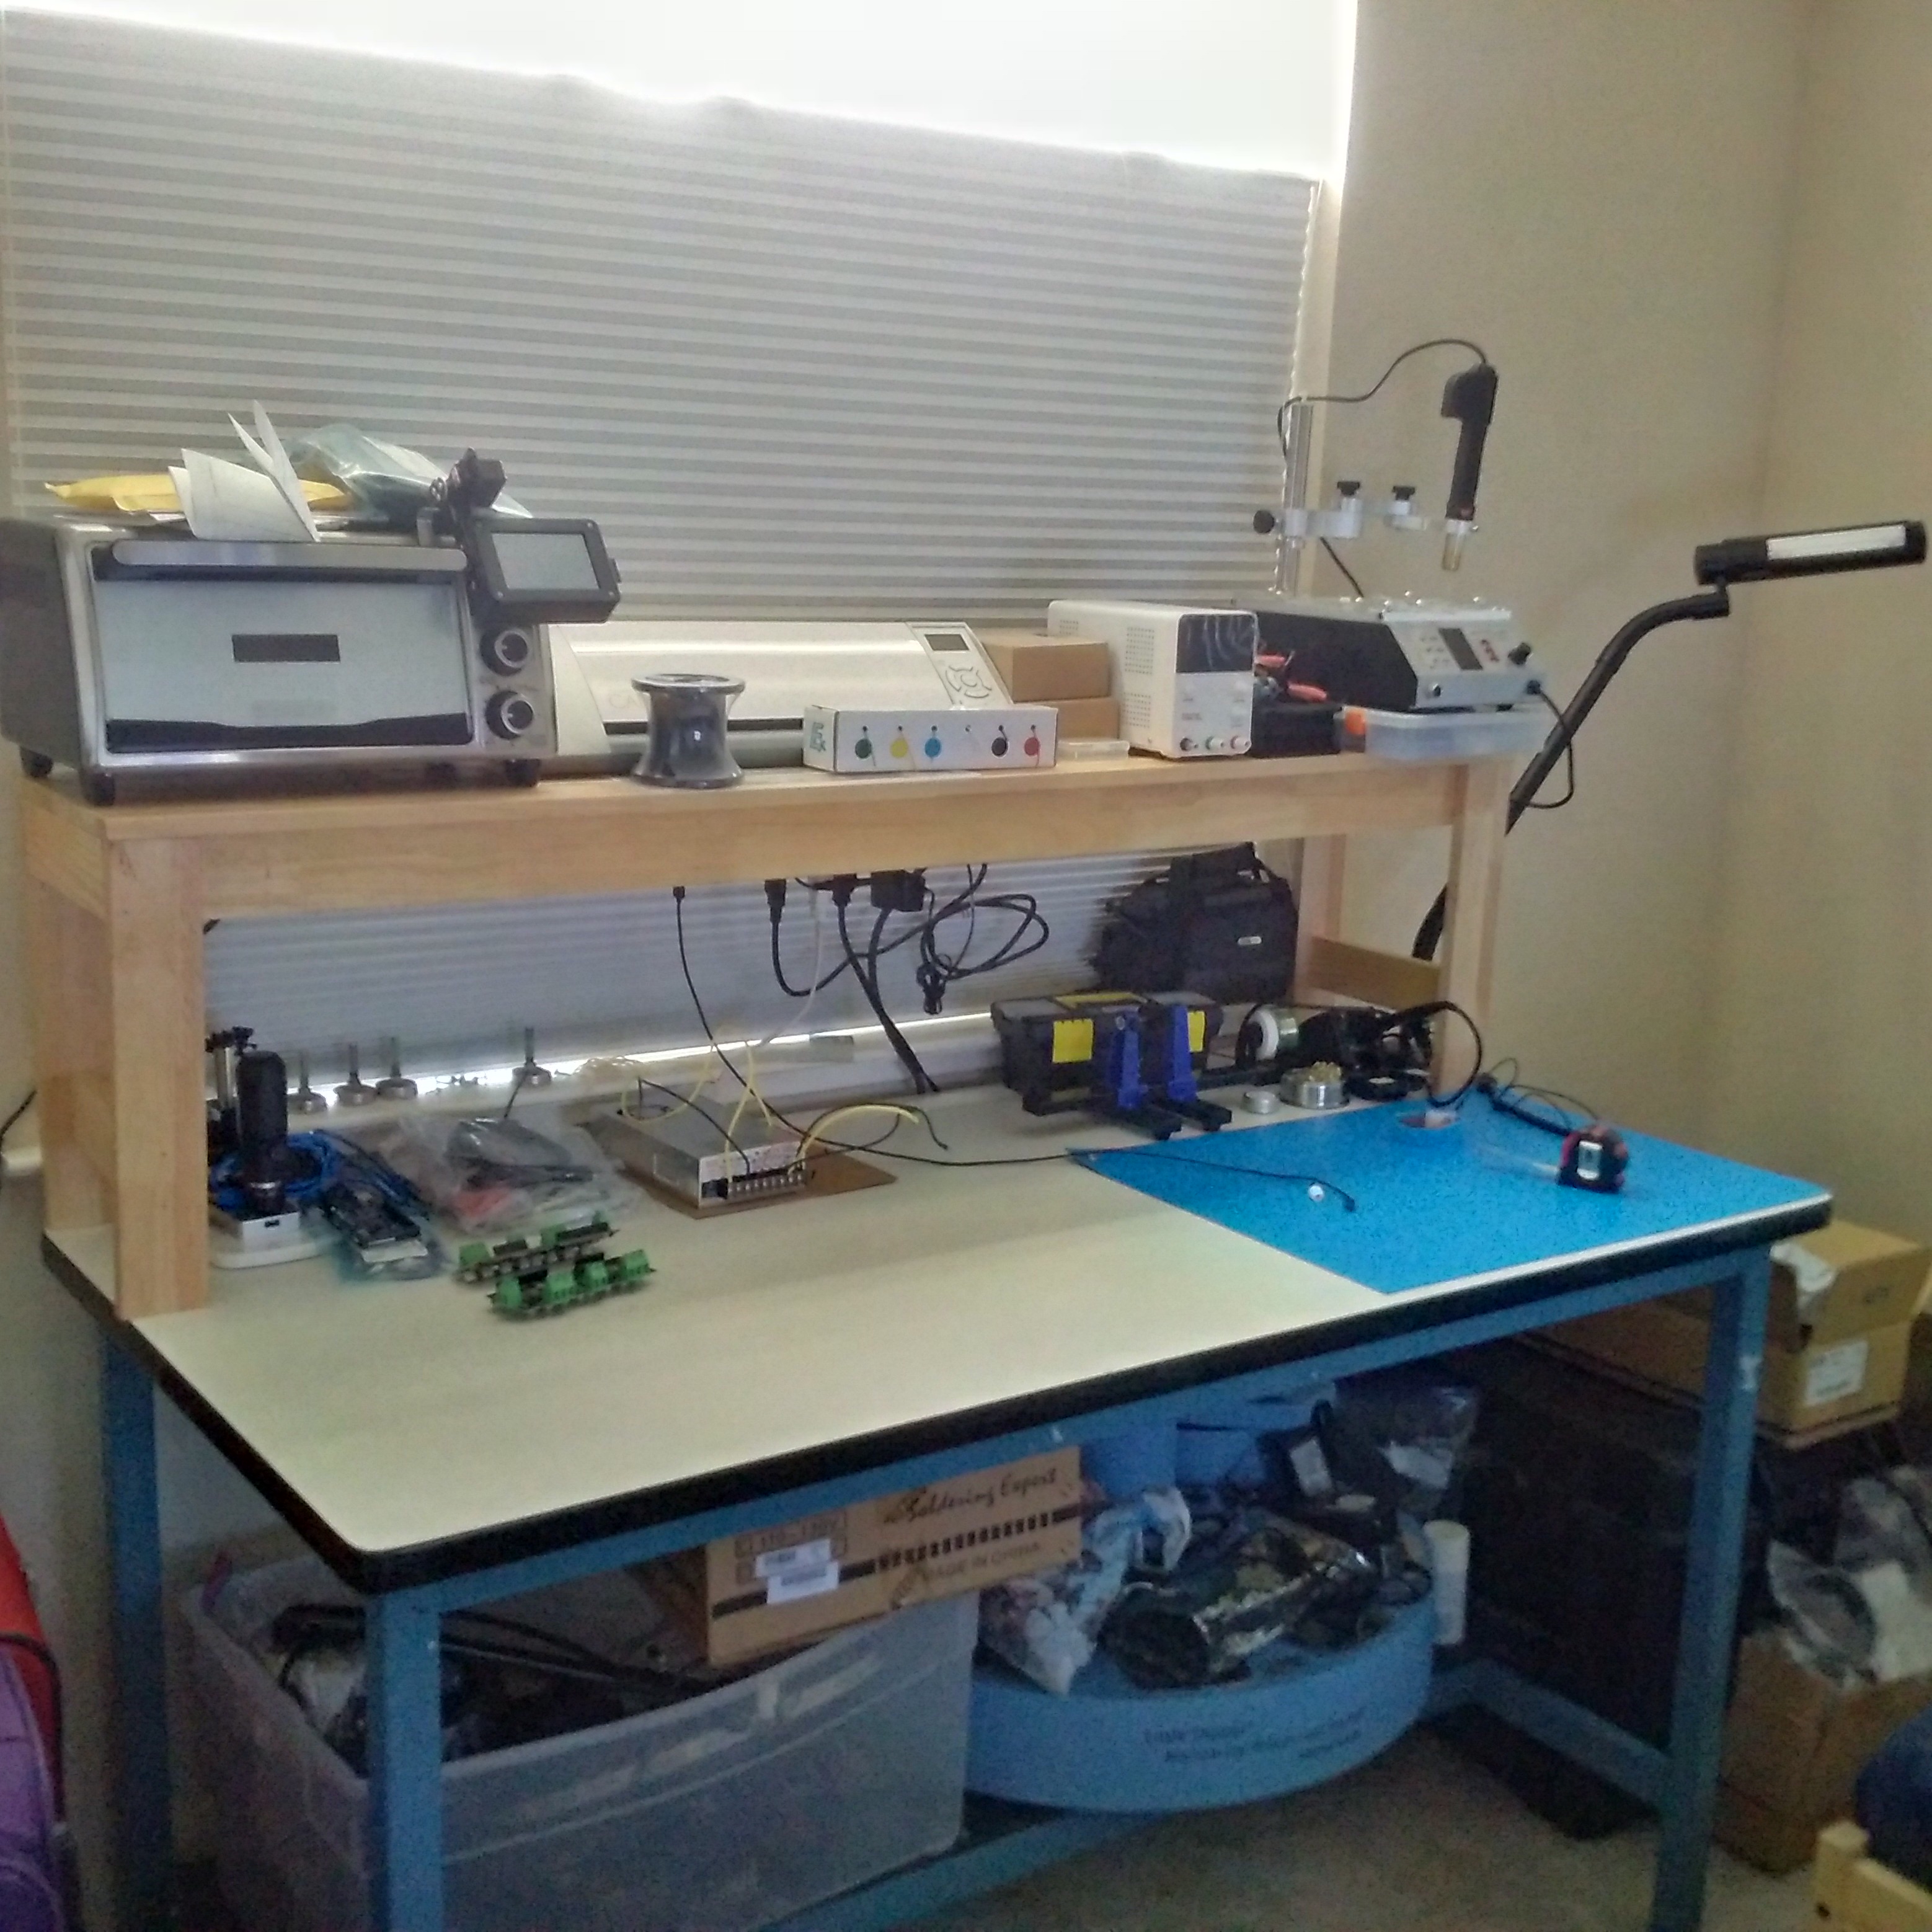
I have found that my workbench is the perfect size for my needs. It is 30”x60” with a steel frame, includes a lower shelf below the work area, and has a static dissipative surface that is connected to ground. I picked it up for $100 on Craigslist. Since then, I have outfitted it with a handmade wooden bench that I found on Craigslist for $50 and a $50 dimmable LED light bar that I got from Amazon. I’ve found that the wooden bench and lights have been quite critical in making sure that I always have the space and lighting that I need to do the job. The lower shelf is useful for storing projects or parts, but not absolutely required. You can always put them on the floor. There are a lot of different bench configurations out there, but just go with something that you like and includes has vertical space.
ESD Mat
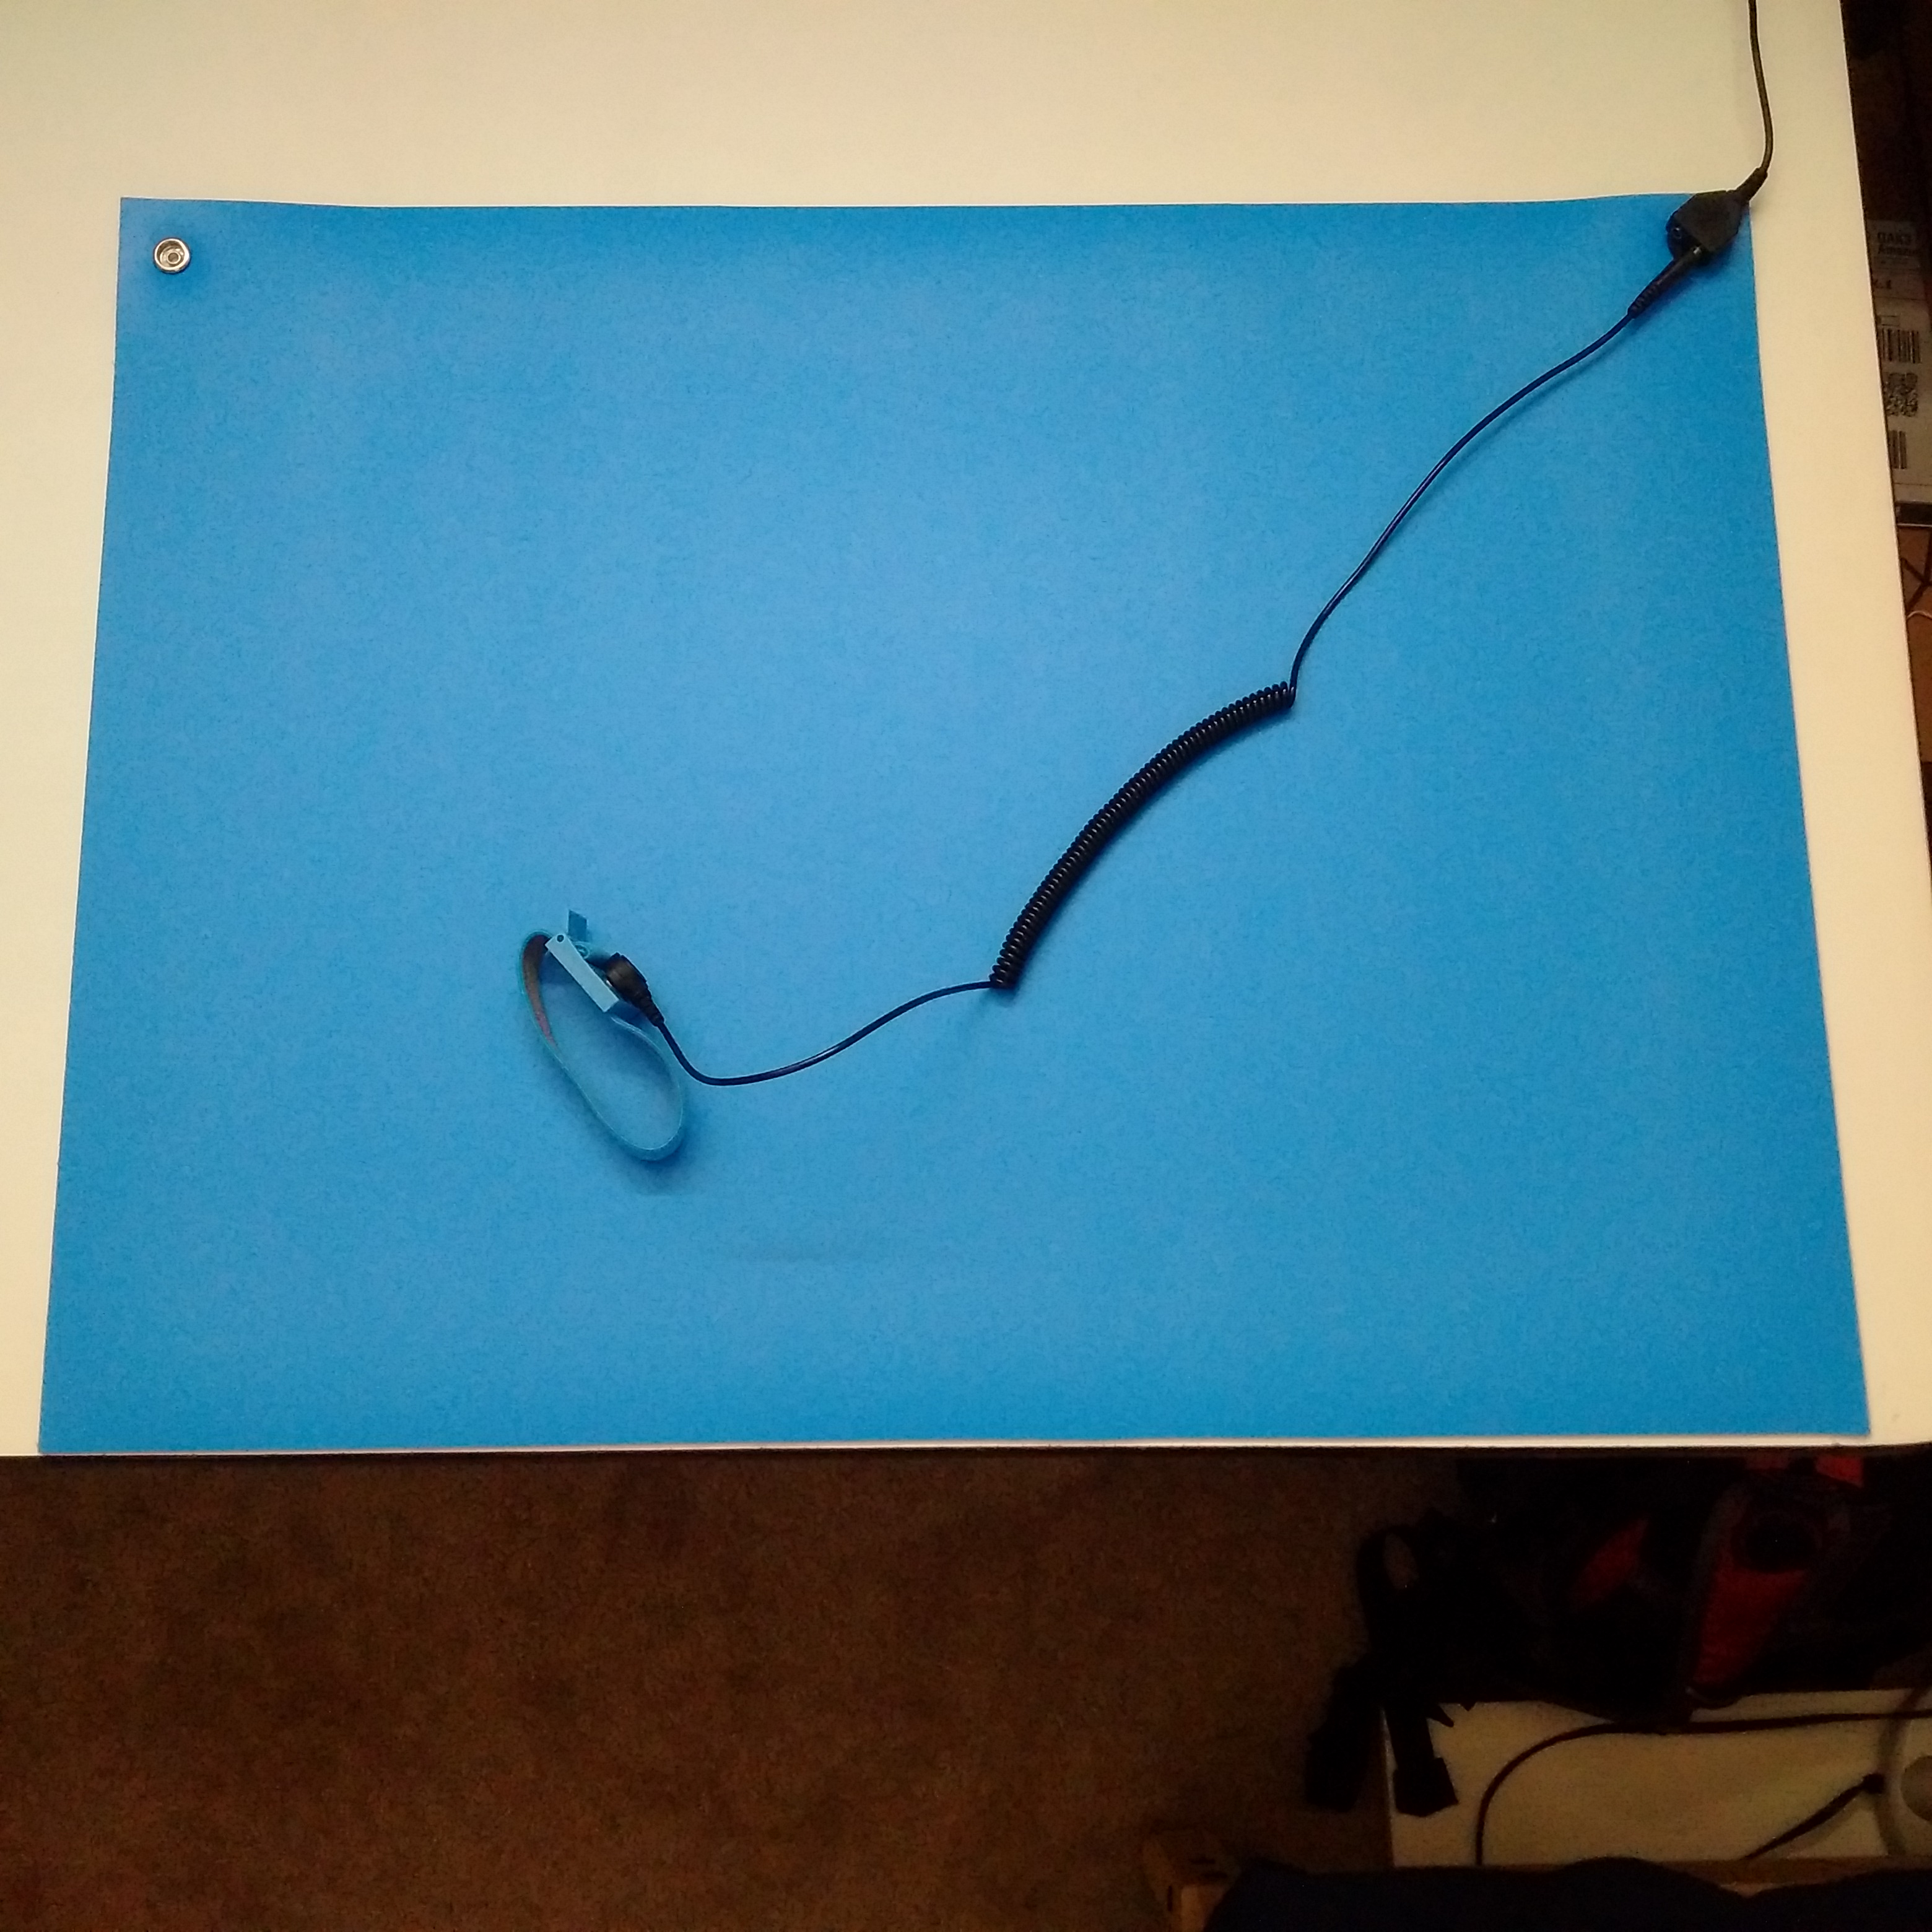
Some components are very sensitive to electrostatic discharge and these blue mats help make a static-safe environment. I originally bought my 18”x24” mat for $40 off of Amazon and it has been pretty useful. Although it does help protect your components, I think it’s biggest role is to protect your work surface from being marred by countless mistakes and accidents that are bound to happen. I would much rather replace a mat than replace a workbench. I consider it essential, but maybe I’m just being petty!
ESD-Safe Tweezers
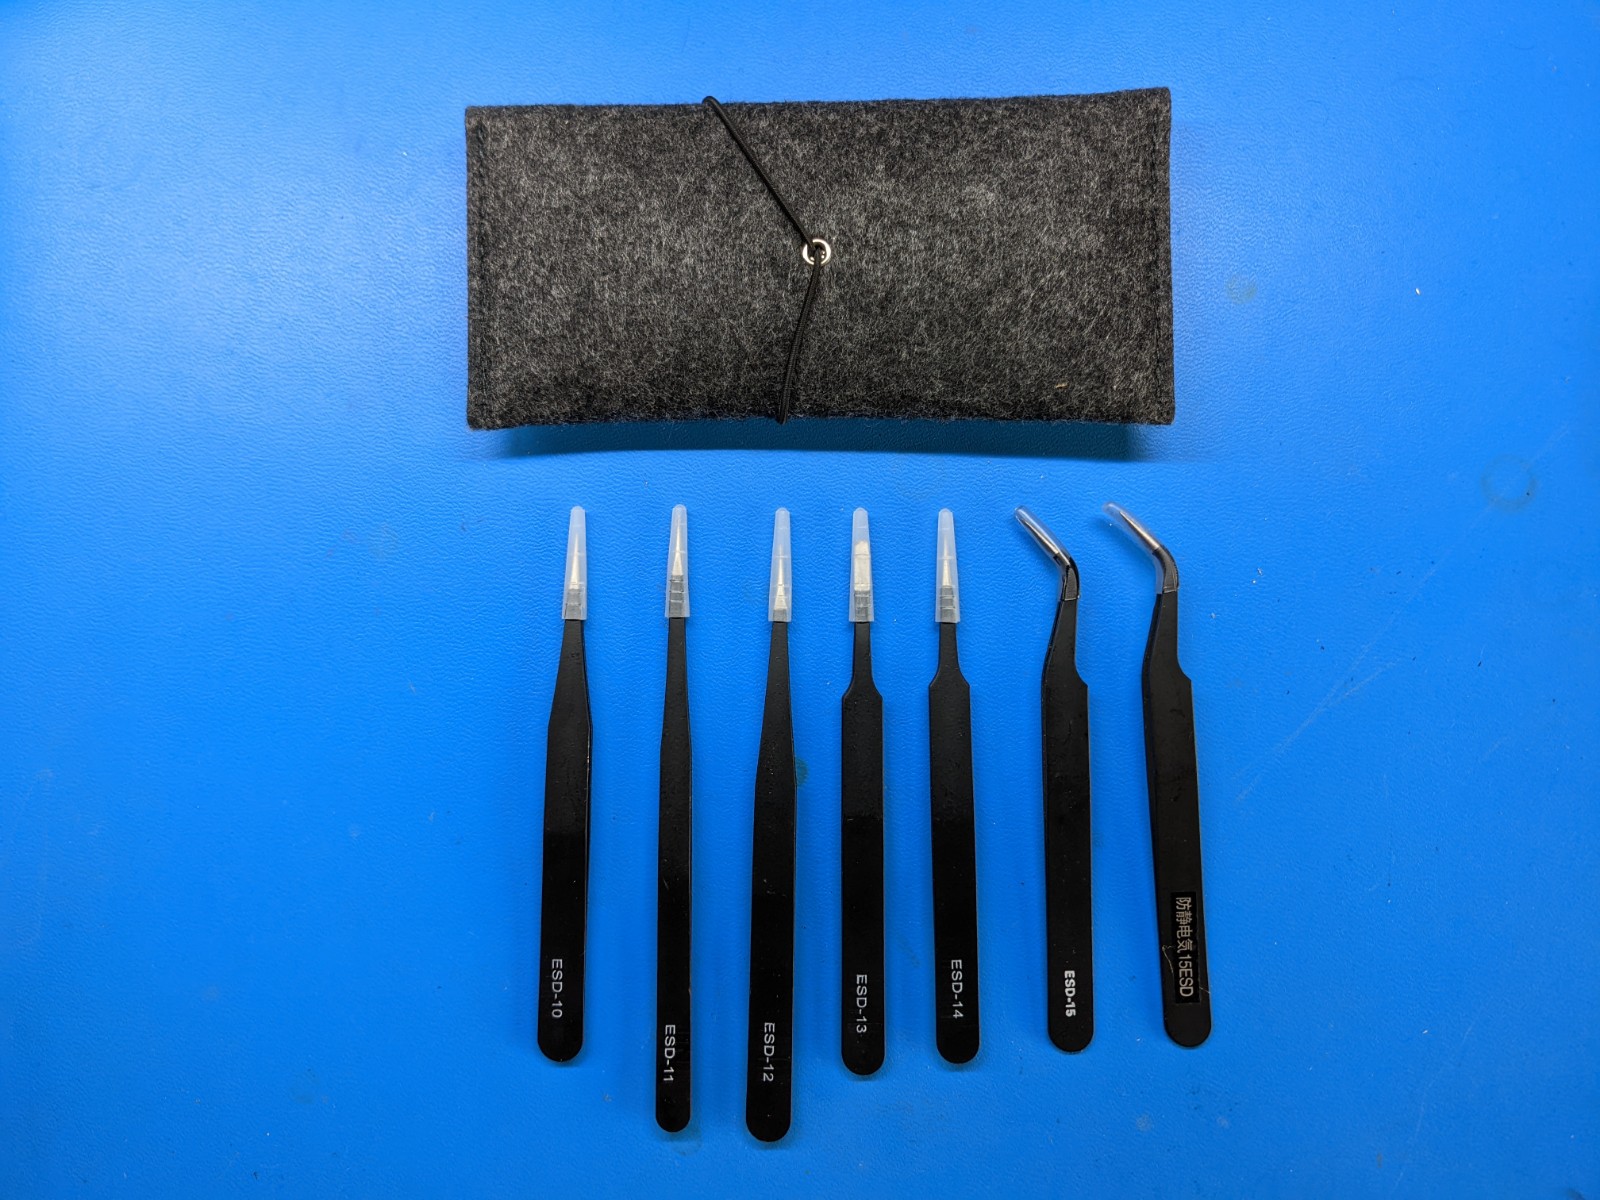
While handling through-hole components is fairly easy, you’ll need to use tweezers or some other tool to help position your SMD components over their pads. You don’t need to really get anything fancy, just make sure that you get a few different shapes so that it is easier to nudge parts around while not disrupting their neighbors. ESD-safe is preferred, but I don’t think it will have a big impact either way. The set that I purchased is no longer available, but it cost $10 at the time.
Wire Cutters and Wire Strippers
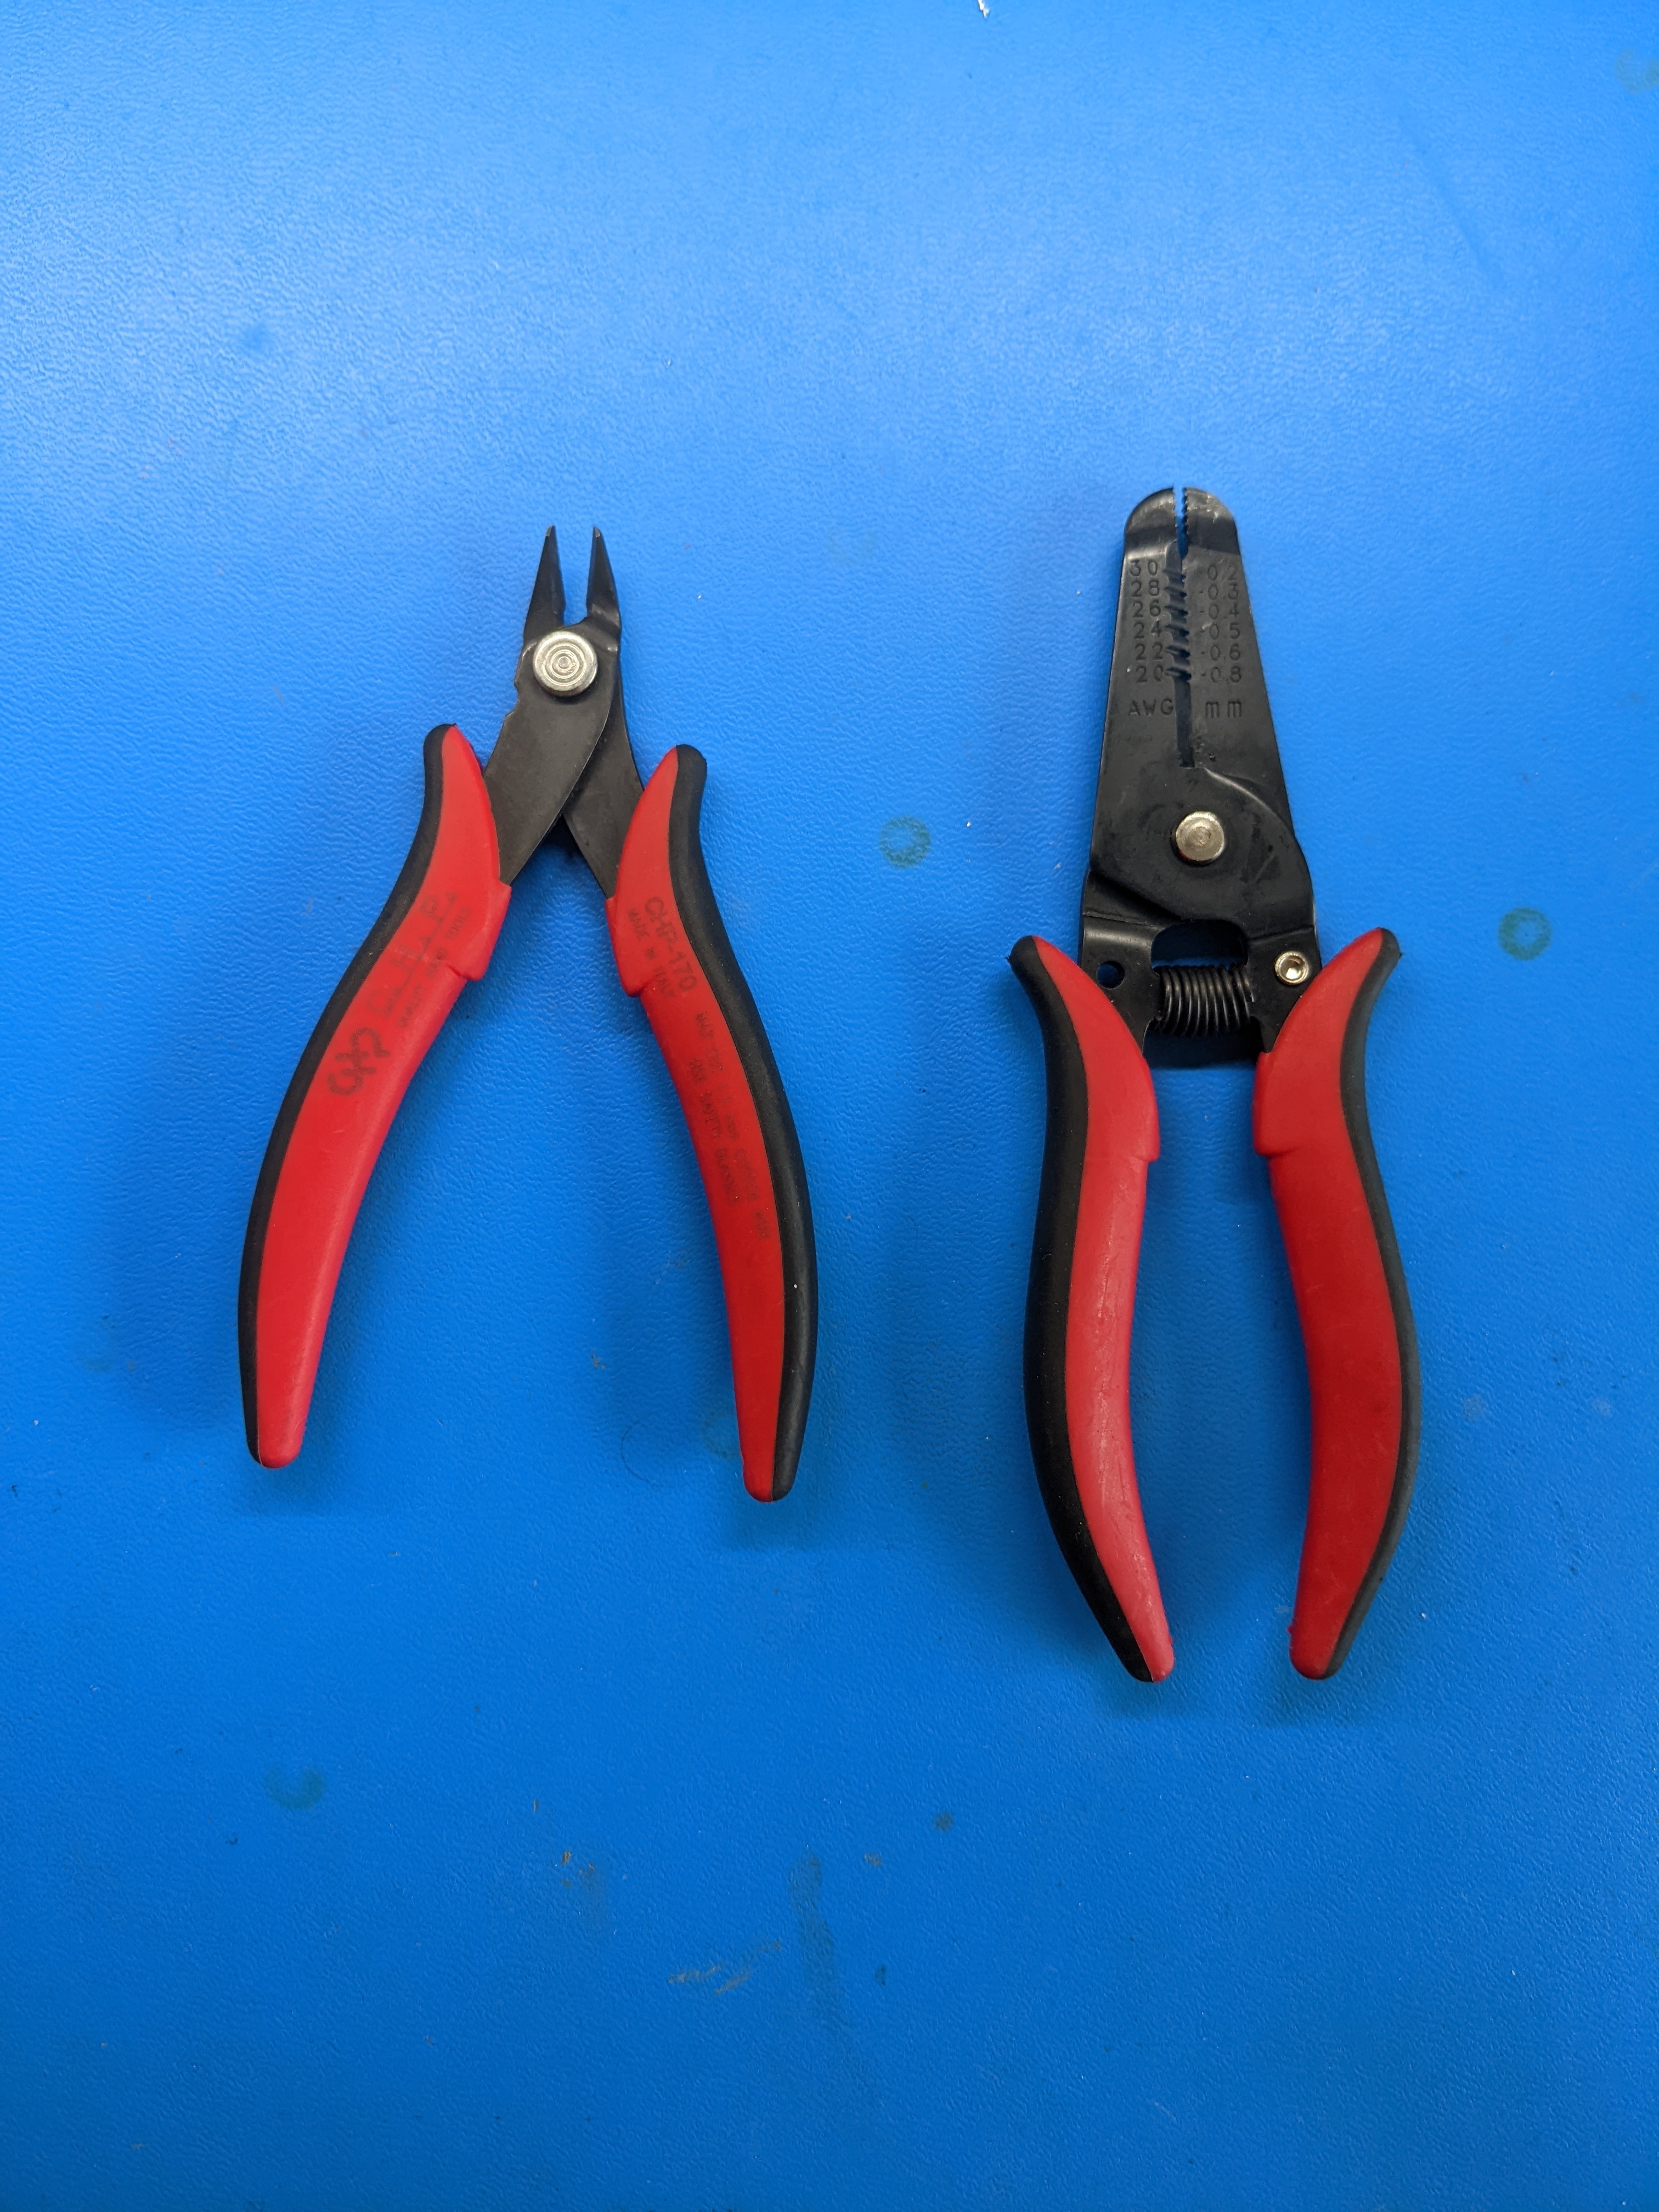
You’ll need to snip and strip things occasionally whether it is wires, PCB edges, plastic housings, etc. These are important, but I don’t have any specific recommendations. If you want the cheapest, go for it. I like having middle tier gear for these since they aren’t crazy expensive and are comfortable to use, but that doesn’t really matter. For the wire strippers, make sure you can cover 14G or 16G wire to 28G wire. I only show one stripper in the image above, but I actually use two pairs for my jobs.
Useful Tools
The tools that I recommend in this section won’t be useful for every project, but they certainly have their time and place. Most of them allow me to connect my computer directly into a circuit of interest to control peripherals or listen to messages being communicated, which would otherwise be impossible to do. You’ll have to figure out what the right tool is for you given the projects that you’re planning to take on. If you’re just starting out, you probably don’t want more than 1 or 2 of these! All of the extras listed here have a cumulative cost of ~$600.
Logic Analyzer
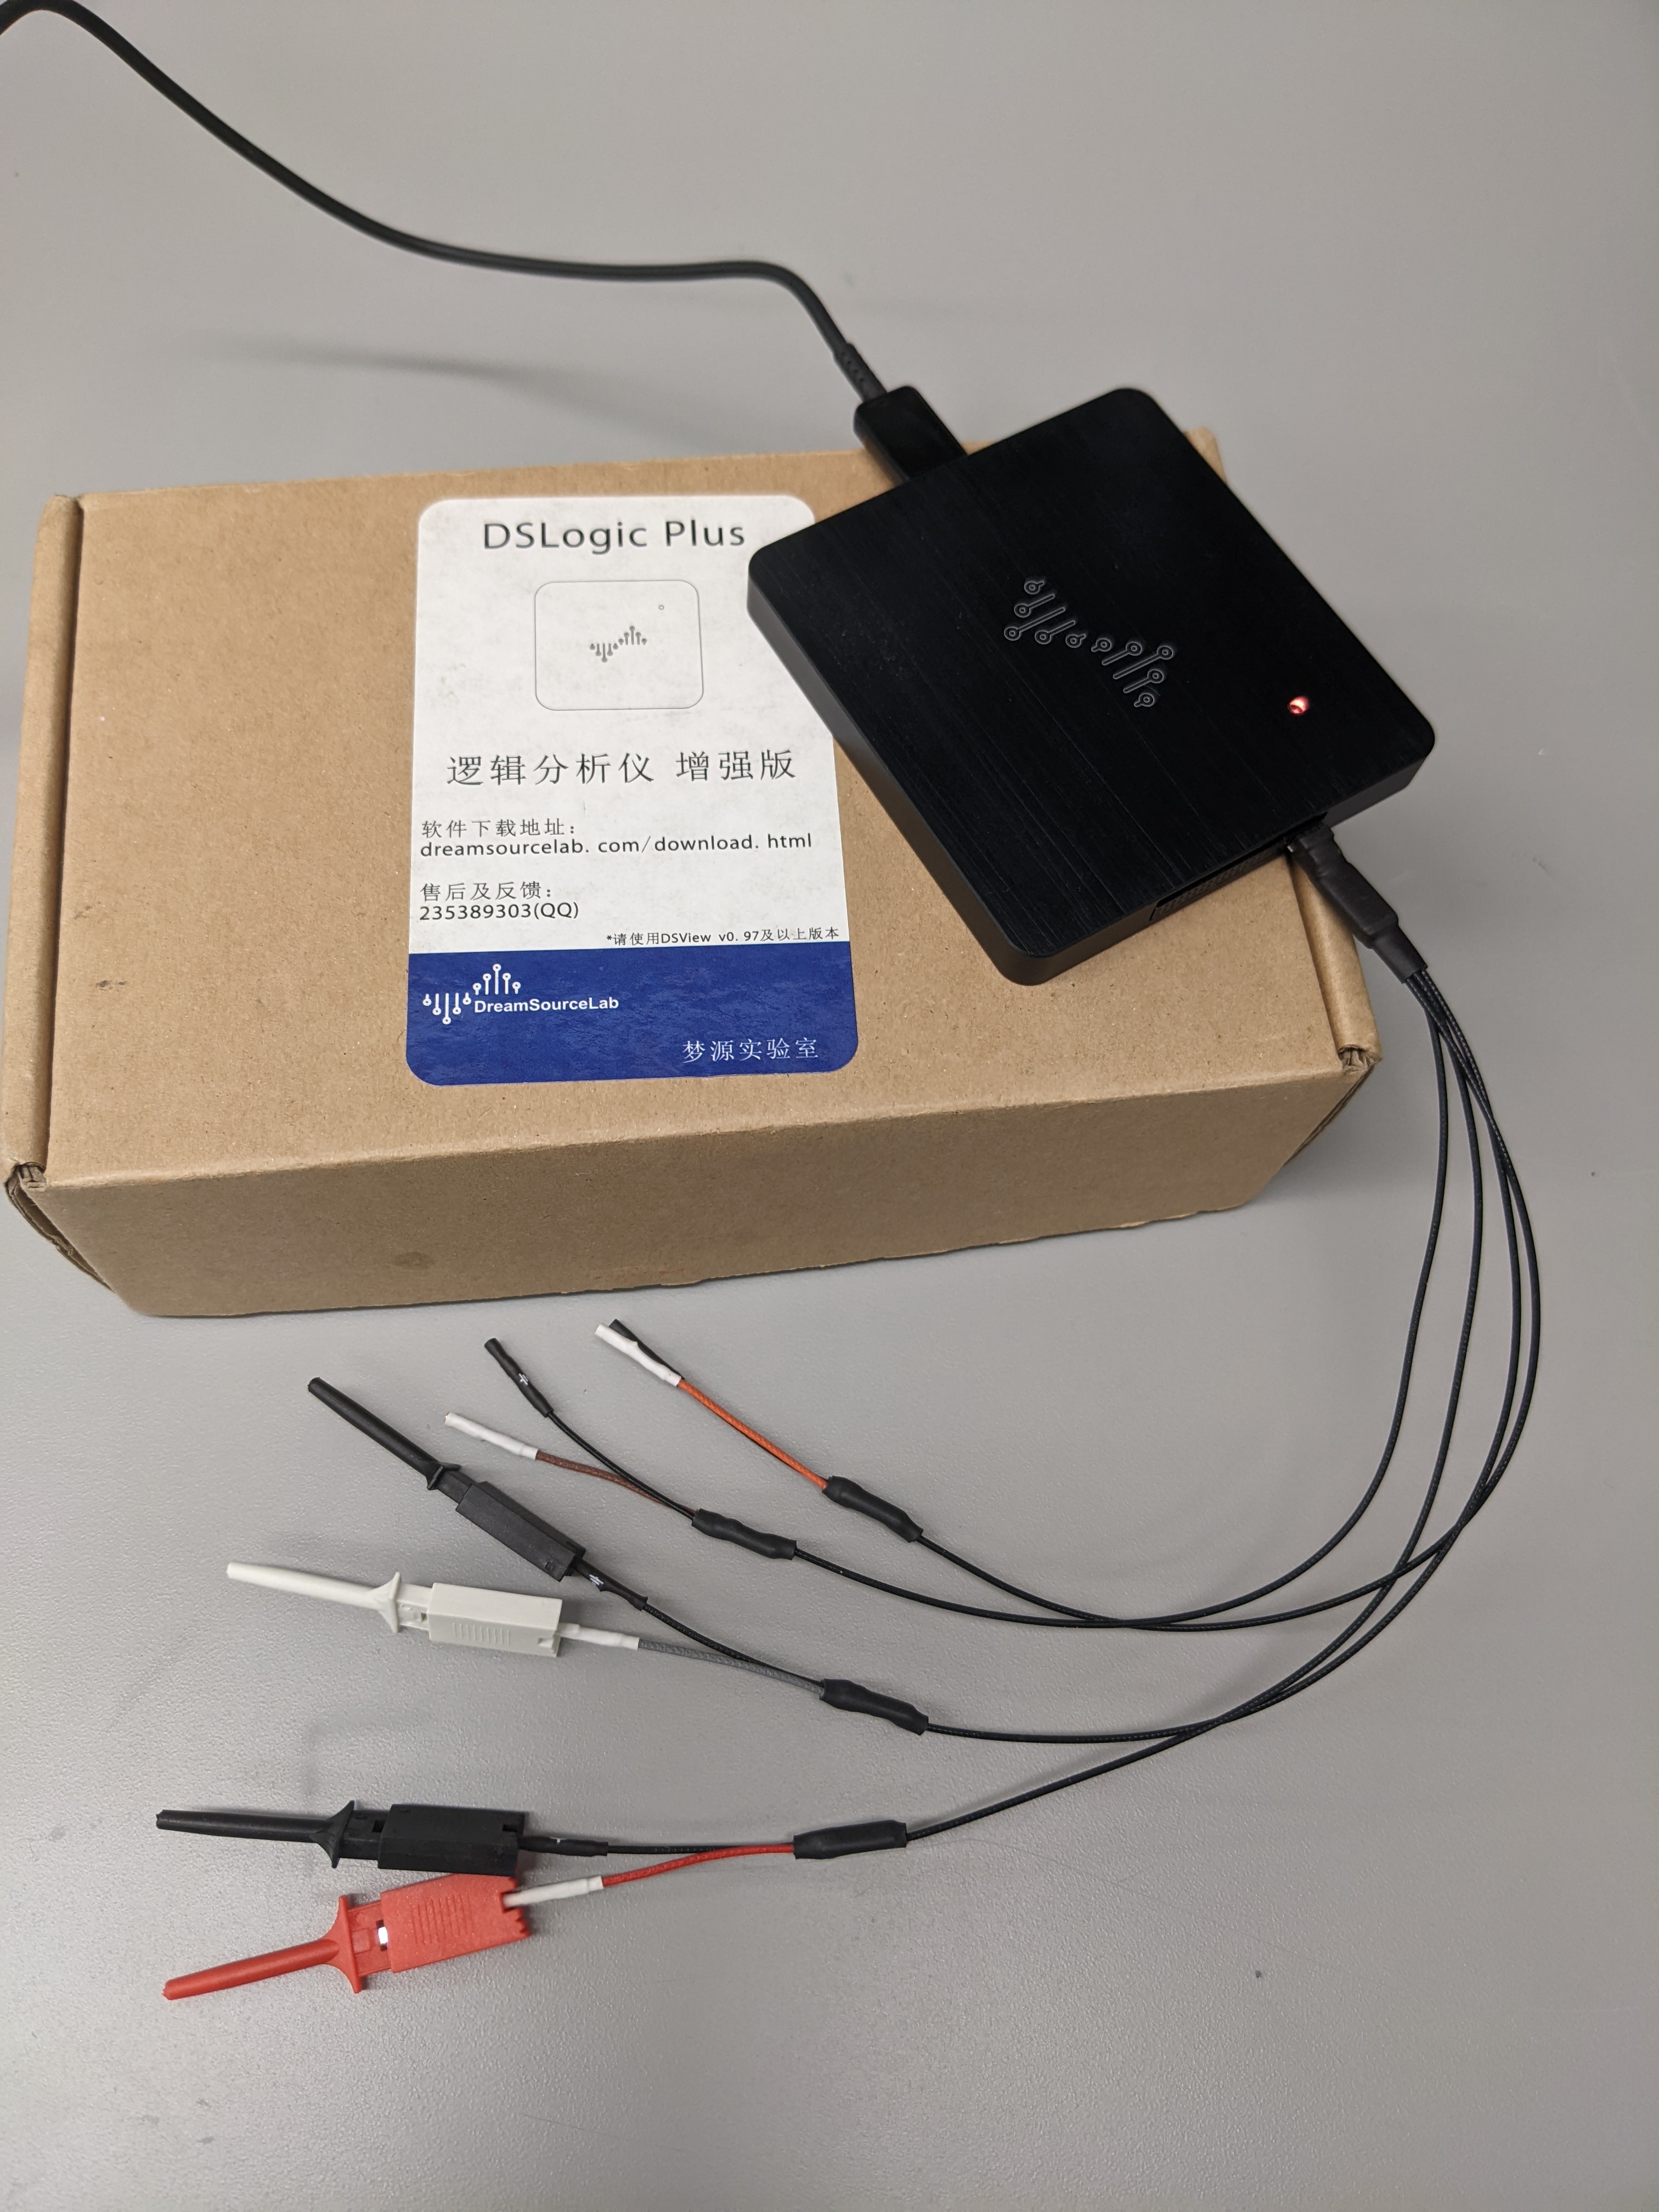
Not every project will require you to monitor how GPIO pins or communication buses change over time, but logic analyzer can help you solve voltage-related problems in ways that a DMM cannot. I purchased the 16-channel DSLogic Plus from DreamSourceLab for ~$150 and have been very happy with it. I haven’t needed professional tools to solve my IO problems and I feel like this company made a very nice product at a time when hobbiest options were extremely limited. I don’t know what options are available these days, but I wouldn’t hesitate to purchase this again, if needed. Also, they started offering fancier options since I originally bought mine, but I haven’t had a need to upgrade. The system can locally store raw data in a buffer before sending it to your PC for viewing, which is nice for capturing events that happen quickly. It also can decode different communication protocols like I2C, SPI, etc so that you can see what data is being transmitted, which has been very useful for me. I would buy this if you plan on working with communication buses or fast signals before you actually need it.
Variable DC Power Supply

Having an adjustable power supply is typically a standard tool found in virtually all electronics labs. I chose to not include it in the essential category because I actually rarely use it. In many cases, when you’re buying parts for your PCB, you’ll include a AC-DC wall wart when you purchase components if you need it. Otherwise, many things can be powered by a Raspberry Pi, Arduino, or USB connector. Having a variable supply is nice though if you want to test part of your system before integrating it with other things. I would say that 90% of the time that I use a variable supply, I’m testing a motor driver and don’t want to be bothered with soldering wire leads to a DC jack. It’s not necessary in many cases, but it is convenient. The power supply I use is an Eventek 300W unit. I haven’t pushed it to its limits, but it states that it supports 0-32V and 0-10A ranges. My only gripe is that the unit doesn’t have a “standby” mode where you can set voltage and current before powering your circuit. Besides that, it’s currently cheaper than I purchased it and I think it is a good unit.
Stencil Cutter
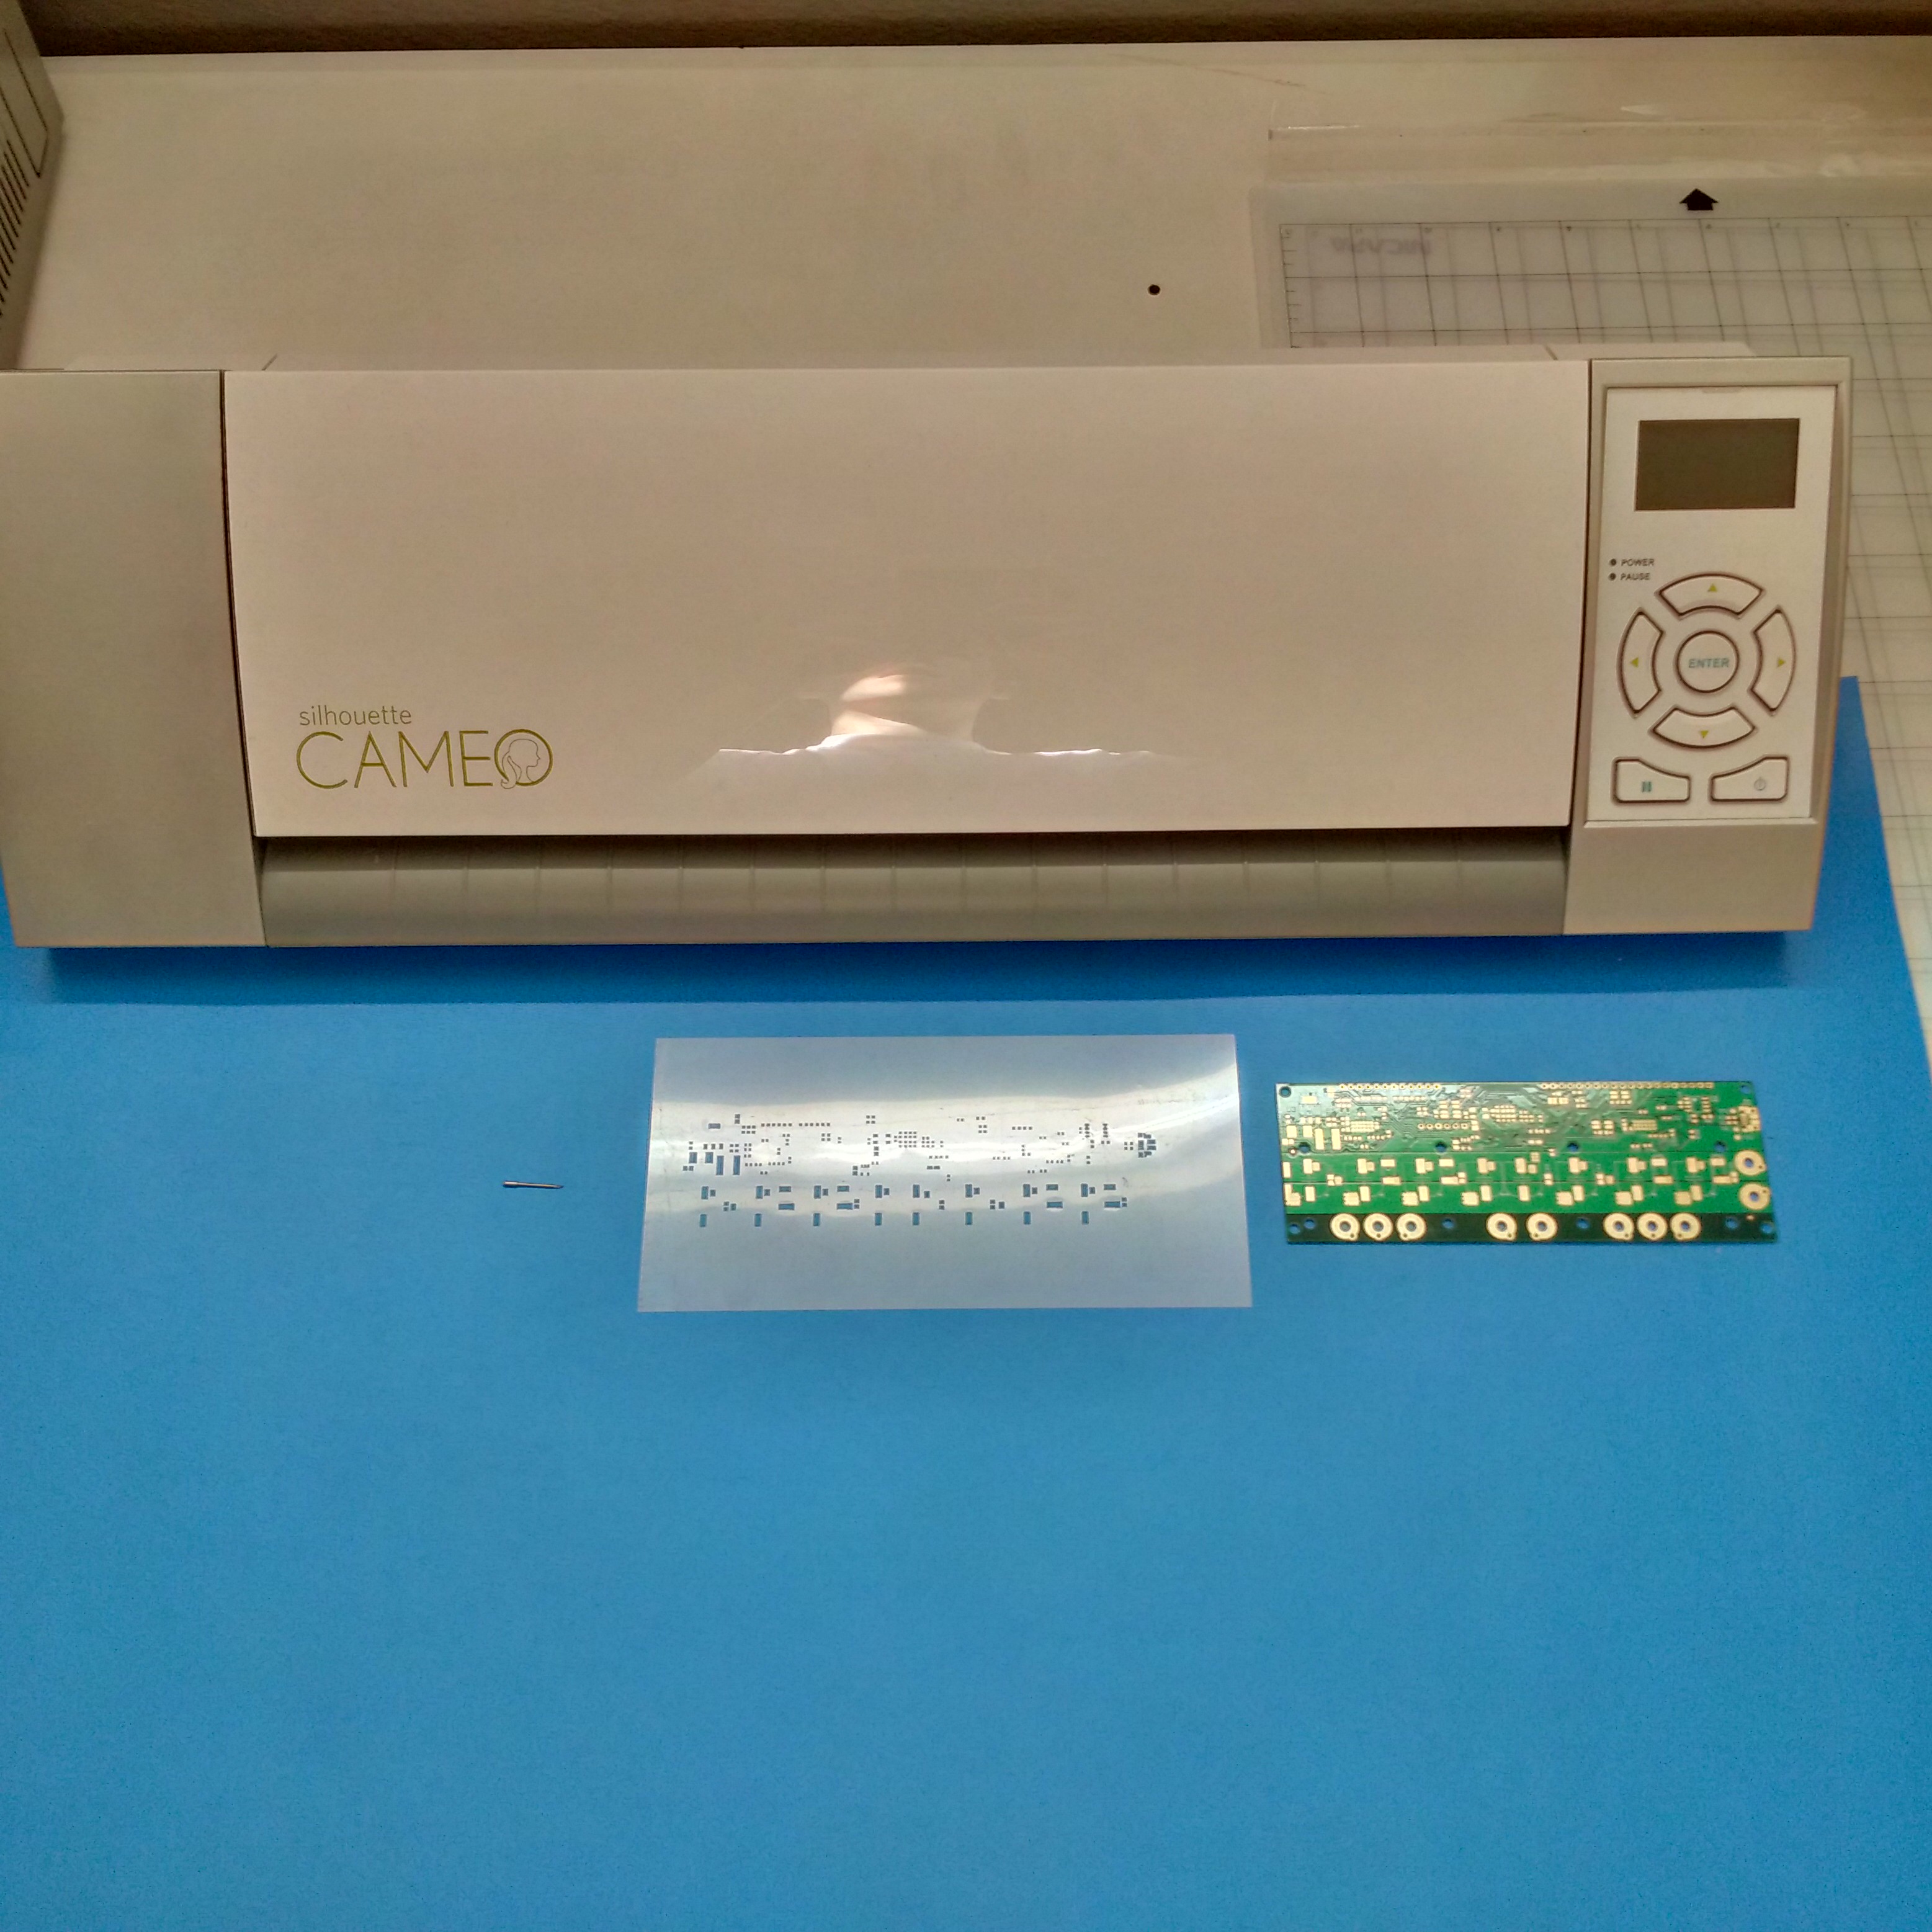
Alright, I’ll admit it. This is a weird one. Even though it is really important to be able to use SMD components in your design, you need to have a stencil so that you can spread solder paste over the pads to bond your parts to the PCB. I think a lot of people just buy their stencils from companies because they think that’s their only option. My preferred way is to laser cut Kapton film since it is quick and easy, but I don’t actually have a laser cutter at home. Instead, I use this Silhouette Cameo 1 vinyl cutter that is normally used for cutting stickers and things and repurposed it to cut mylar sheets using a tool that pmonta published on Github around 2012 called gerber2graphtec. Gerber are design files made by your CAD software like KiCAD and graphtec is the language that this vinyl cutter uses to cut shapes. It’s not perfect, but it can cut holes for 0402 parts and has worked well for me in all but one case where the holes I needed were much smaller than 0402. I think the manufacturer stopped producing this model, but I was able to find one on eBay for ~$30 a while back and it has paid for itself many time over. I wrote a guide on how to set this up.
FTDI USB-to-UART Driver
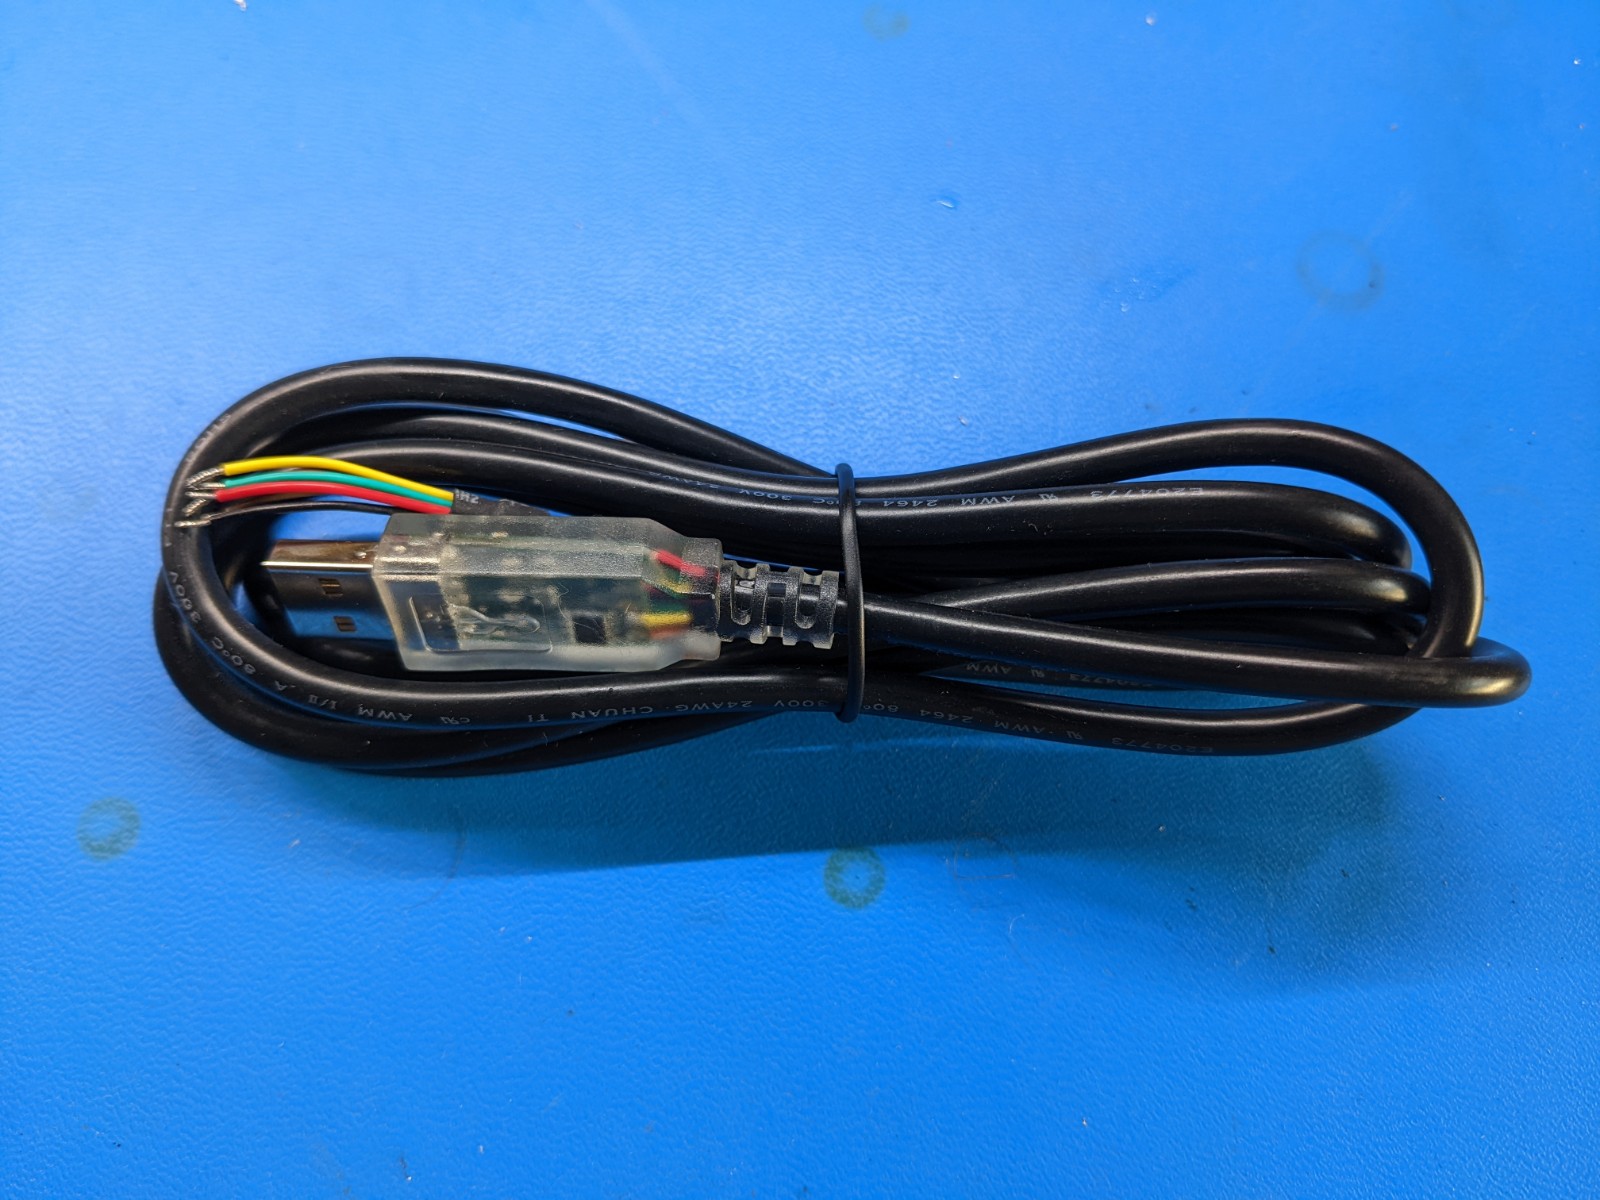
A lot of systems use UART to transmit data to other things and these USB-to-UART devices are great for troubleshooting code or hardware that isn’t behaving the way that you expect. The FTDI cable that I’m showing here is the easiest to get started with since you just plug the wires into your circuit, but my favorite one cost $10 at the time and allows you to select the output voltage and handshaking lines, which can be important for interfacing with different boards. There is a lot of freely available software for managing a UART port on your PC like CoolTerm.
I2C Driver and SPI Driver
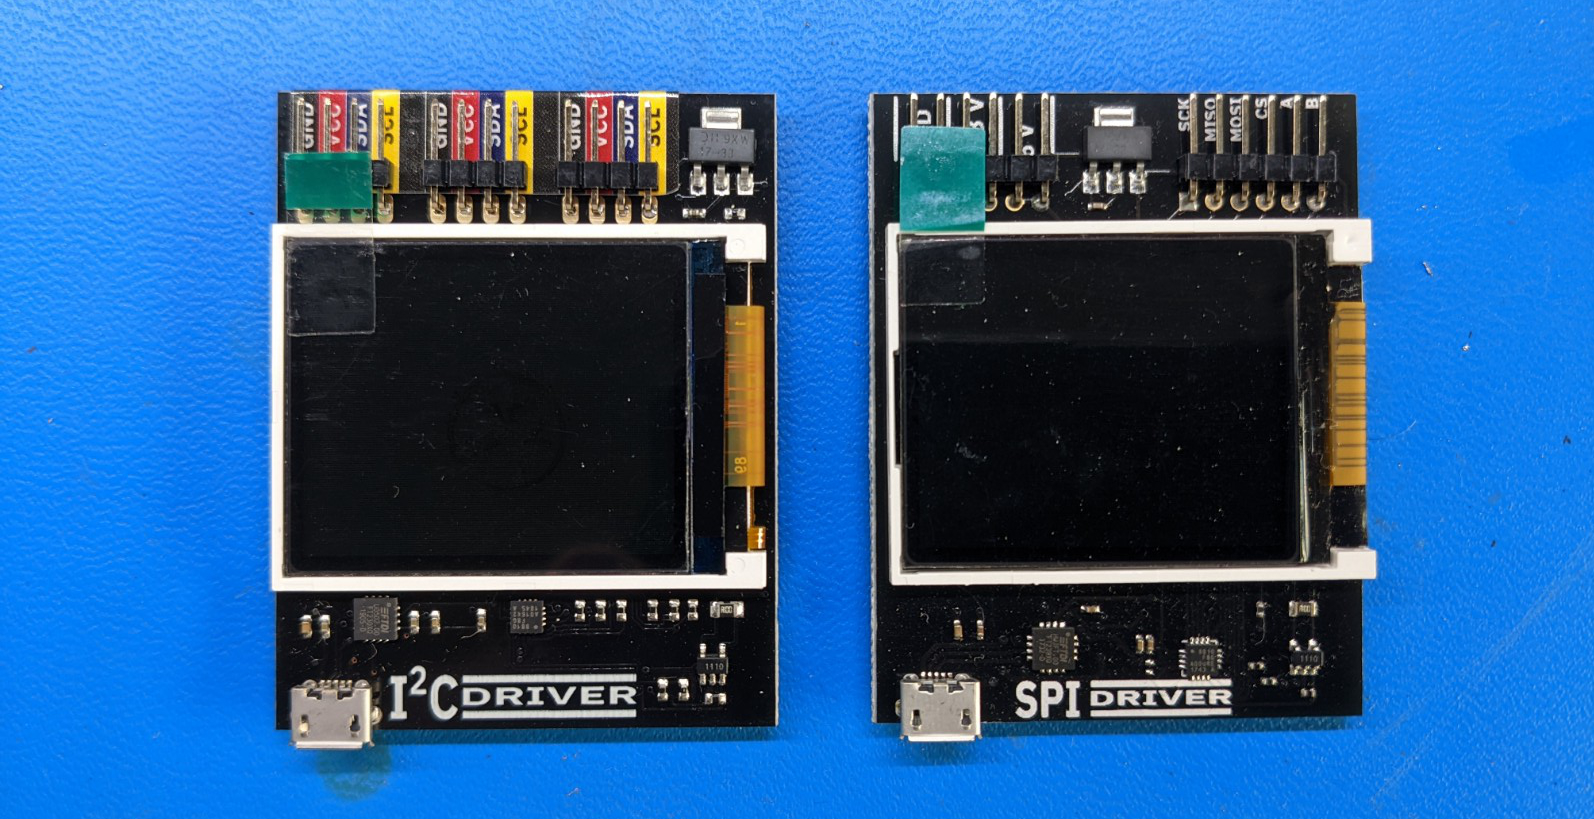
If you are using I2C or SPI communication buses, it can be nice to have some devices that allow you to interface your PC with the circuit under test. These have been less useful for me than the UART driver since it will usually require using custom software to manage the interface and usually a logic analyzer is enough for me to identify what has gone wrong. They still have their place though. I purchased my I2C and SPI drivers from a guy who makes them in California. They cost about $30 each if you don’t get the fancy peripherals.
Black Magic Probe v2
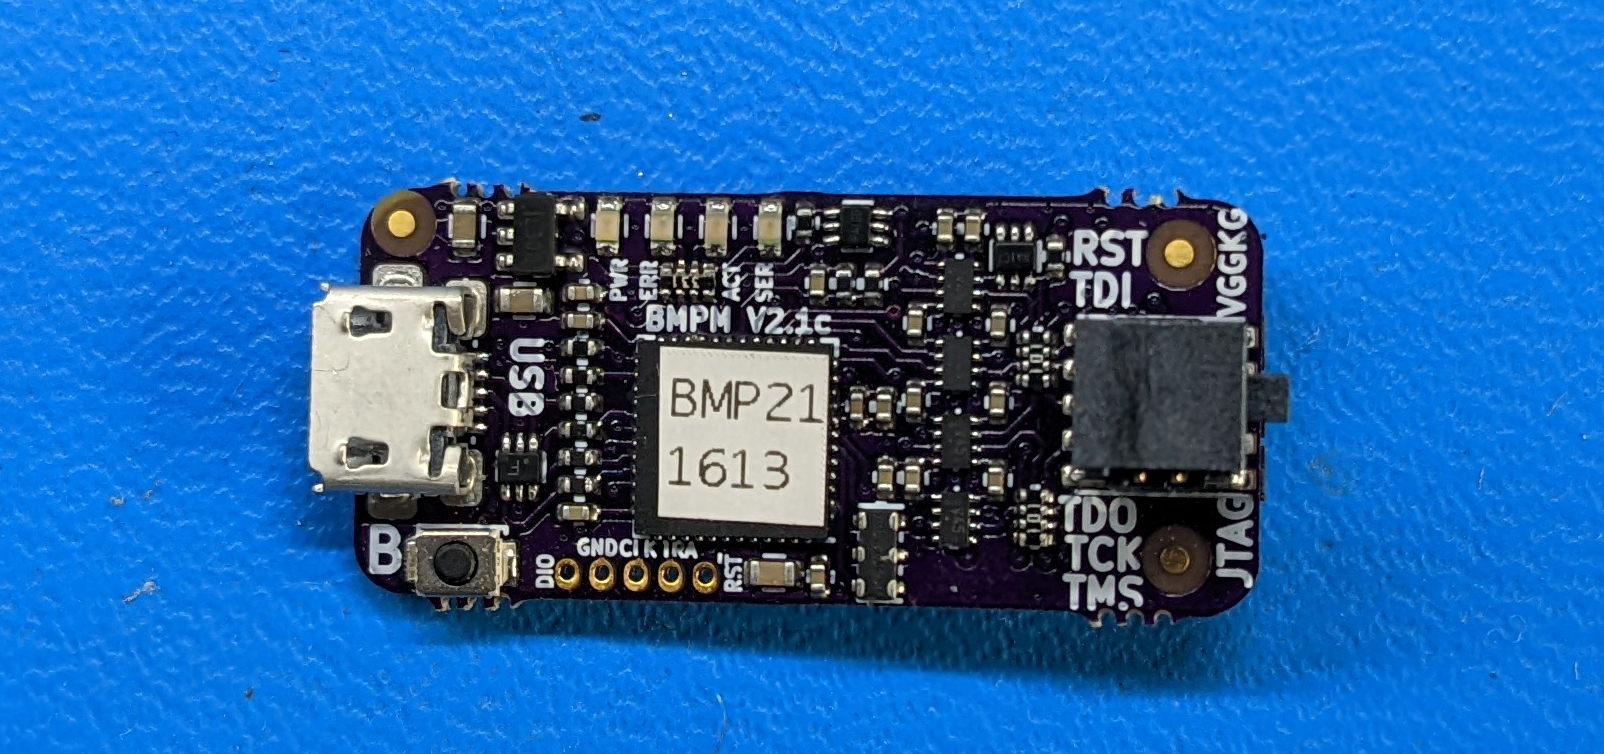
Yeah, the name isn’t very descriptive… The Black Magic Probe is a debugging tool for ARM Cortex MCUs and it supports JTAG and single wire debug (SWD). If you start exploring more advanced systems like STM microcontrollers, this tool really helps in either programming the chips or pausing the microcontroller to view registers or examine what the microcontroller is executing in real-time. It can be really useful at times, but I do consider it to be a specialty tool. It’s not worth purchasing until you are interested in developing PCBs that use more advance microcontrollers. If purchasing, I recommend going with the full kit which costs $90.
SMD Part Organizer
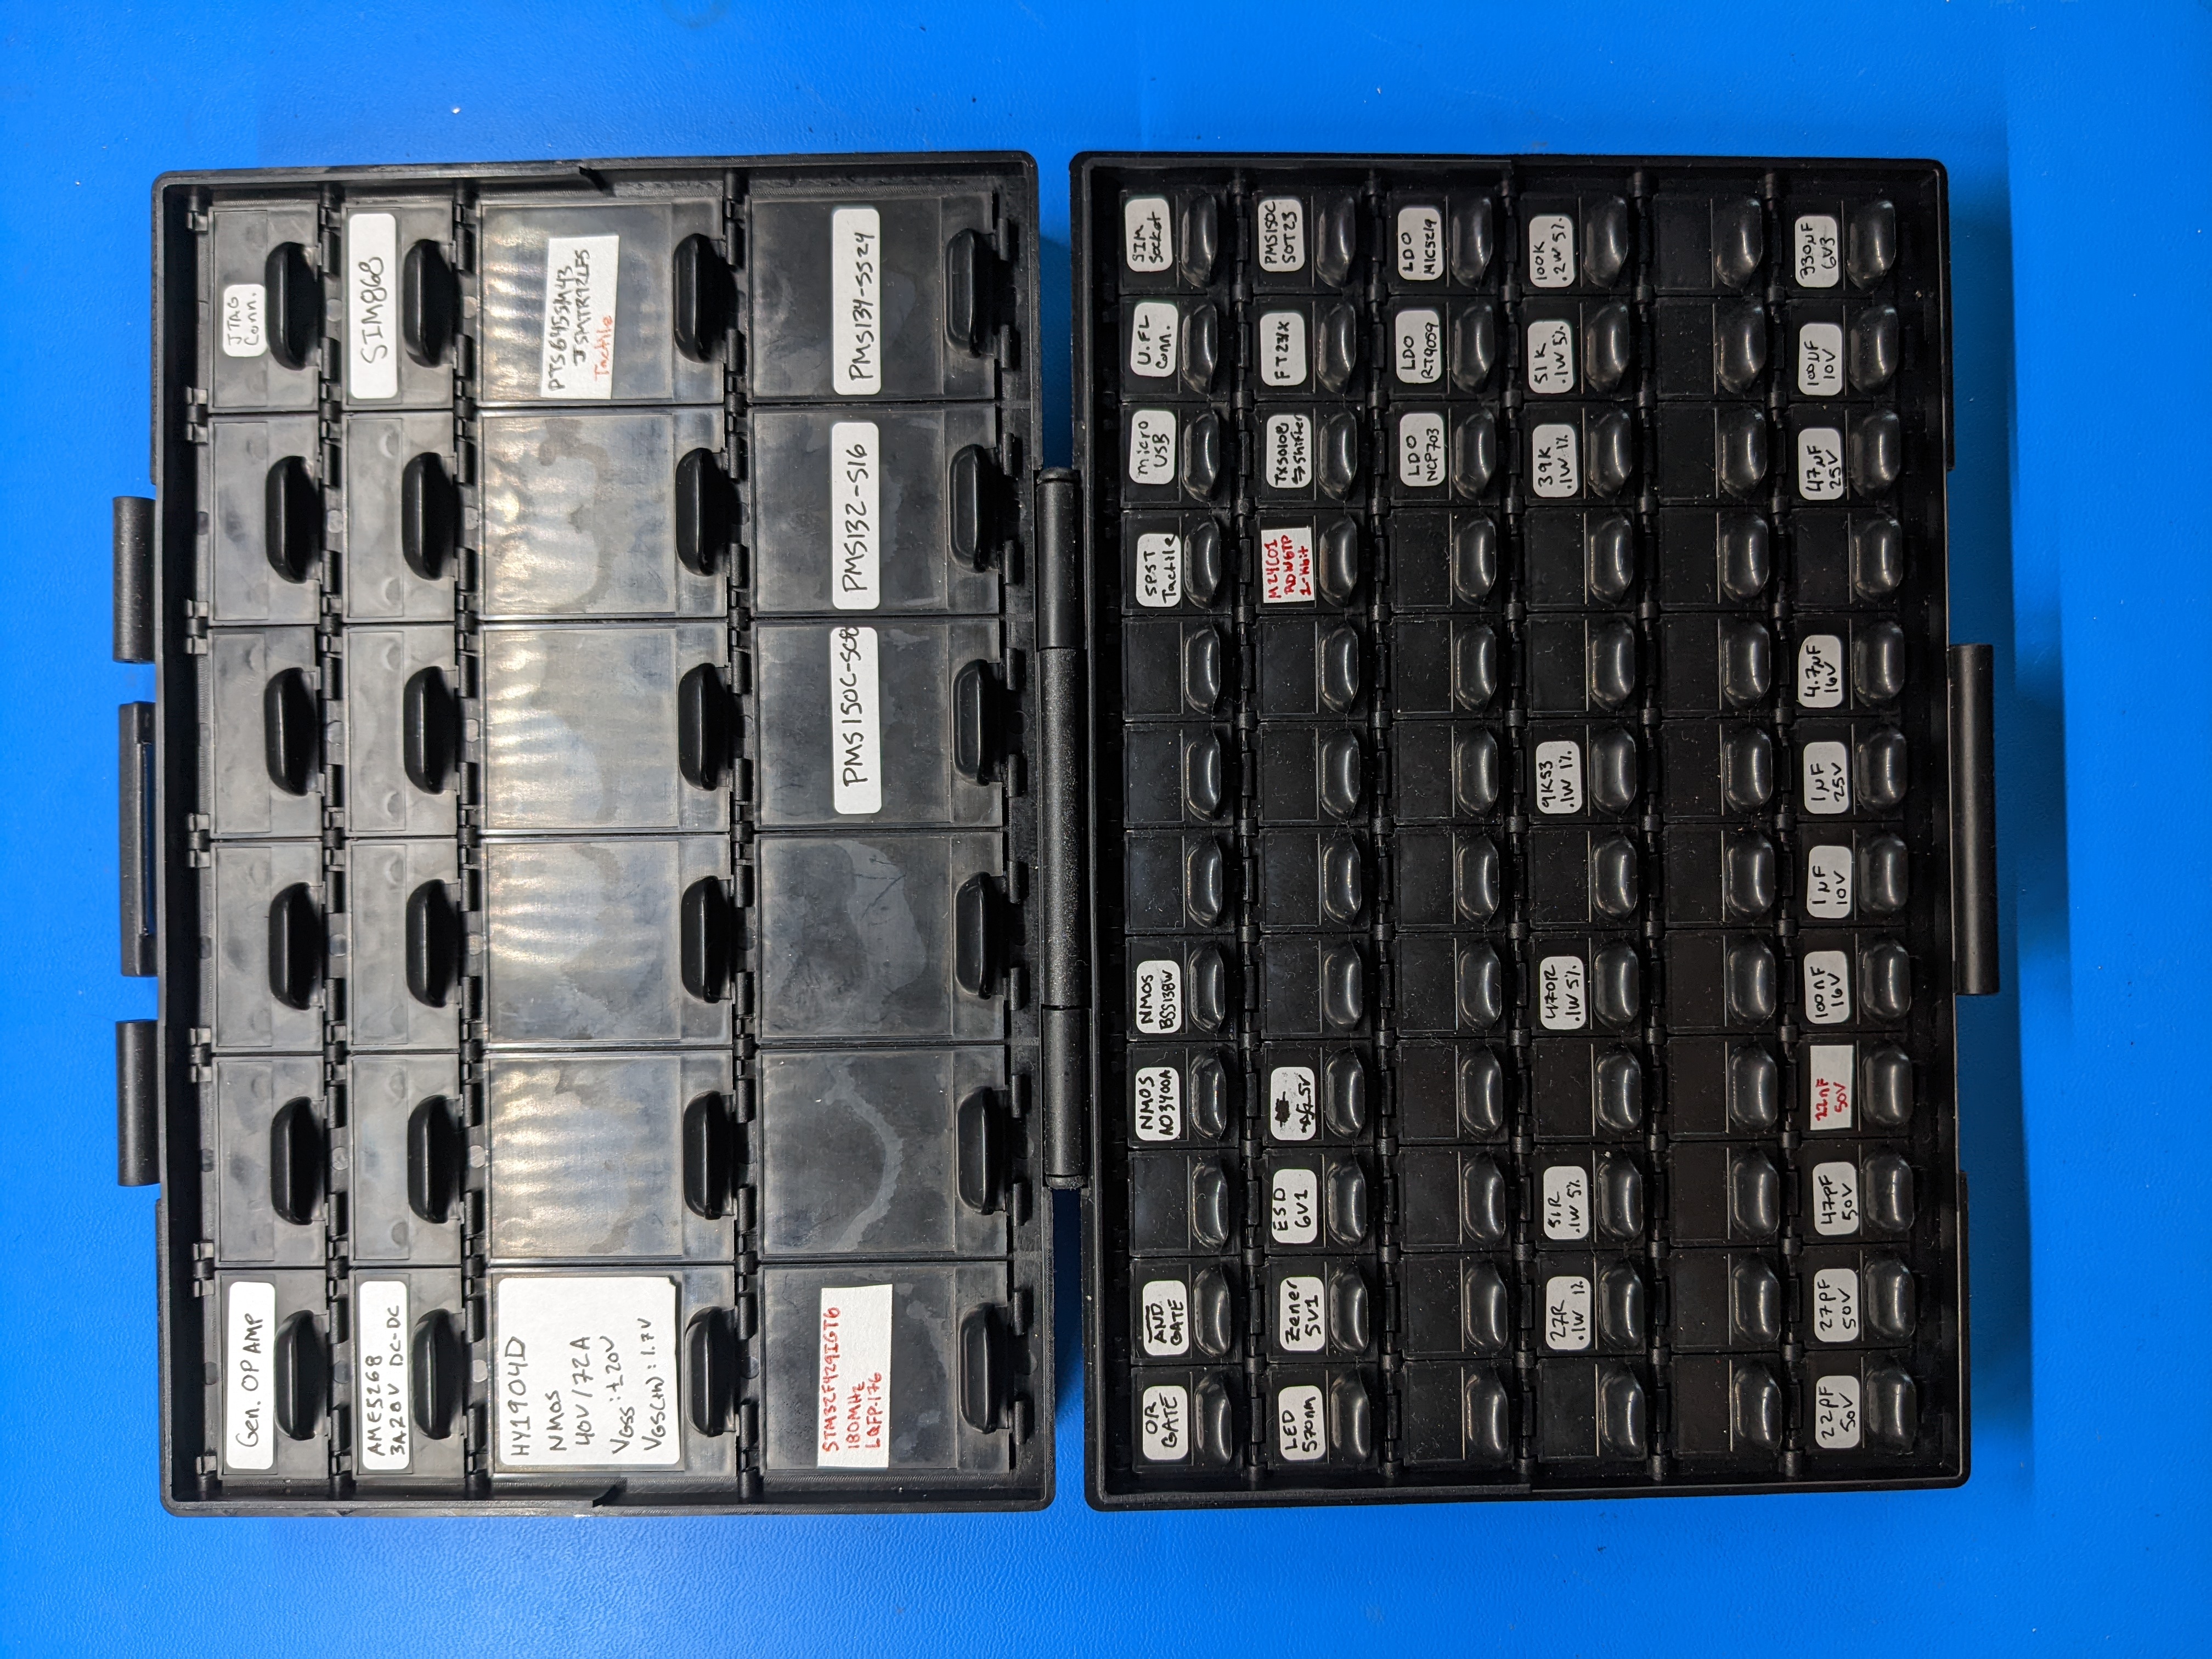
You will eventually end up with a library of ESD-sensitive components like microcontrollers, motor drivers, etc. Or, you just might have a lot of different resistors or capacitors. An organizer like this $30 AideTek organizer is really convenient in compactly storing all of your parts. Different sized compartments means that it can support a wide range of sizes. This is definitely a quality-of-life purchase and not needed at all. If you really get into PCB fab, make sure you pick one up though!
Oscilloscope
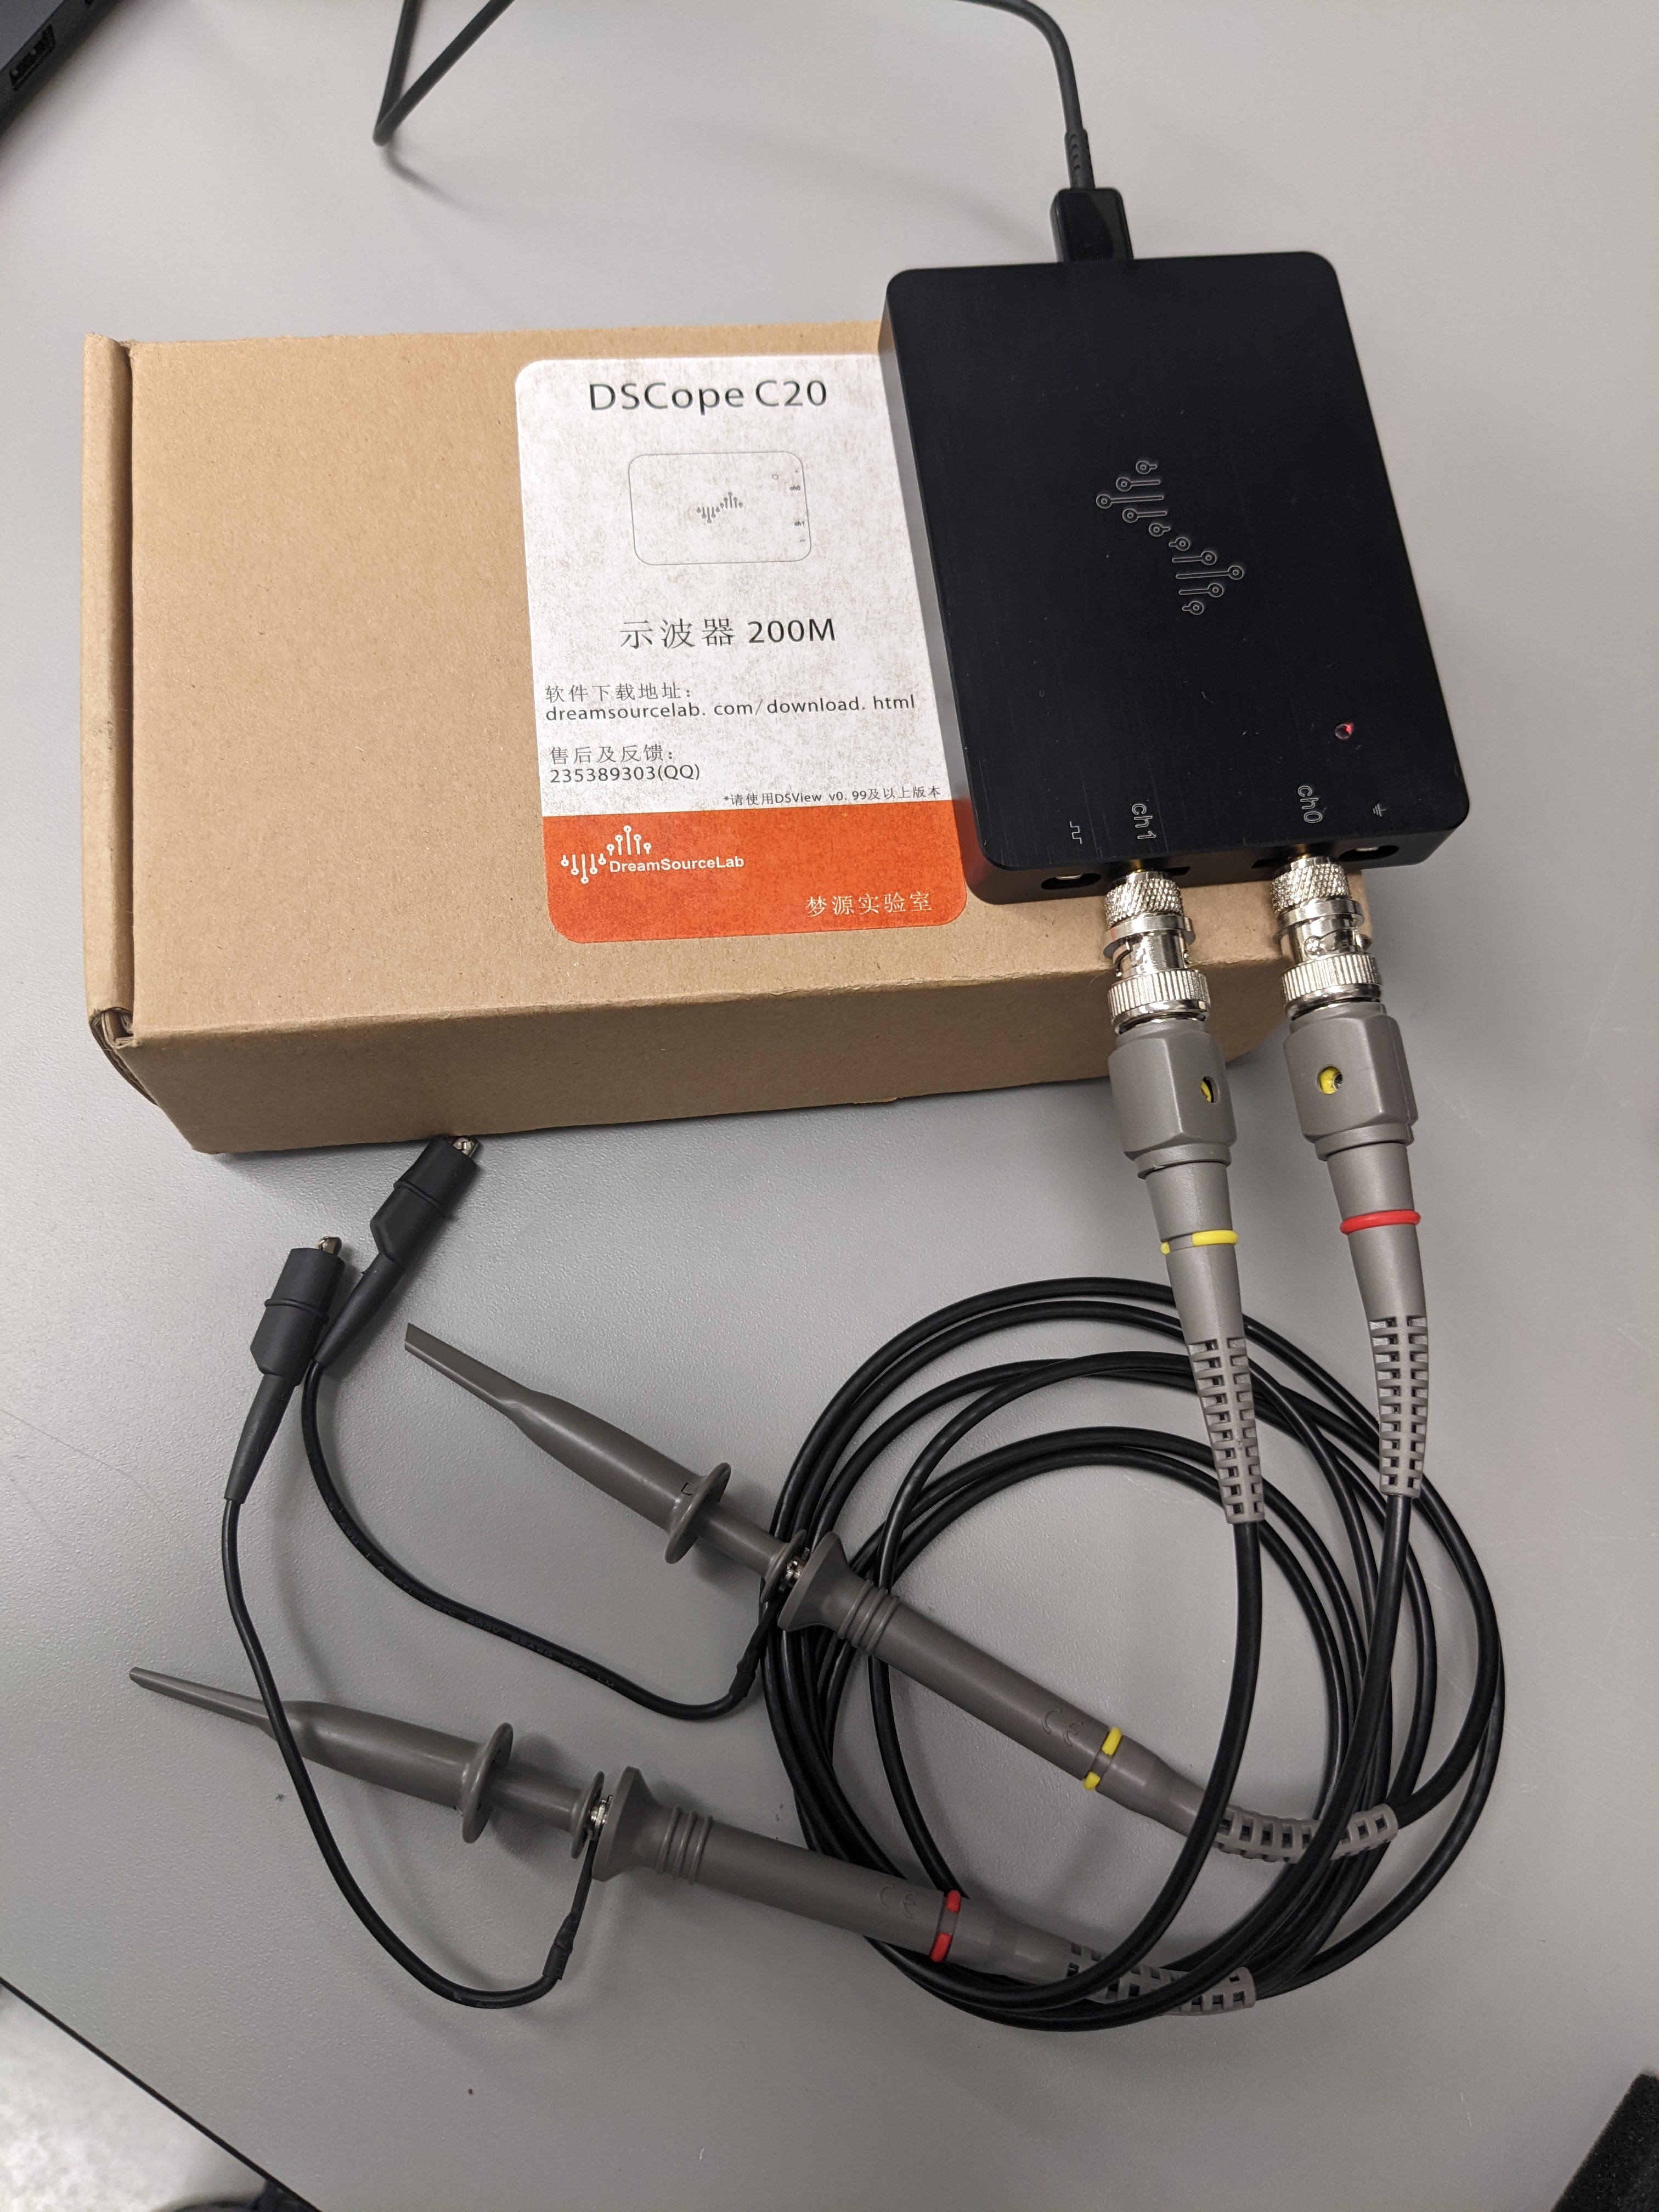
One of the most defining tools of the electrical engineer is also last on my list. I have only wanted to use my oscilloscope once after owning it for 4 years and that was to check coil timing and voltages on a stepper motor to identify why it wasn’t behaving as expected. They do have their place if you really run into weird situations and want to check how a voltage varies over time, which is particularly important for analog devices. Similarly, I’m not listing a function generator at all because I don’t have one and have never needed one. If you do want an oscilloscope, I use the DSCope from the same DreamSourceLab company that makes the logic analyzer that I really like. It’s convenient because it doesn’t take up a lot of bench space and it has features that I think are reasonable. They stopped selling my model, but they do have some good options that are well built starting at $180.
Final Words
The equipment I listed on this page is the exact equipment that I use in my home lab; however, just because I’m using these tools and recommend them, that doesn’t mean that they are the only option. Things have probably changed over the past few years and there are probably some exciting alternatives available now. Either way, the most important thing is that you want tools that help you learn and improve at making electronics. I didn’t really know what I was getting into when I first started my lab, but I quickly found building things to be incredibly engaging and personally satisfying. If you’ve had a taste of building things and want to dive deeper, I think what I listed here is a good start and I hope that it takes you to new and exciting places in life. While I was paid to build things for some time, I would say that home projects gave me 80% of electronics the knowledge that I have today and have made me much more effective at doing what I do. If have questions or comments, feel free to reach out at any time - I would be happy to chat. Wishing you the best of luck on your adventure!
Leave a Comment
Comments are moderated. Email won't be published. All fields are required. *