Build Your Own: Gel Illumination and Imaging Chamber
PURPOSE:
Provide a DIY alternative to expensive commercial gel imaging solutions. Benefits include exposing operators to fewer hazardous materials, reducing equipment cost and possibly improving image quality. It was initially designed for the Fordyce lab at Stanford in Dec 2014 and was further modified in July 2017 to improve the design of the door.
Introduction
Traditional DNA gel staining and imaging often includes staining the DNA with ethidium bromide followed by imaging the gel with a UV light source. This is worrisome for a few people who frequently handle these materials due to the known mutagenic activity of the materials and these people are often looking to minimize their exposure when possible. As a result, some labs have transitioned over to using less hazardous stains, such as the Sybr series, and light sources, such as blue LED transilluminators. Here, I provide schematics and a list of parts for constructing a gel imaging station. Feel free to modify the design files to fit your own needs and preferences.
Gel Chamber
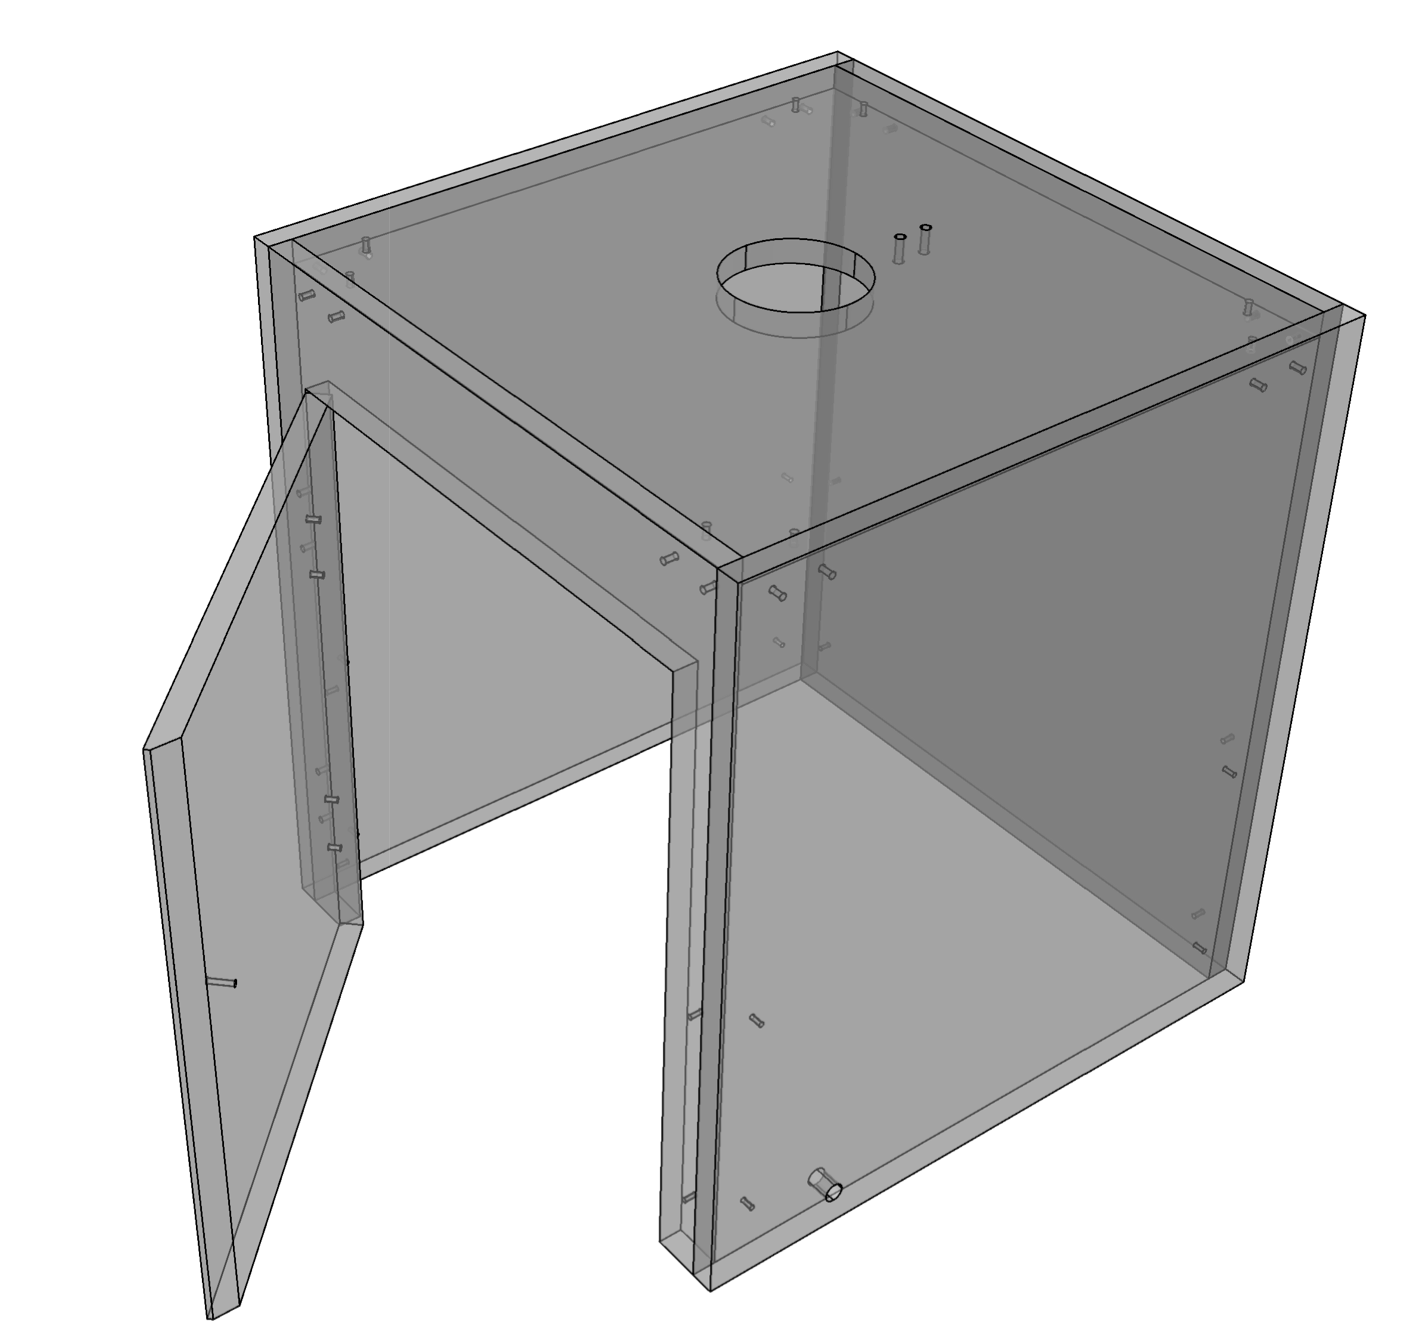
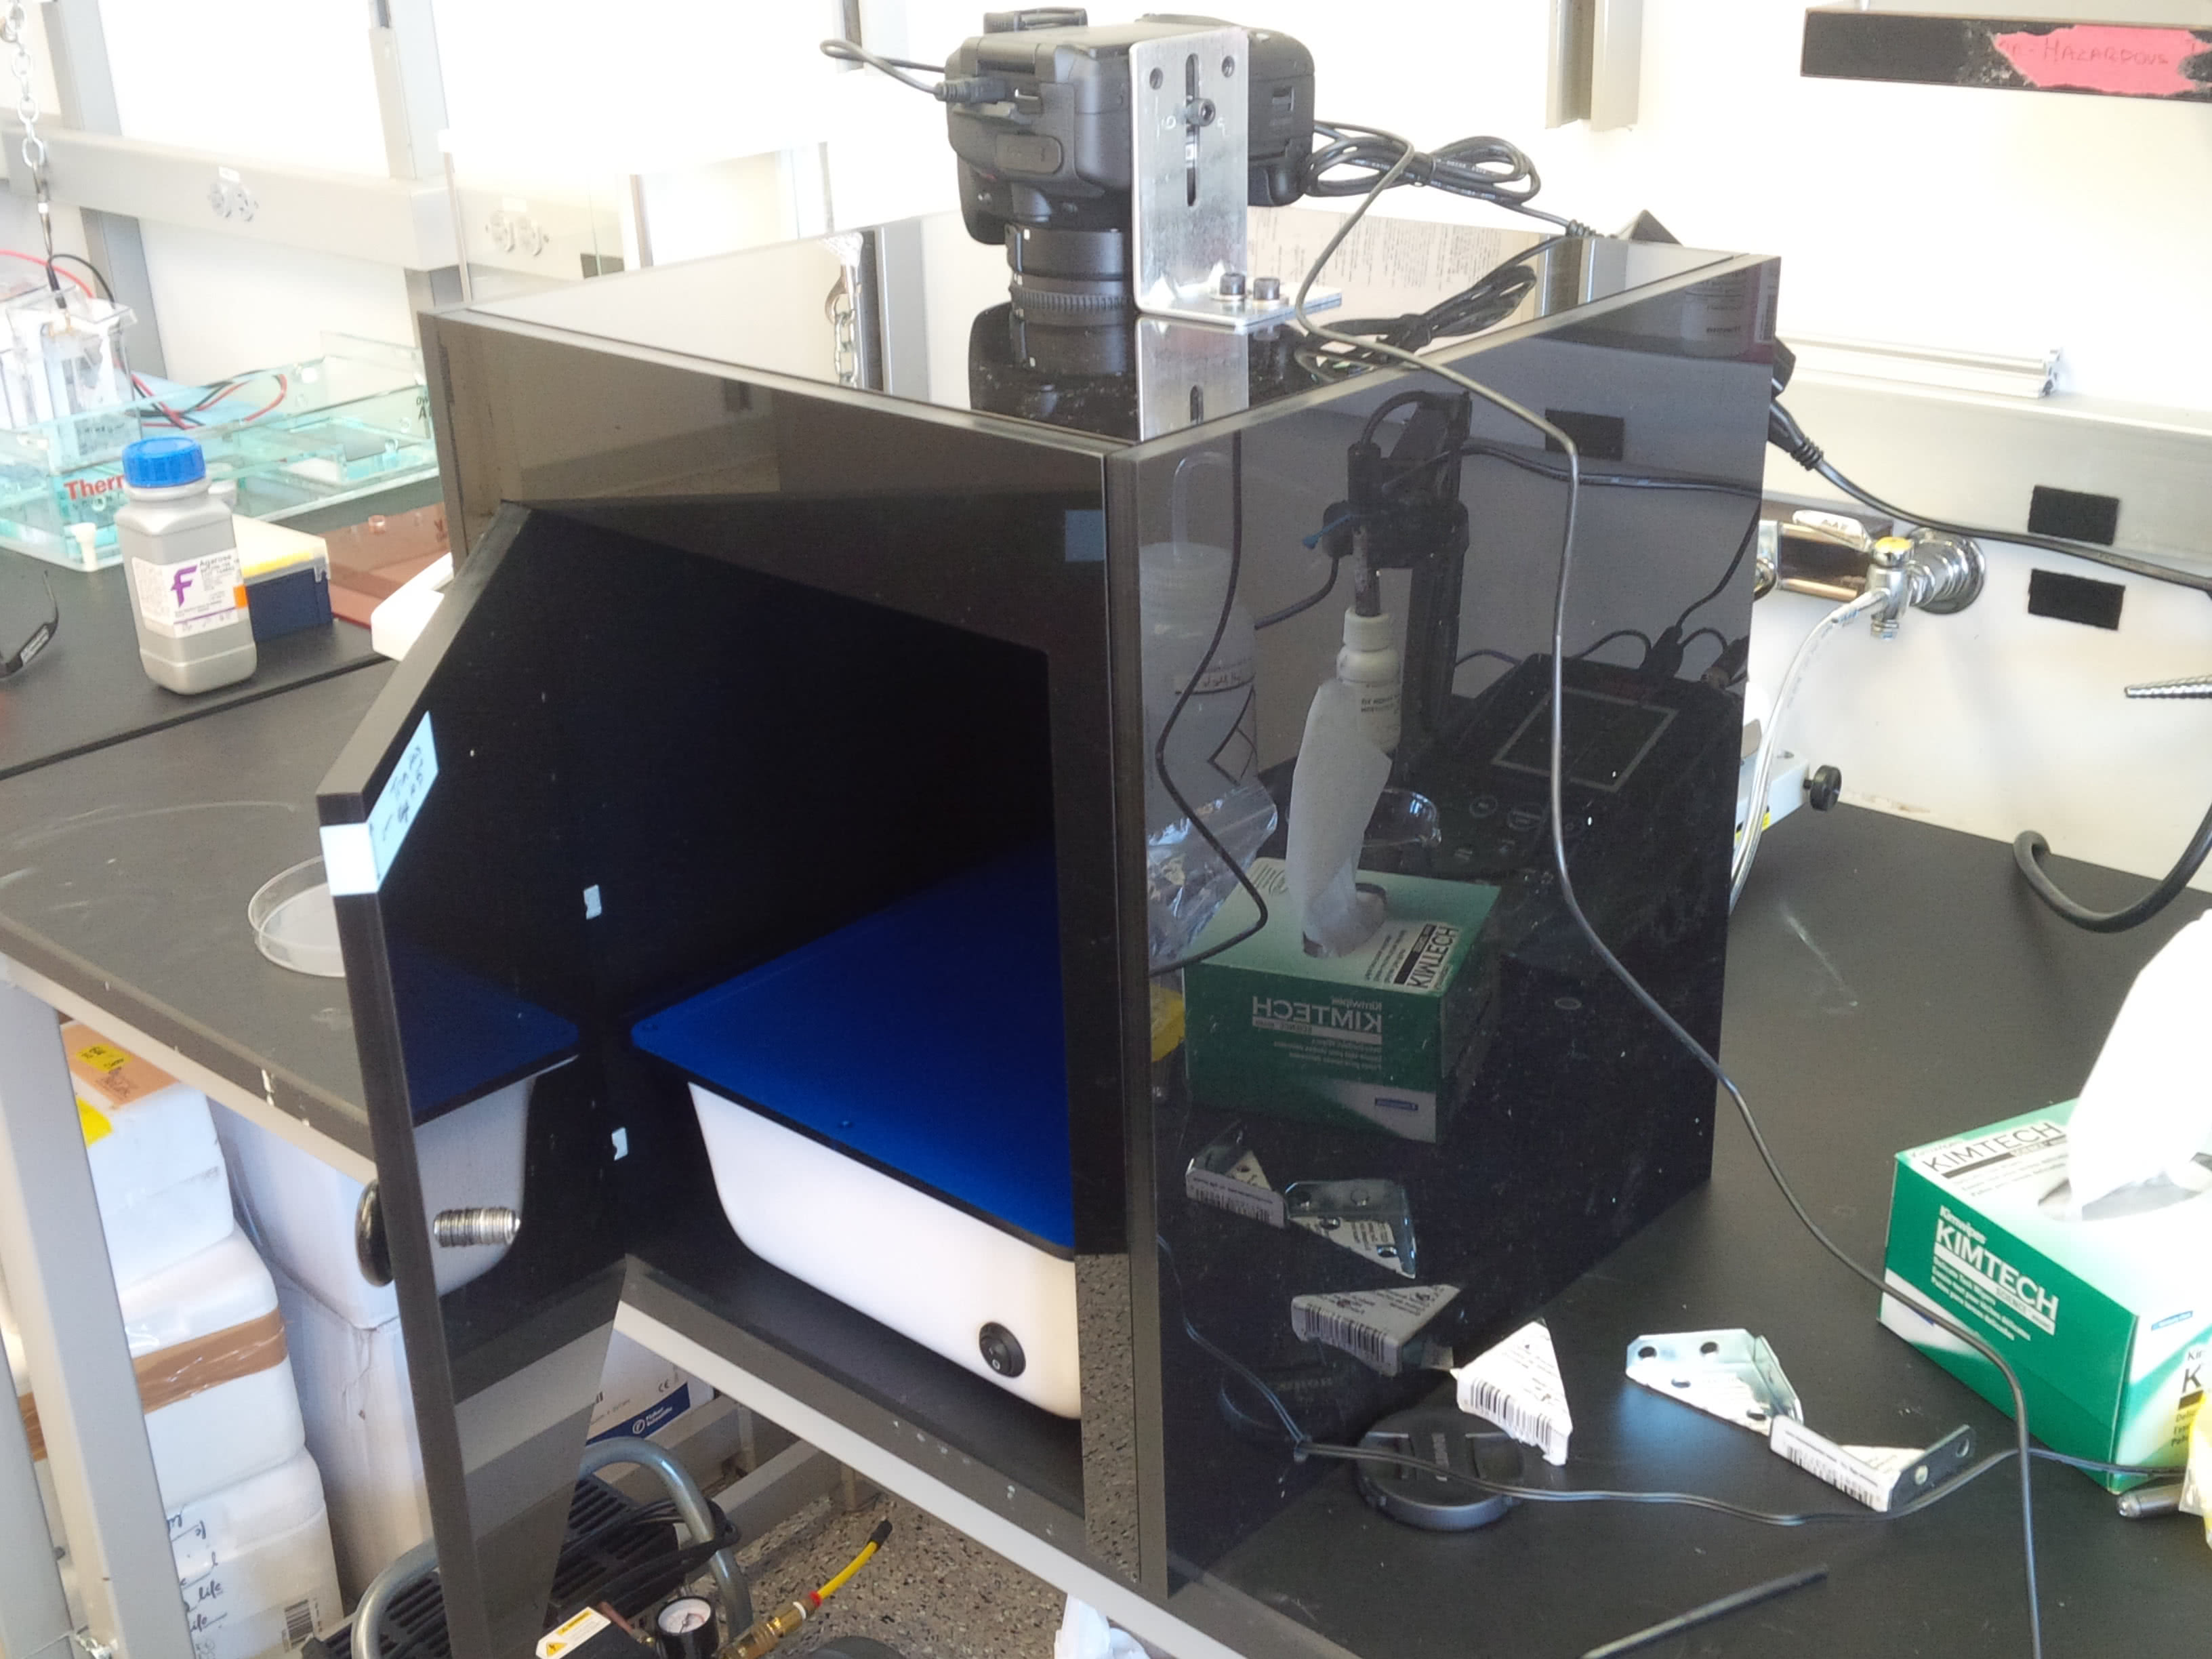
The imaging chamber itself is assembled with 0.5” acrylic panels held together internally by brackets and is designed to mount a low end Canon DSLR above a Clare Chemical DR89 blue LED transilluminator. The Canon DSLR was chosen due to its ability to be externally viewed and triggered by either either a workbench computer or the operator’s laptop. The transilluminator does not necessarily need to be from Clare Chemical, but the system was initially chosen due to its large 25 x 22 cm viewing surface and decent quality. The port on the right panel was designed to be compatible with the power cord for this transilluminator. You can modify this as needed.
The acrylic box has W x L x H dimensions of 14” x 14” x 15.5” without the camera attached. The width and length was chosen to be compatible with the previously identified transilluminator and the height was chosen to provide a large enough field-of-view for the camera. AutoCAD drawings can be downloaded in the Parts List and Files section below. STL files may be uploaded at a later date or upon request.
UPDATE: The design was updated on 20170702 to improve the door design. Previously, the door had trouble closing due to contact with the workbench and contact with the rightmost threshold. To account for these issues, the top and bottom of the door was trimmed by 2mm and the right edge was trimmed by 3mm. The right edge also received a 45° chamfer.
Acrylic panels were machined by Kyle Brutschy at SF Machine Works with the following specifications:
| Panel | Face | Quantity | Diameter | Depth | Tapped |
|---|---|---|---|---|---|
| Back | Inner | 4 | 0.1360” | 0.25” | 8-32 |
| 4 | 0.1066” | 0.25” | 6-32 | ||
| Left | Inner | 4 | 0.1360” | 0.25” | 8-32 |
| 4 | 0.1066” | 0.25” | 6-32 | ||
| Top | Inner | 8 | 0.1360” | 0.25” | 8-32 |
| Through | 2 | 0.2010” | Thru | 1/4-20 | |
| Right | Inner | 4 | 0.1360” | 0.25” | 8-32 |
| 4 | 0.1066” | 0.25” | 6-32 | ||
| Through | 1 | 0.3900” | Thru | ||
| Front | Inner | 4 | 0.1360” | 0.25” | 8-32 |
| 4 | 0.1066” | 0.25” | 6-32 | ||
| Outer | 4 | 0.1360” | 0.25” | 8-32 | |
| Door | Outer | 4 | 0.1360” | 0.25” | 8-32 |
| Through | 1 | 0.1770” | Thru |
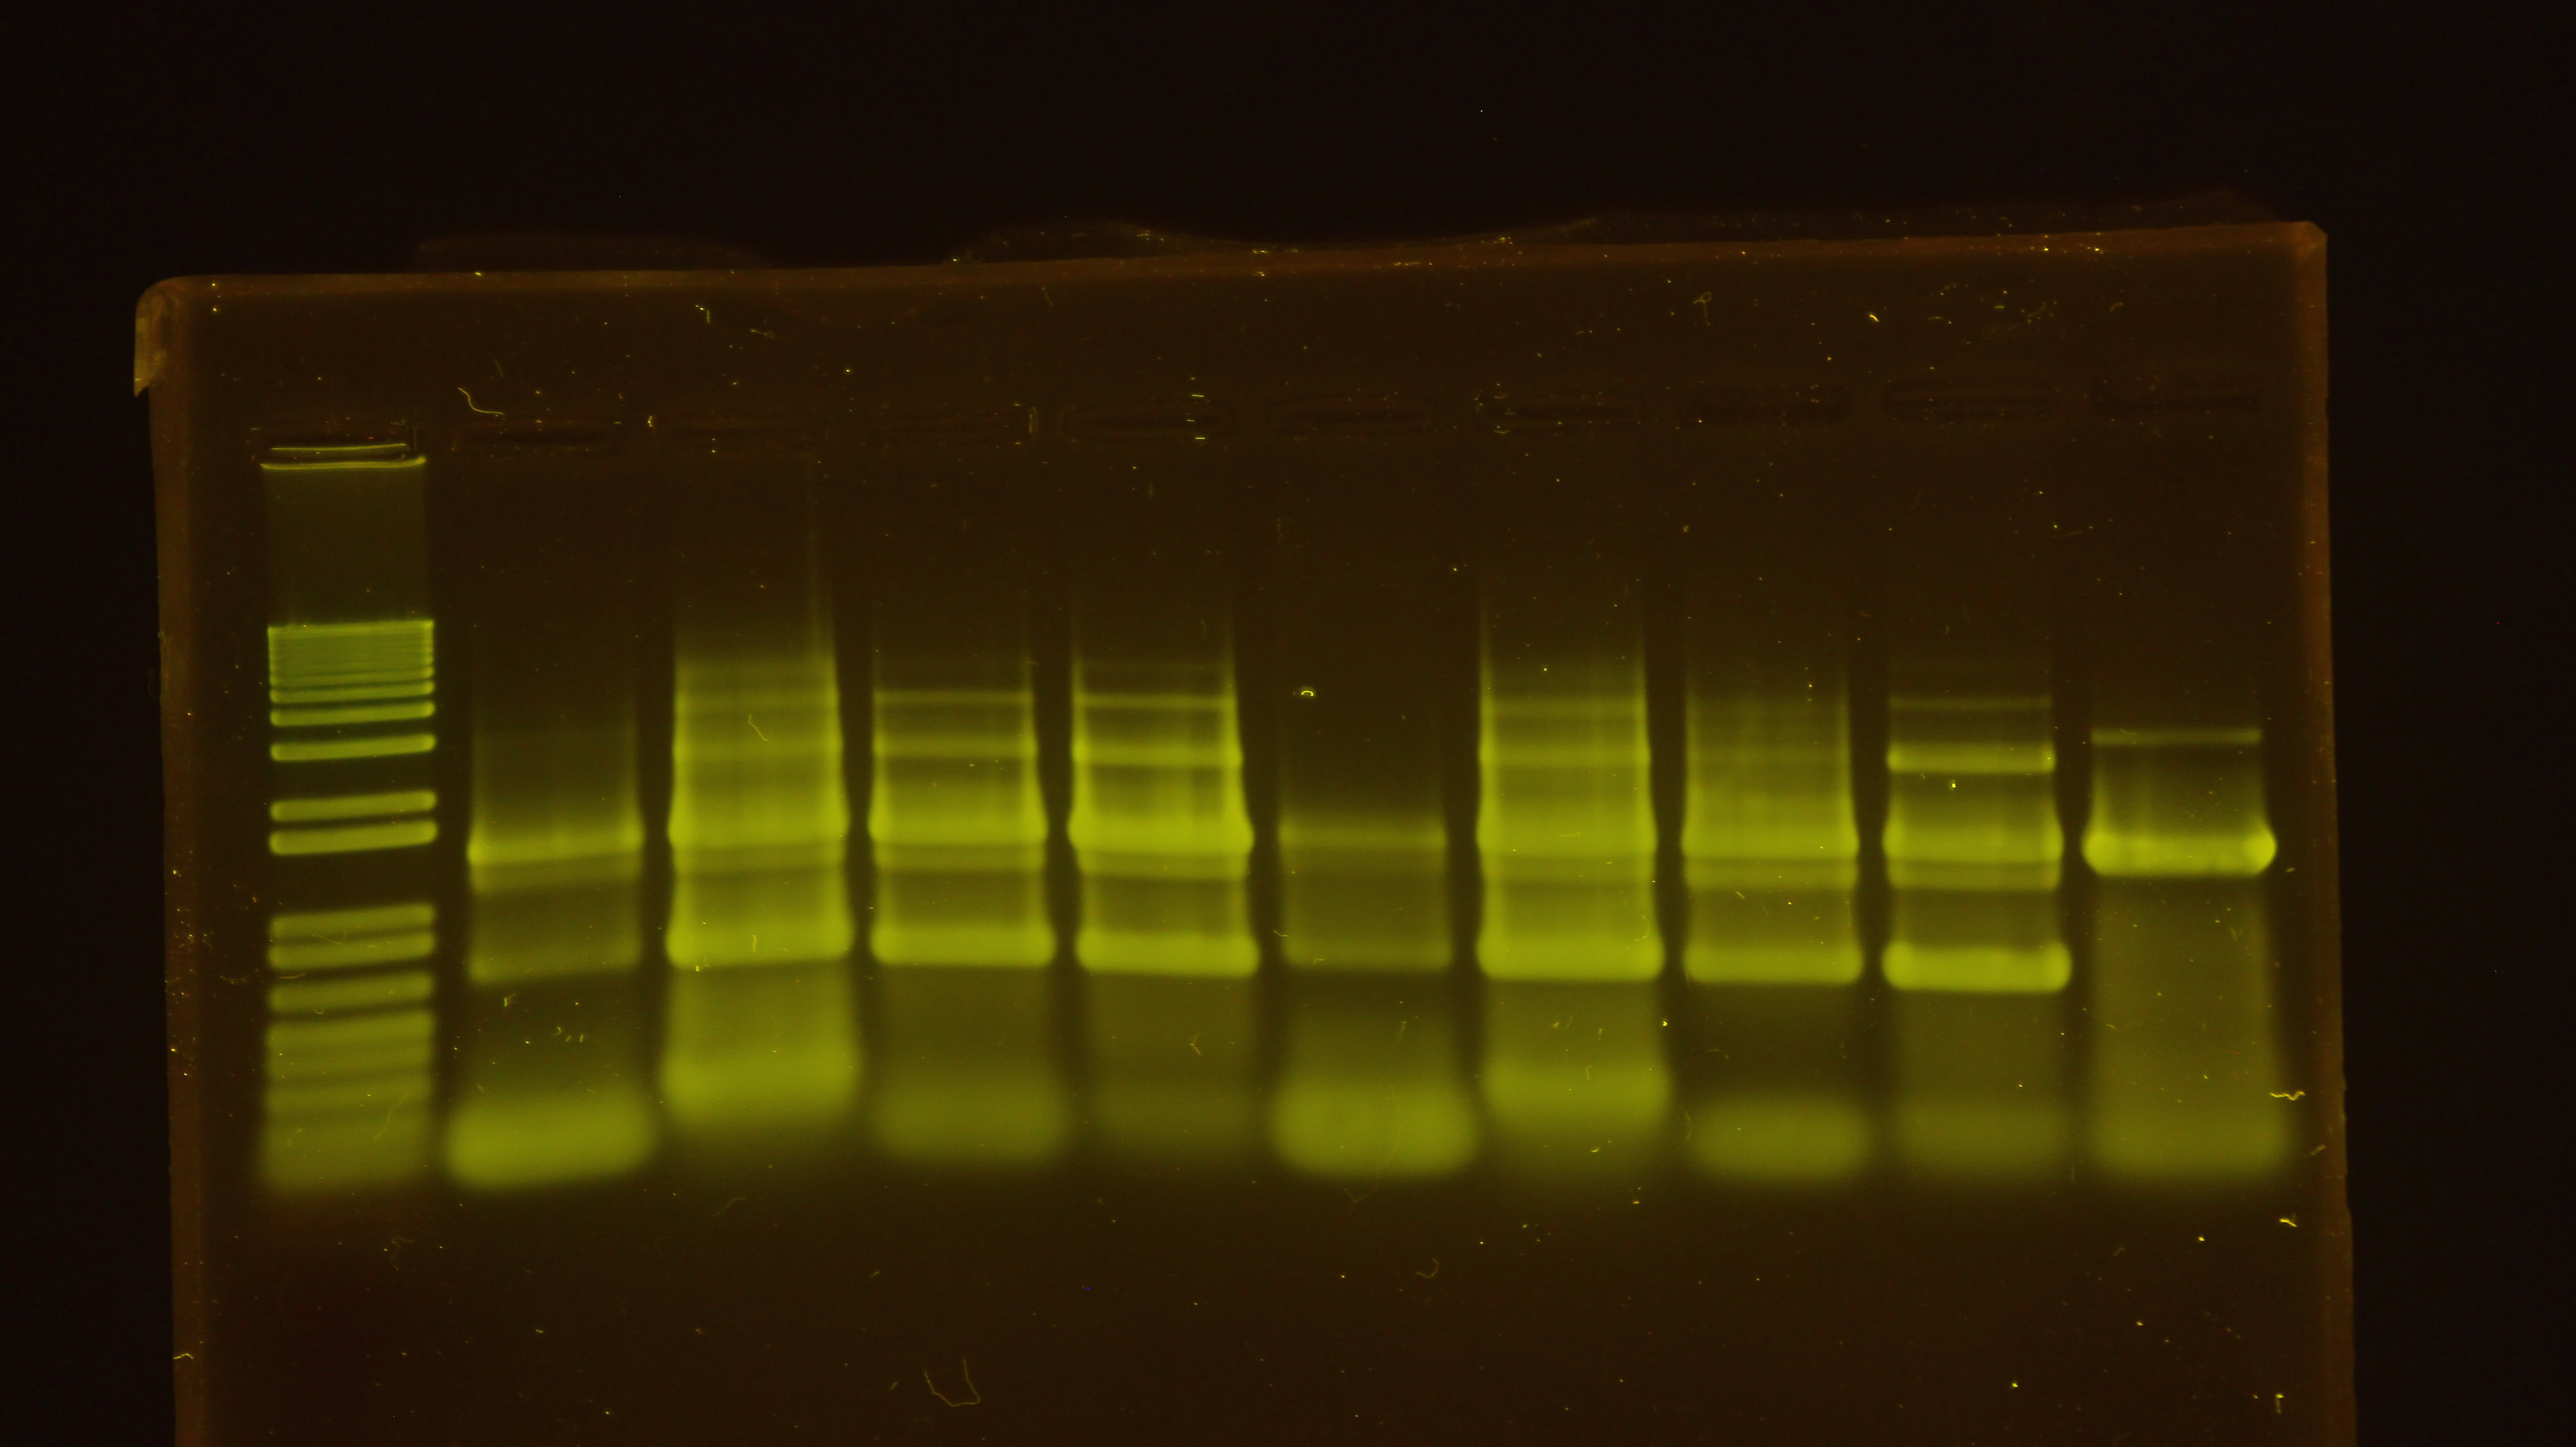
Gel Imaging
To image the gel, a high pass filter is necessary to block out the blue light. Clare Chemical provides orange filtered glasses and a panel to lay over your gel to view results. This is good for quick viewing, but not necessarily sufficient for imaging. The camera was ultimately outfitted with 58mm Tiffen filters that attach to the lens like most polarized filters so that the gel can be placed onto the transilluminator and imaged quickly with good quality.
To image, Canon has free remote imaging software known as EOS Utility, which makes viewing, capturing and saving gel images incredibly easy. After the focus has been set and once the software is installed on an imaging workstation or laptop, color correction, exposure and aperture settings can be programmatically adjusted in realtime. It’s as easy as clicking the virtual shutter release button to transfer the image to the computer. Its not necessary to use a Canon here, but it was chosen because its software is known to be easy to use for external triggering.
Benefits for using a DSLR include:
- Instant transfer to operator’s laptop.
- The 12+ megapixel camera often has a higher resolution than most commercial gel imaging stations.
- The zoom lens can be adjusted for close up images of gel bands or left zoomed out to capture large field-of-view images with an exposure of approximately one second.
Parts List and Files
Besides the machined acrylic panels and the Clare Chemical DR89 Transilluminator , all of the parts were either acquired from McMaster-Carr or Amazon. For acrylic panels, check with your local machinist or plastics store such as TAP Plastics. For blue LED transilluminators, feel free to use any that can fit within a 13” x 13” space and meet your budget needs.
Chamber CAD Files
Download AutoCAD drawings here!
McMaster-Carr Parts
| Name | Part Number | Quantity | Description | Link |
|---|---|---|---|---|
| Camera Brace | 15275A66 | 1 | Bracket Galvanized Steel, 1-7/8” & 3-1/2” Length of Sides | View on McMaster |
| Corner Bracket | 1088A31 | 4 | Inside Corner-Reinforcing Bracket, 2” Length of Sides | View on McMaster |
| Edge Braces | 1556A41 | 8 | Bracket Galvanized Steel, 1” Length of Sides | View on McMaster |
| Adjustable Friction Hinge | 1791A44 | 2 | Adjustable-Friction Hinge, 200 lb. Capacity, 1-11/16” High Leaf, 1-7/16” Width, Black | View on McMaster |
| Cabinet Door Knob | 11645A11 | 1 | ABS Plastic Pull Knob Black Finish, 1-5/16” Knob Diameter, 1” Projection | View on McMaster |
I don’t remember if the door knob fit well on this because it originally came with a 1” wood screw, but it could be usable. It might be worth looking for an alternative knob or screw. Also, things not listed here include:
- A few short 1/4-20 screws to mount the camera to the bracket and the bracket to the top panel.
- 8-32 with 0.25” or shorter depth for corner brackets and door hinges.
- 6-32 with 0.25” or shorter depth for edge braces.
- Black electrical tape to block light from the gap between the panels. The panels we received were slightly smaller than 0.5” (around 0.47”).
Amazon Parts
| Part | Approx $ | Description | Link |
|---|---|---|---|
| Camera | $403 | Canon EOS Rebel T3i Digital SLR Camera with EF-S 18-55mm f/3.5-5.6 IS Lens (discontinued by manufacturer) | View on Amazon |
| Filter 1 | $18 | Tiffen 58mm 12 Filter (Yellow) | View on Amazon |
| Filter 2 | $31 | Tiffen 58mm 21 Filter (Orange) | View on Amazon |
| AC Adapter (replaces camera battery) | $19 | Kapaxen ACK-E8 AC Power Adapter Supply Kit For Canon EOS Rebel T5i / T4i / T3i / T2i / 700D / … | View on Amazon |
| Alternative Transilluminator (Not Tested) | $869 | Huanyu Instrument DUT-48 Blue Light Transilluminator wavelength 470nm | View on Amazon |
Filter 1 and Filter 2 will stack onto each other and mount to the camera lens. The order for stacking isn’t important.
The Amazon links above were provided by the Amazon Services LLC Associates Program, which is an affiliate advertising program that gives this website an opportunity to earn some money while connecting you to products that have been or can be used for completing the project you are viewing. Any money earned will be used for covering costs associated with registering this website or the costs of the projects posted here.
Leave a Comment
Comments are moderated. Email won't be published. All fields are required. *