
SCI-Arc 3D Printer Recommendations and Services
Commentary - 4/2023
Out of date - no longer affiliated with SCI-Arc, but the Ender 3 printer here is still upgraded and regularly used! It was a good investment. Feel free to reach out if you do want printer help. No guarantees that I’ll be responsive, but it doesn’t hurt!
PURPOSE: It can be a bit daunting to get started with 3D printing when there are so many options out there. On the other hand, if you have already spent some time printing, it could be fun to see what upgrades are out there to improve your printing experience. The following page is redacted’s (2nd year M.Arch 1 student) and my recommendation for getting started with with 3D printing at SCI-Arc. We also discuss some upgrades that we have been testing.
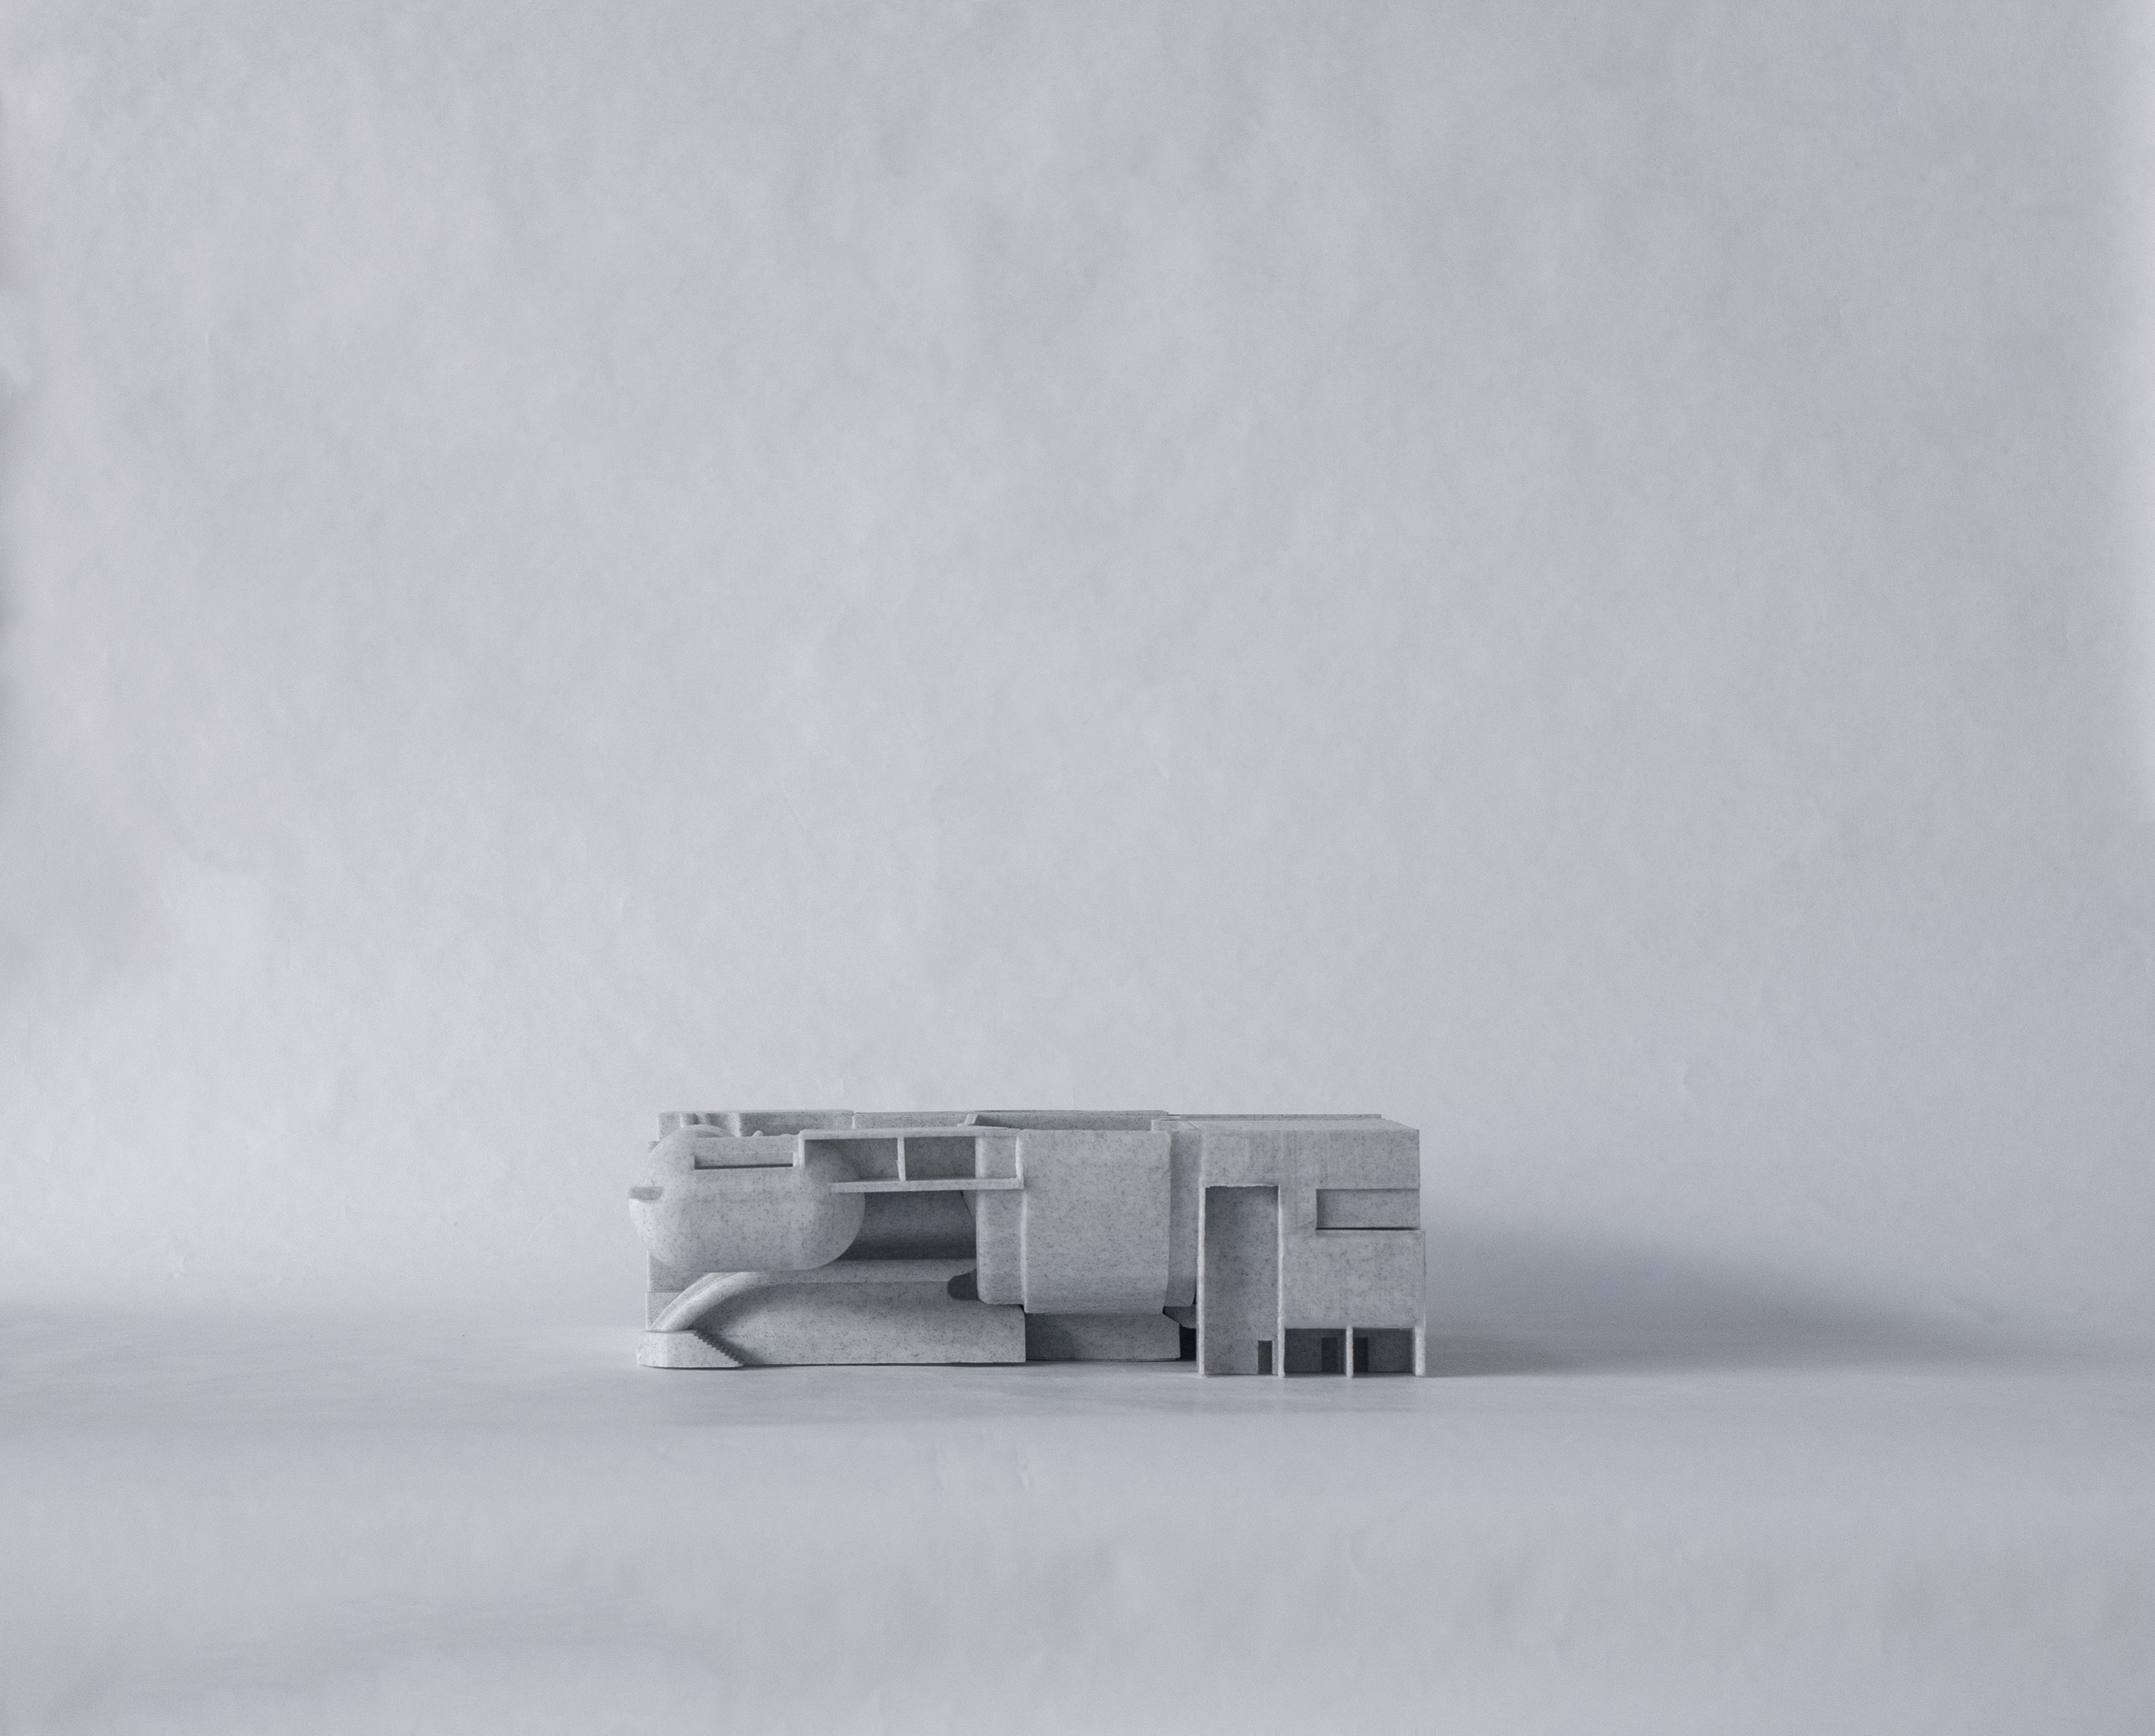
Example Prints

Introduction
Everyone at SCI-Arc has a Prusa. They are easy to use and they usually don’t have bad prints. That being said, I bet redacted that we could get prints that are just as good as a Prusa with a printer that costs significantly less. After living with the printer for a year we are both incredibly happy with our decision and want to share our experience to help you understand that there are other quality printers out there. I am personally making this recommendation even after working with more expensive 3D printers on a daily basis (including Ultimakers, FormLabs, and Stratasys systems). Redacted and I are both satisfied with the Ender 3 Pro as an entry level printer and wouldn’t hesitate to get it again if we had a choice.
Disclaimer: The following Amazon Affiliate links are for items that we actually purchased or used. That being said, we want you to know that Amazon might pay us if you click on our Amazon links.
Redacted’s Printer Kit
Kit Items
Here’s a list of what we bought for the printer - we’ll explain each item down below.
| Item | Model | Vendor | Link | Price ($) |
|---|---|---|---|---|
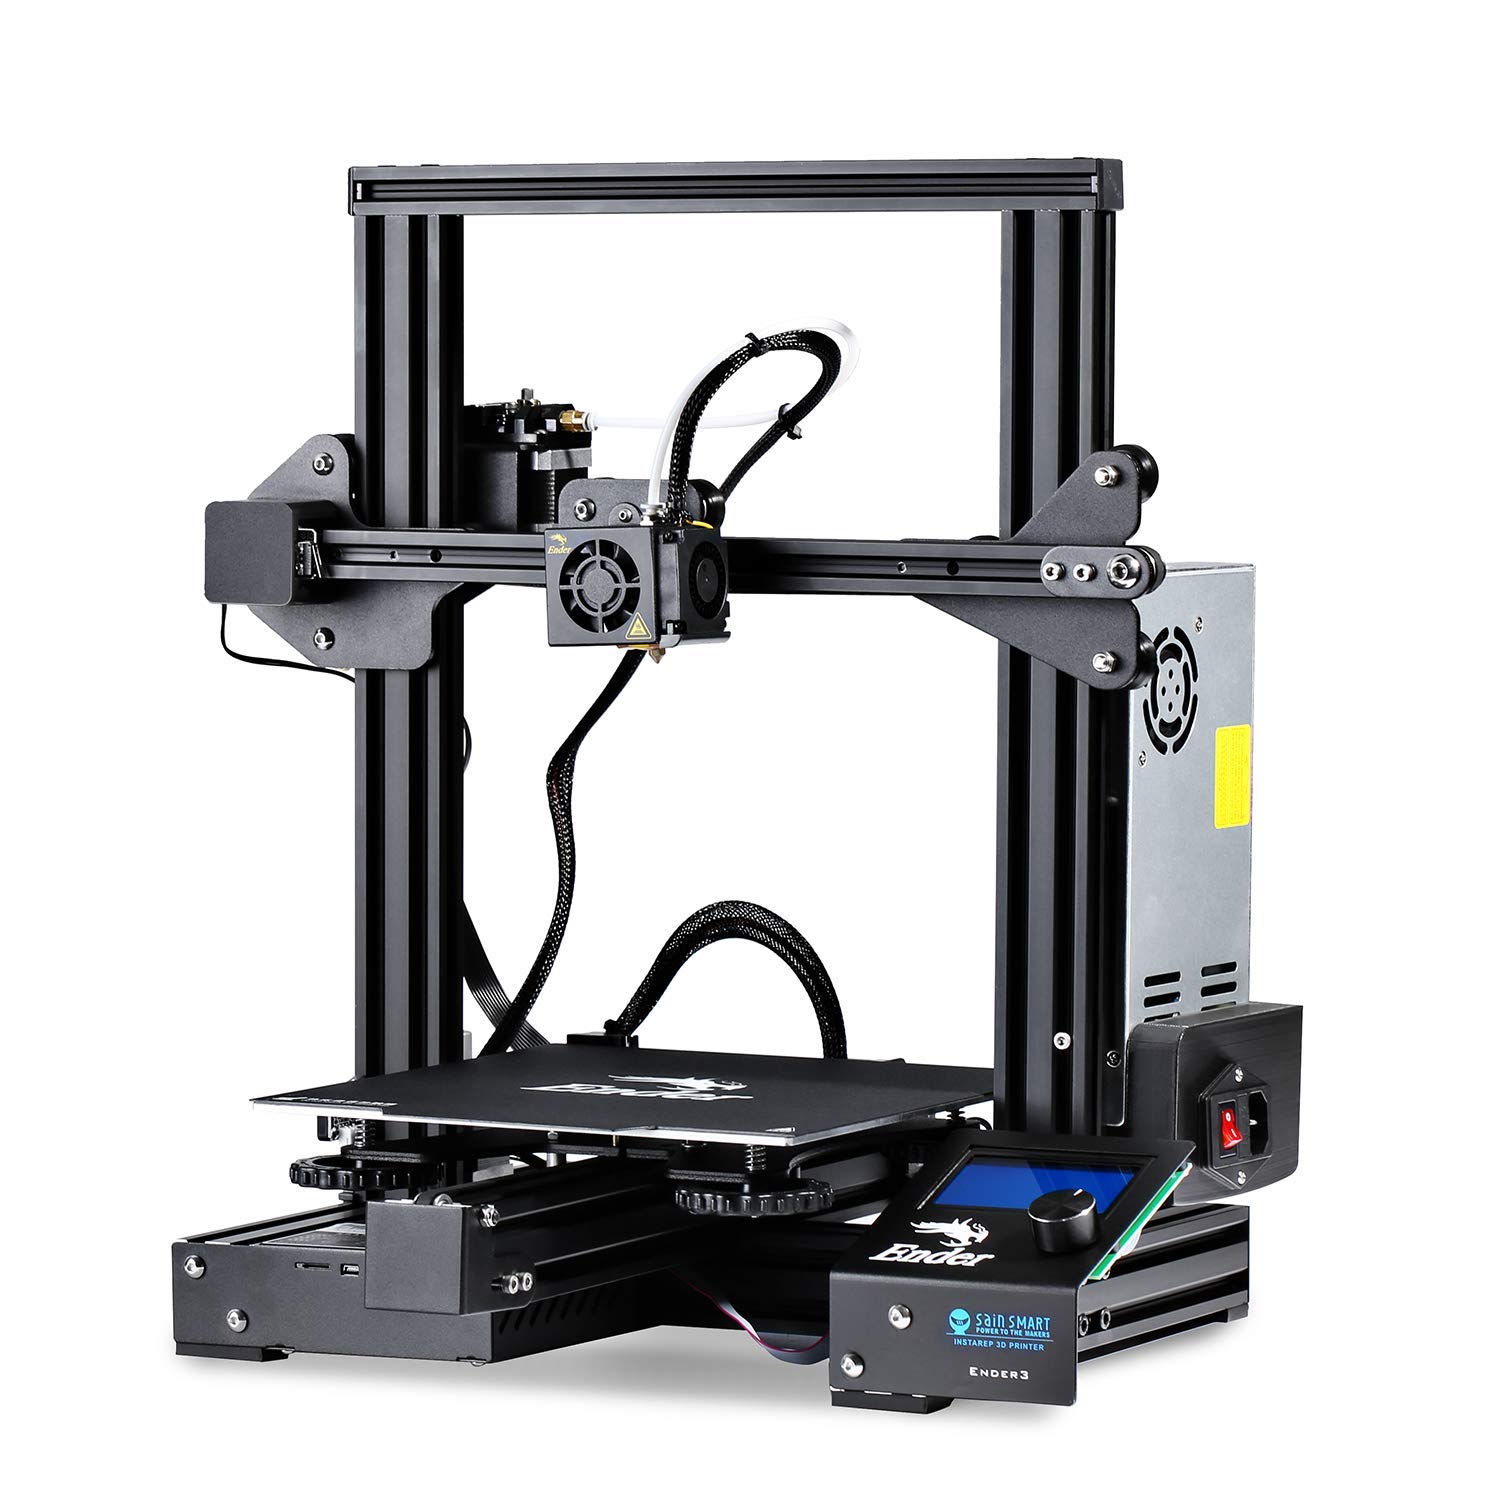
| 3D Printer | Ender 3 Pro | Sainsmart | Link | 260 |
| Build Plate | Tempered Glass Plate | Sainsmart | Link | 20 |
| Glue Sticks | 8.2g Clear Glue, 3 Pack | Uhu | Link | 6 |
| Angled Pliers | 3517 | Tekton | Link | 7.25 |
| Nozzle Cleaning Kit | 0.4mm Needles | Wobion | Link | 10 |
| Brass Brushes | Retractable Bristles | ATB | Link | 15 |
| OUR TOTAL | ~310 |
Rationale
Alright, so we bought an Ender 3 Pro. Why?
I really liked that this printer used aluminum extrusions because they gave it more structural strength. This is important for clean prints that have smooth sides. We decided to go with the Pro version rather than the standard because there is a wider rail for the Y-axis, which provides additional stability for the build plate. Furthermore, we bought the Sainsmart version because it included extra nozzles, snips and a silicone sock for the heater to prevent our parts from getting soft during printing, which is a nice touch.
However, a known issue with the Ender 3 printers is that some of them have a bowl-shaped build plate when they leave the factory. This was so bad that we could not get reliable prints without using a raft. After contacting Sainsmart about the issue, we ended up using their glass build plate. Glass is great because the build plate will have superior flatness and it shouldn’t wear down like plastic or magnetic plates. The Ender 3 glass also comes with a special surface coating to help remove parts when the plate cools. This is nice, but our builds were coming off a bit too easily, so we used Uhu glue sticks to help the part stick to the plate a bit better. This is what we’ve been using ever since.

The Ender 3 Pro came with a pair of snips to trim support, but it can be difficult to remove support that is deeper in the part. To remove those supports, we purchased angled pliers.
It is generally a good practice to keep the nozzle clean so that plastic doesn’t stick to it and drag around your print, we purchased a set of brass brushes. Also, we wanted to try some special filaments like wood. These filaments can be tricky because they can clog a nozzle. Rather than risk tossing out a good but clogged nozzle, we purchased a nozzle cleaning kit. 0.4mm piano wire is usually good enough to do the job. We haven’t had a clog yet, so this was probably not necessary.
Once the printer was set up and we learned what settings and plastics work well with our printer, redacted and I ended up with some really clean and smooth prints! The key to good prints are to have a good frame, use good plastics and use appropriate slicer settings.
Helping you get started
There’s a lot of small details that are good to be aware of and keep track of as you 3D print. Things like improper build plate leveling, building your printer with gaps in the wrong place, or using the wrong slicer settings that can really throw off a print. I have worked with many printers for several years now and I can offer advice or assistance if you want help getting started.
Services that may be of interest to you include:
- Assembling your printer for you to ensure that you are working off a good printer
- Teaching a 3D printing bootcamp class:
- Cover different types of printers
- Walk you through how to generate G-code and what settings work well for the Ender 3
- Teach how to correctly level a bed and setup a print
- Teach how to fix problems you might run into when printing
- Discuss different types of filaments and how to find the right profile for your material
- Discuss simple upgrades that you can make to your system now
- Upgrading your firmware and tuning the system to give you safety features such as thermal runaway protection and allow you to add upgrades on your own. Tuning
- Install silent mainboard to quiet down the motors and upgrade the firmware.
If you are interested, visit the Services section down below.
Upgrades
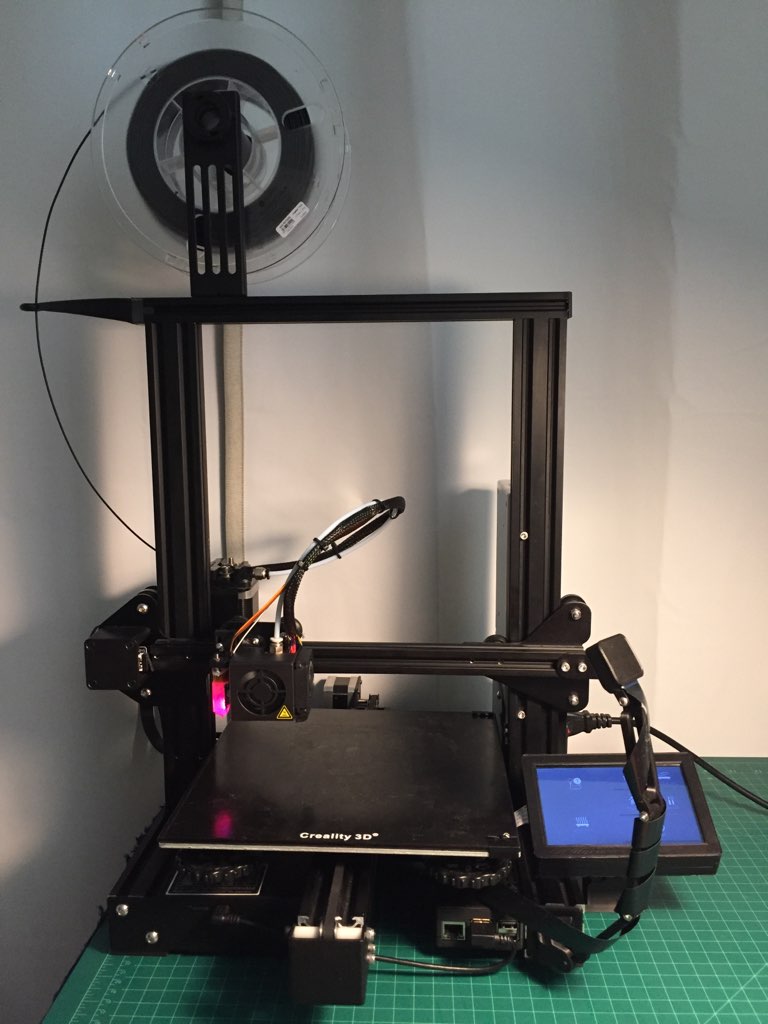
Now that we’ve been using the printer for some time, we decided that it was time to make our lives easier by changing the firmware and adding some real upgrades. Our Ender 3 Pro is currently rocking the following:
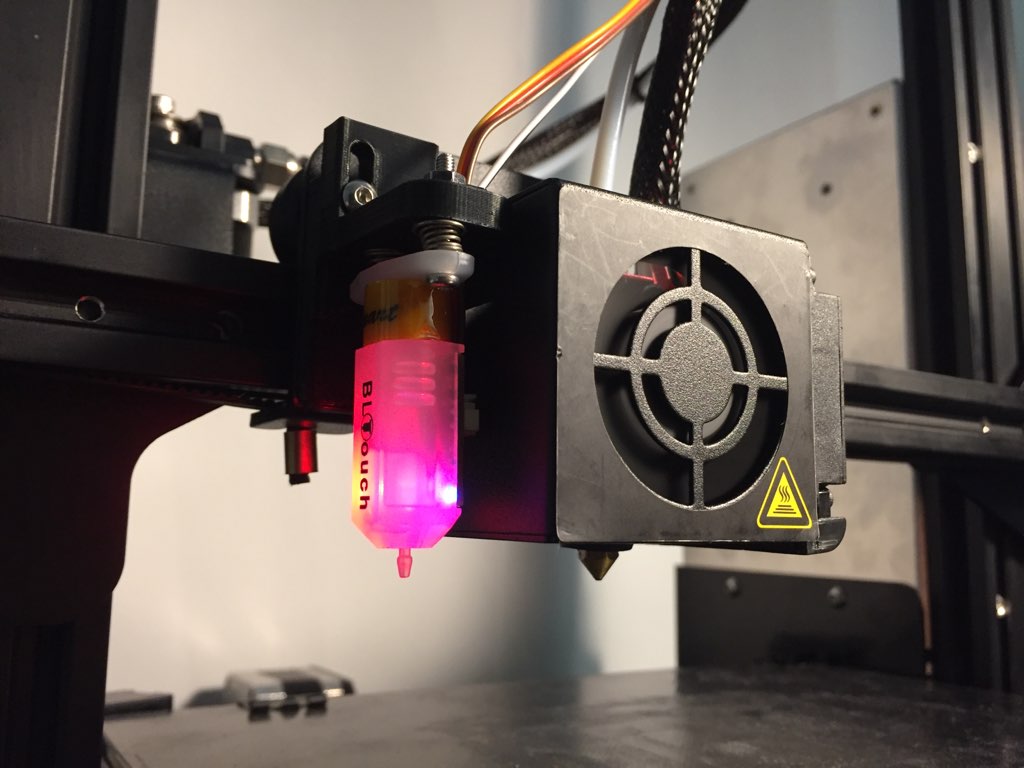
- BLTouch for auto bed leveling
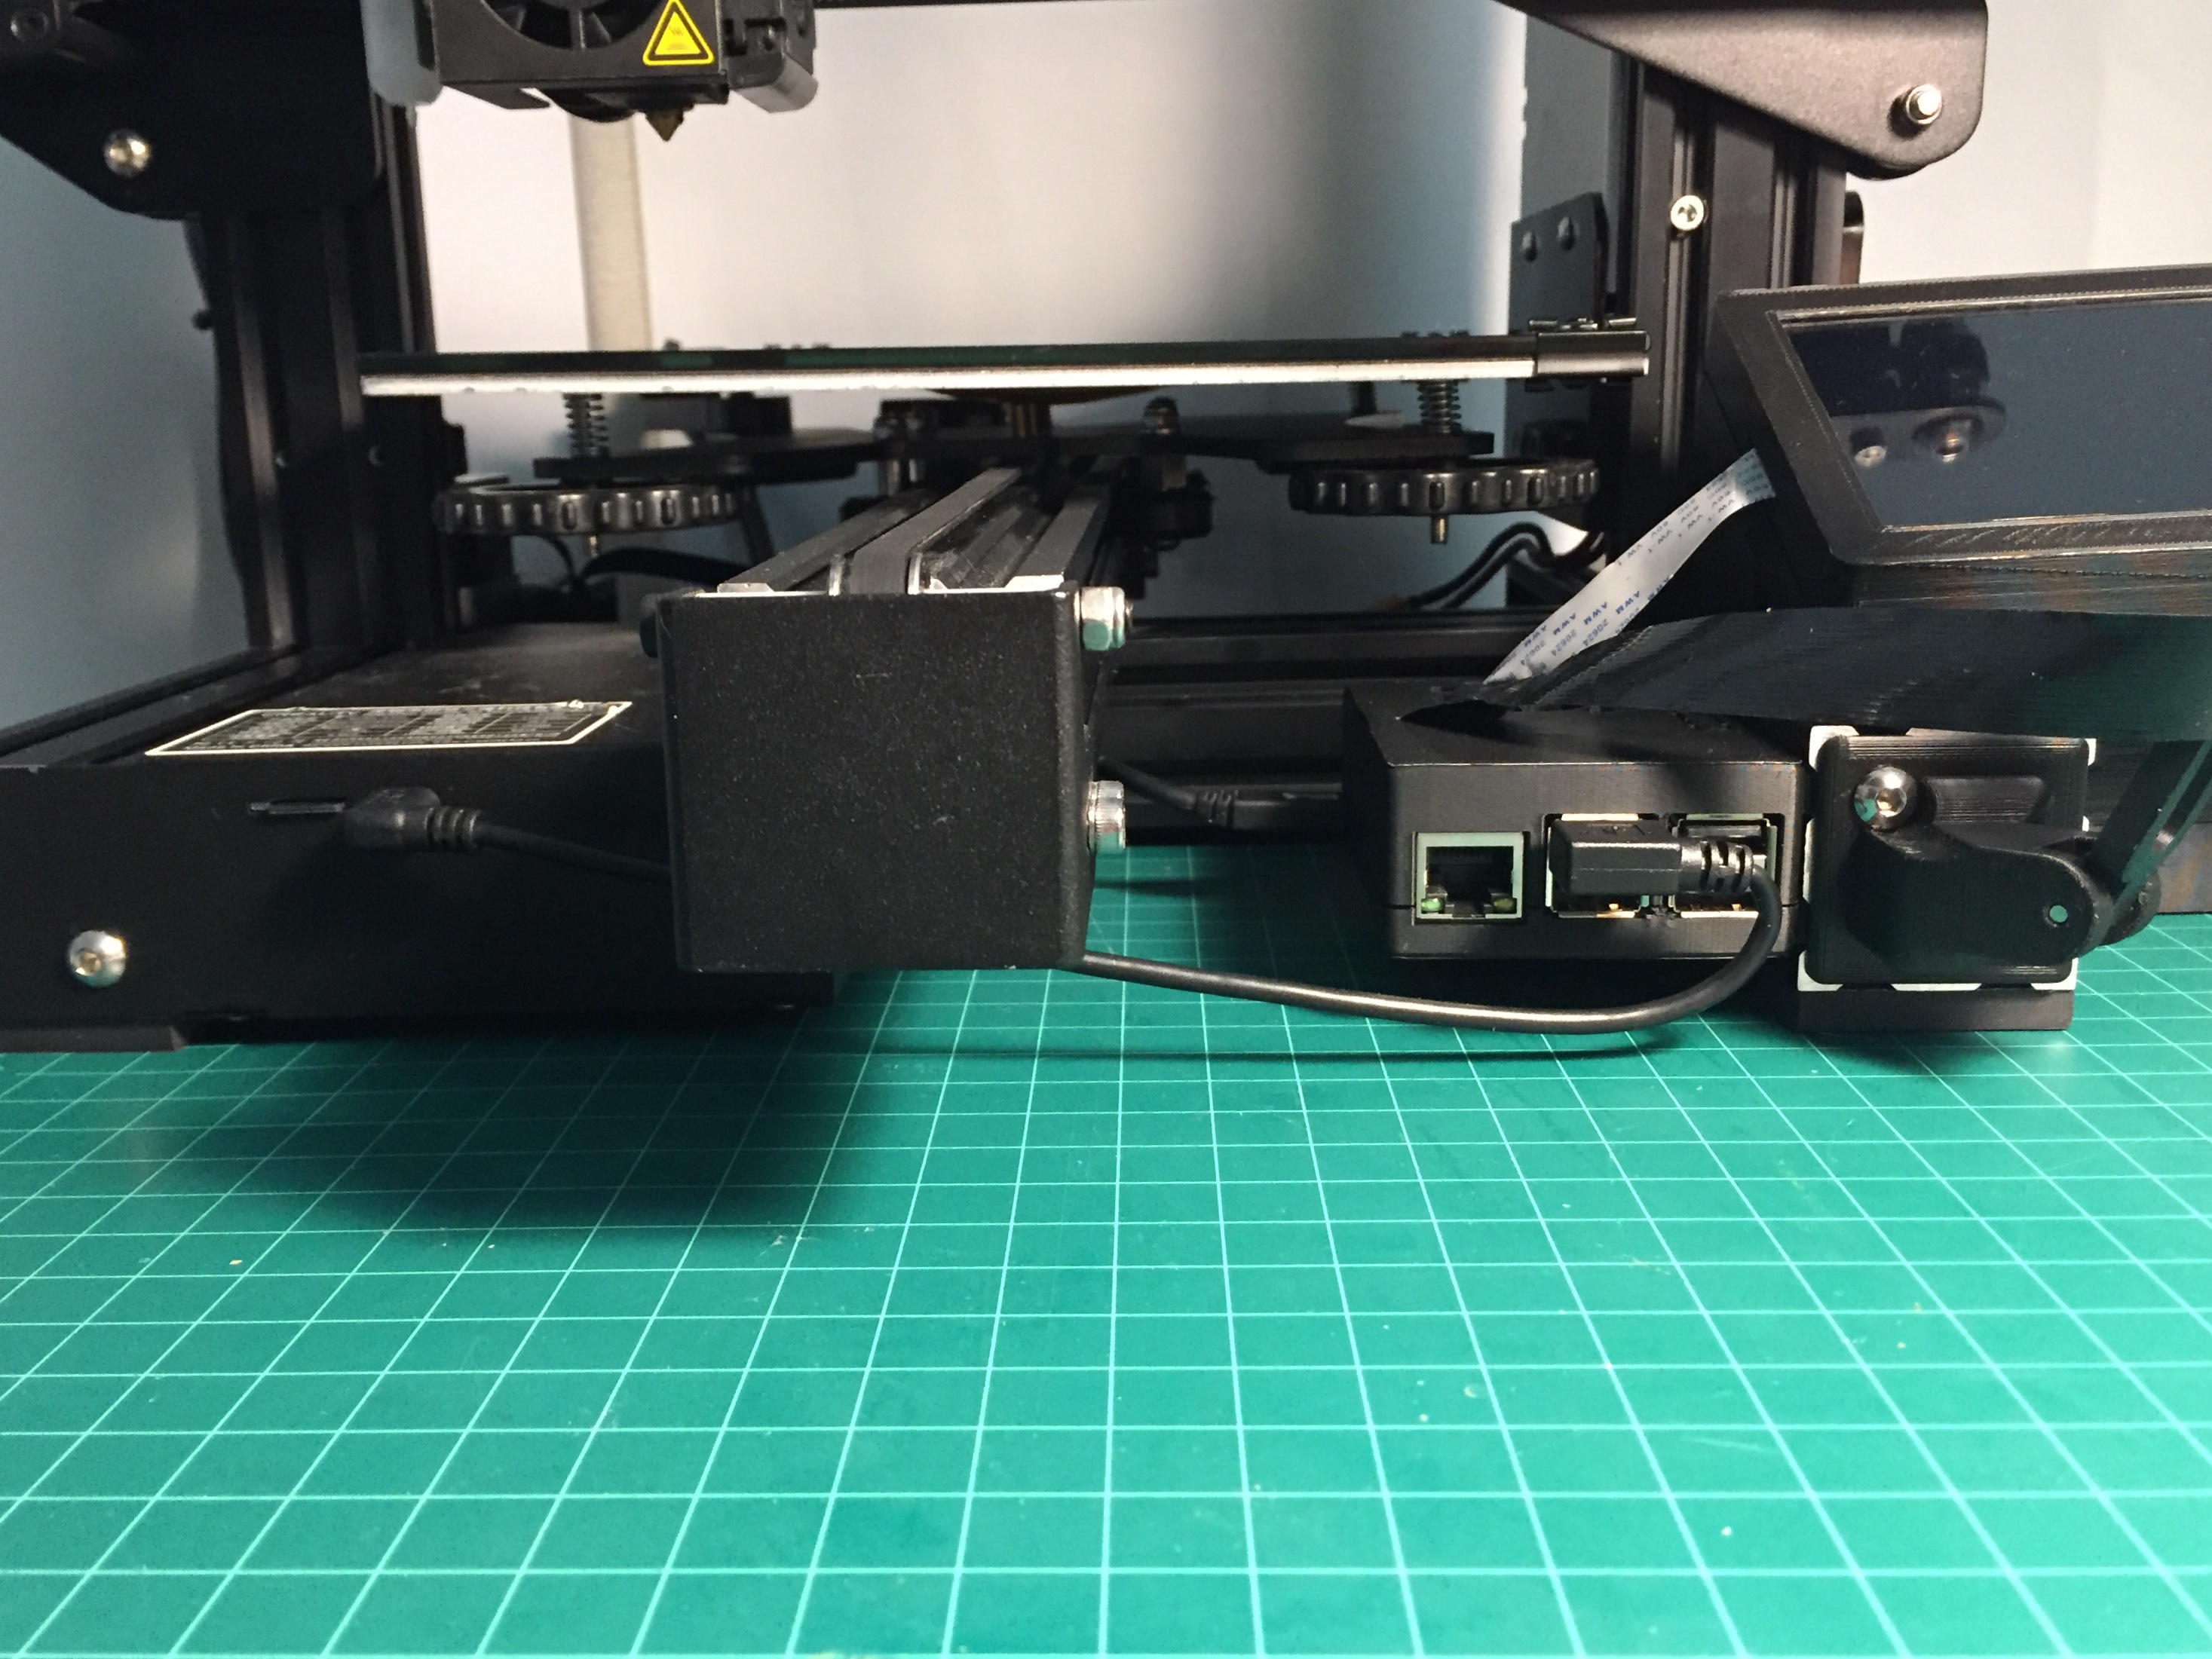
- OctoPrint server for an easy to use printer dashboard
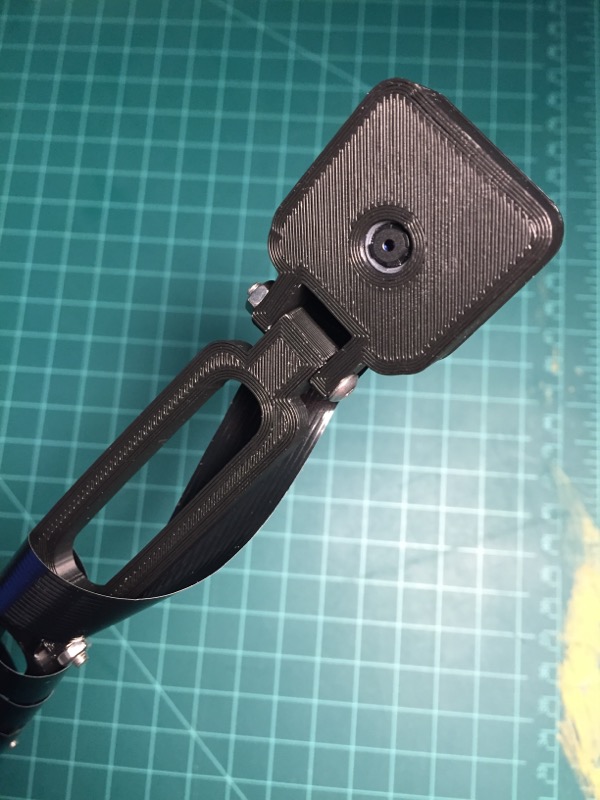
- 8 megapixel camera for checking on prints remotely and creating timelapses
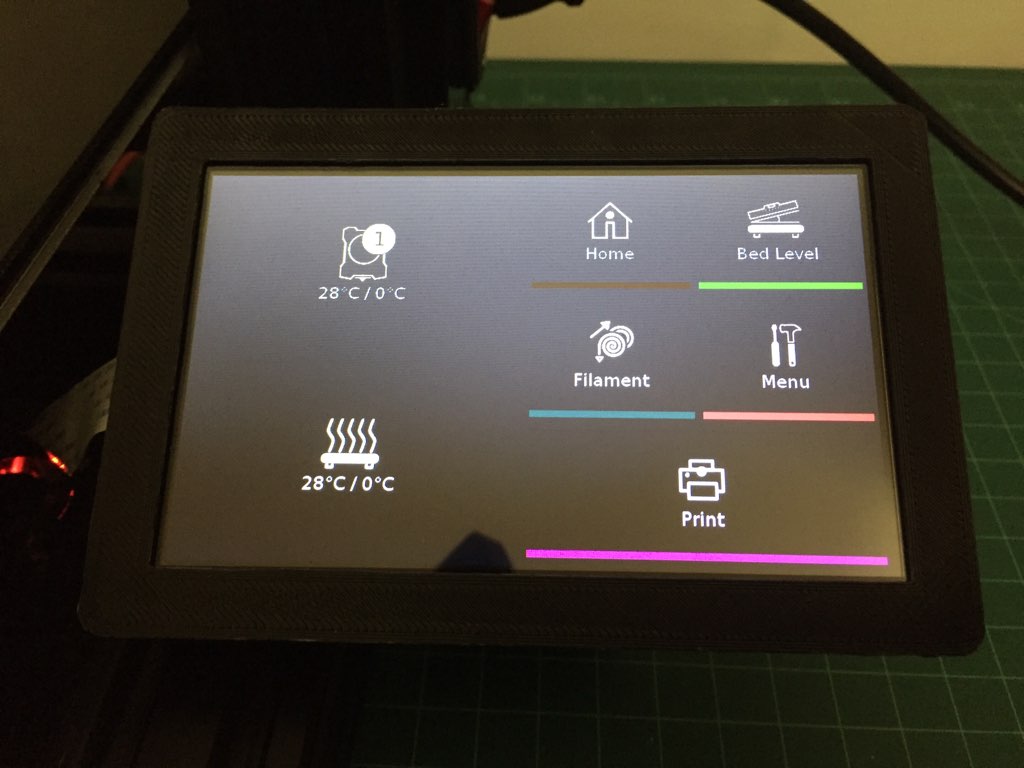
- Touchscreen to access OctoPrint directly from the printer
The BLTouch has been amazing because it means that we no longer need to spend minutes fiddling with the printer before starting a job or worrying that the bed might have shifted since we last used it. The auto bed leveler will map the build plate before we print and compensate for any variations in height. Perfect first layers every time. Amazon kit, Amazon adapter
OctoPrint is pretty convenient because we now have a way to expose way more functionality of the printer from the comfort of our computer. Want to see how the print is doing? Log on. Want to upload a new file? Drag and drop. Want a timelapse? Check the box. What layer am I on and how close am I to finishing? Change the tab. 1 of my 10 parts is starting to fail during the print? Cancel that object mid print and build the other 9. Amazon Pi, Amazon SD card
Webcam is a relatively cheap upgrade to the server that really lets you be away from the printer while controlling your system. Amazon camera, Amazon cable
Touchscreen exposes some of the OctoPrint functionality without really needing to be on the computer and it gives a cleaner looking physical interface to the printer. I’m planning to upgrade the software on this unit to make it far better than the stock display. Currently using a custom designed case. Amazon screen
Services
If you’re interested in a service, please send an email to the address underneath my picture on the side or to robert (at) puccilabs.com . My phone number is also listed on the flier posted around SCI-Arc. If you’re interested in an upgrade that isn’t listed here, please reach out!
Getting Started
- Assemble printer - $75
- 3D Printing Bootcamp - $30
- Upgrade firmware and tune system - $30
- Install silent mainboard (upgrades firmware) - $65
Printer Upgrades
FIRMWARE UPGRADE REQUIRED
- Auto bed leveling upgrade - $100
- OctoPrint server upgrade - $125
- Camera upgrade - $50
- Access server anywhere upgrade - $50
- Touchscreen upgrade - $80
Leave a Comment
Comments are moderated. Email won't be published. All fields are required. *